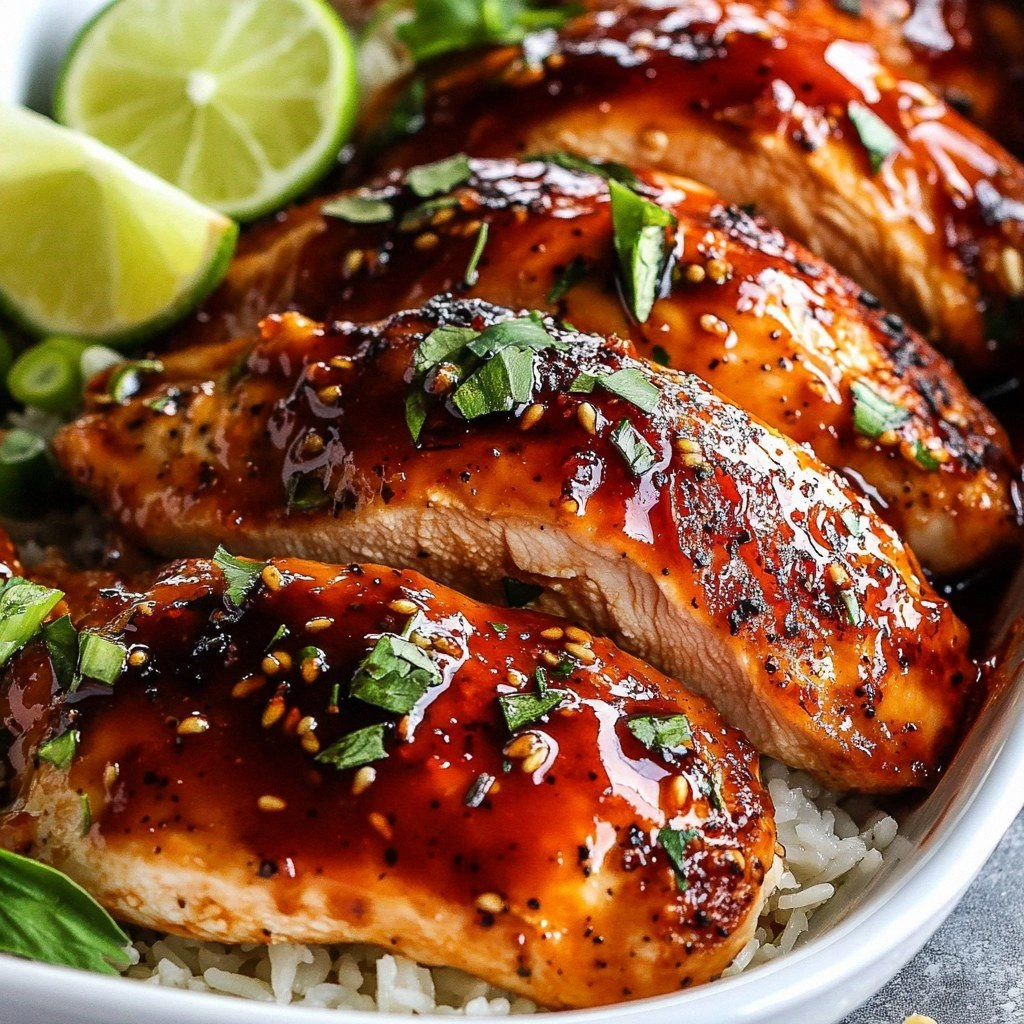
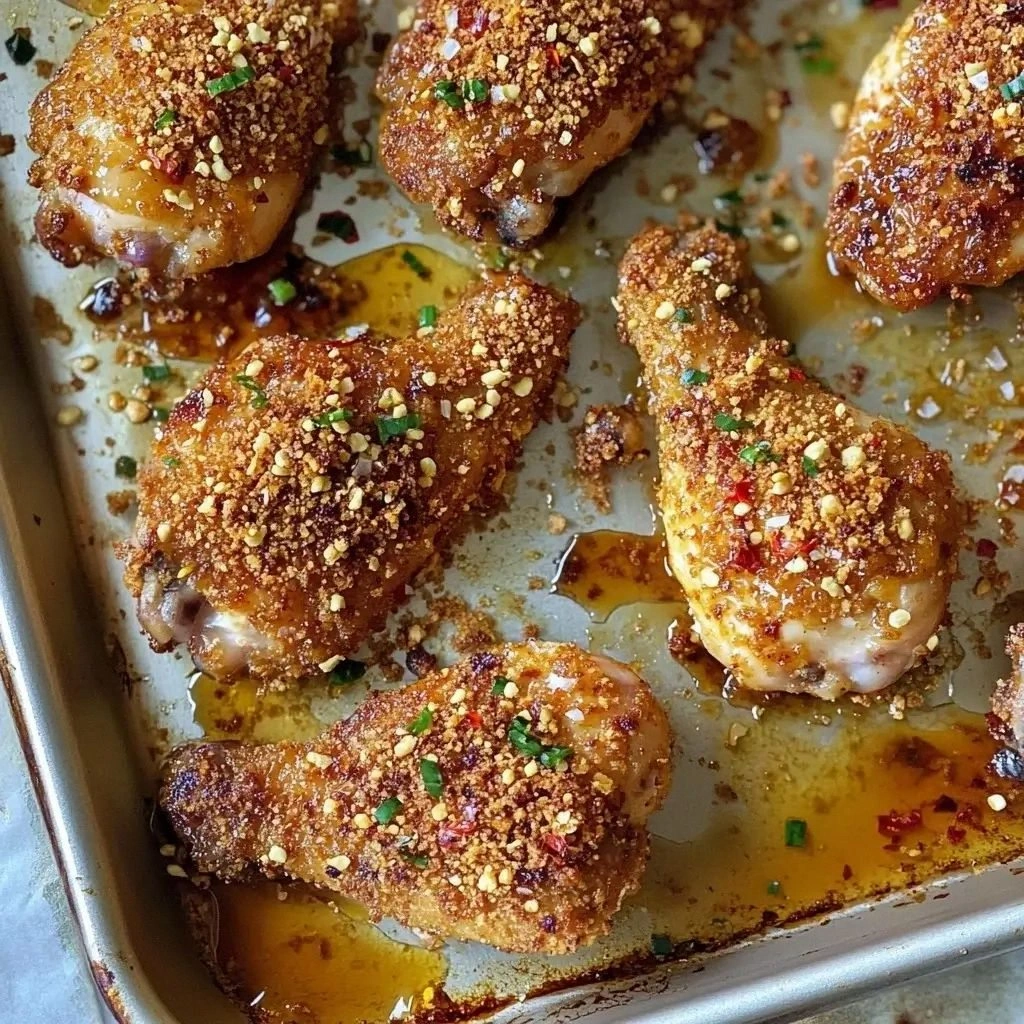
I’ve spent the last week chasing the perfect bite of crispy, honey‑kissed chicken, and when I finally cracked the code, I knew I had to share it. Picture a sizzling pan, the sound of a thick coating turning from translucent to golden, and a sweet, spicy aroma that makes your mouth water before you even take a bite. That’s the moment when the ordinary transforms into extraordinary—when the humble chicken thigh becomes a showstopper that could win a foodie award in a single bite.
The kitchen was a chaotic symphony: the timer blared, a stray egg splattered on the counter, and I was juggling a handful of spices that seemed to whisper, “I’m ready.” I laughed, grabbed a handful of breadcrumbs, and as the hot honey drizzled over the chicken, the kitchen smelled like summer barbecue meets dessert. The heat from the oven sang a low, comforting hum, while the sizzling sound told me the coating was getting its crunch on.
What makes this version stand out? I didn’t just toss a few ingredients together; I engineered a flavor profile that balances sweet, heat, and savory with surgical precision. The coating is light enough to let the juicy chicken shine, yet crispy enough to satisfy the crunch craving that lingers in your memory long after the last bite. It’s the kind of dish that turns a simple dinner into a headline moment.
And the twist? I added a splash of hot honey that’s not just sweet but has a kick that lingers on your palate like a well‑timed drumbeat. I’ll be honest—when I first tasted the first piece, I didn’t even know I was eating a recipe. I was simply savoring the moment, and I dare you to taste this and not go back for seconds.
What Makes This Version Stand Out
- Taste: The sweet heat of hot honey cuts through the richness of the chicken, creating a flavor balance that feels both daring and comforting. The honey’s floral undertones contrast with the smoky char, producing a complex palate that lingers. It’s a dish that invites you to experiment with spice levels, making each bite a new experience.
- Texture: The coating is a double‑layered marvel—flour for structure, breadcrumbs for crunch—resulting in a crust that shatters like thin ice when you bite. Inside, the chicken remains moist, with juices that burst like a hidden waterfall. The result is a satisfying contrast that keeps your mouth moving.
- Simplicity: With only nine ingredients, this recipe is a masterclass in how less can be more. There’s no need for exotic sauces or complex marinades; the magic happens in the coating and the honey. It’s a go‑to for busy weeknights and lazy weekends alike.
- Uniqueness: The combination of hot honey and a breadcrumb‑flour blend is rarely seen in mainstream recipes. It’s a bold statement that says, “I’m not afraid to mix sweet and heat.” The result is a dish that stands out even in a crowded dinner table.
- Crowd Reaction: Friends who’ve tried it describe it as “the best chicken ever” and “a flavor explosion.” The dish is perfect for parties, as it can be made ahead and reheated without losing its crispness. The crowd’s reaction is proof that this version is hands down the best you'll ever make at home.
- Ingredient Quality: Using high‑quality, fresh chicken thighs ensures a juicy interior that pairs perfectly with the crunchy exterior. The breadcrumbs should be freshly toasted for maximum crunch, and the hot honey should be a blend of pure honey and chili flakes for optimal flavor. Quality ingredients are the backbone of this recipe.
Inside the Ingredient List
The Flavor Base
The hot honey is the star of this dish, a sweet glaze that carries a subtle heat from chili flakes or fresh pepper. It’s not just a sweetener; it’s a flavor vehicle that infuses every bite with a lingering warmth. If you’re not a fan of honey, try a maple syrup with a pinch of cayenne for a similar effect. The honey’s viscosity also helps the coating adhere to the chicken, creating a uniform crust.
The Texture Crew
Breadcrumbs provide the crunch that is the hallmark of this dish. For best results, use panko or homemade breadcrumbs toasted until golden. Flour acts as a binder, giving the coating structure and preventing the breadcrumbs from falling off during baking. A pinch of salt in the flour mixture enhances flavor without overpowering the honey’s sweetness.
The Unexpected Star
The eggs are the glue that holds the coating together. They add richness and help the breadcrumbs set into a firm crust. If you’re vegan, you can replace eggs with a mixture of mashed banana and a splash of soy sauce for binding. The eggs also give the chicken a slight sheen that looks as good as it tastes.
The Final Flourish
Garlic powder and paprika add depth, a subtle earthiness, and a smoky note that complements the sweet heat. They’re essential for a balanced flavor profile. If you’re a garlic lover, you can add a few minced garlic cloves to the coating for an extra punch. Paprika’s color also gives the dish a vibrant, appetizing look.
Everything’s prepped? Good. Let’s get into the real action…
The Method — Step by Step
- Preheat the oven to 400°F (200°C). As the oven warms, the air inside the kitchen takes on a warm, comforting scent. This temperature is critical for achieving that golden crust while keeping the chicken juicy. I like to set a timer for 15 minutes to keep track of the first half of baking.
- Season the chicken thighs. Pat the chicken dry with paper towels, then sprinkle both sides with salt and pepper. The salt enhances flavor and helps draw out moisture, creating a better crust. A light coat of pepper adds a subtle heat that complements the hot honey.
- Prepare the coating station. In a shallow dish, combine flour and garlic powder. In another dish, whisk the eggs until they’re frothy. In a third dish, place the breadcrumbs. This tri‑station setup lets you dip each piece quickly and efficiently.
- Coat the chicken. First, dredge each thigh in flour, shaking off excess. Next, dip it into the beaten eggs, ensuring a thin, even coat. Finally, roll it in breadcrumbs, pressing gently so the crumbs cling. The coating should feel like a firm, dry shell that will crisp up beautifully.
- Arrange on a baking sheet. Use parchment paper or a silicone mat to prevent sticking. Space the chicken pieces so they don’t touch, allowing heat to circulate. Lightly spray the top of each piece with cooking spray to help the coating brown evenly.
- First bake. Place the tray in the oven and bake for 20 minutes. During this time, the chicken will cook through and the coating will start to firm up. You’ll hear a satisfying crackle as the breadcrumbs begin to brown.
- Apply the hot honey. Remove the tray, drizzle hot honey over each piece, and return to the oven. The honey will caramelize slightly, creating a glossy, sticky glaze. This step is where the sweet heat truly shines.
- Second bake. Bake for an additional 10–12 minutes, or until the coating is golden brown and the chicken reaches an internal temperature of 165°F (74°C). The final bake also allows the honey to set into the crust, giving it a delightful crunch.
- Rest before serving. Let the chicken rest for 5 minutes on a cutting board. This allows the juices to redistribute, ensuring each bite is juicy and tender. It also gives the honey glaze a chance to thicken slightly.
- Serve and enjoy. Plate the chicken with a side of your favorite dipping sauce or a fresh salad. The aroma alone will make your guests swoon. Remember, the best part is the first bite that’s sweet, spicy, and wonderfully crunchy.
That’s it — you did it. But hold on, I've got a few more tricks that'll take this to another level…
Insider Tricks for Flawless Results
The Temperature Rule Nobody Follows
Many people bake at 375°F, but 400°F gives a crisper crust and a more caramelized honey glaze. The higher heat also helps seal the chicken’s surface quickly, preventing it from drying out. If your oven runs hot, lower the temperature by 20°F to avoid burning the honey.
Why Your Nose Knows Best
Your sense of smell can guide you to the perfect moment to remove the chicken. When the coating emits a nutty, toasted aroma and the honey has a faint caramel scent, it’s time to pull the tray. Trust your nose; it’s the best judge of doneness.
The 5-Minute Rest That Changes Everything
Resting the chicken for five minutes after baking allows the juices to redistribute. Without this step, you’d end up with a dry interior and a soggy crust. The rest period also lets the honey glaze thicken into a glossy coating that sticks beautifully.
Double‑Coating for Extra Crunch
If you love an ultra‑crunchy texture, dip the coated chicken back into the egg and breadcrumbs before the second bake. This double coating creates a thicker crust that’s almost like a fried chicken bite, but without the oil.
Cooling Rack Magic
After baking, place the chicken on a wire rack instead of a flat surface. This allows air to circulate around each piece, preventing steam from softening the crust. The result is a consistently crisp exterior that stays crunchy even after a few minutes.
Creative Twists and Variations
This recipe is a playground. Here are some of my favorite ways to switch things up:
Spicy Mango Glaze
Swap the hot honey for a blend of mango puree and a dash of sriracha. The mango adds tropical sweetness while the sriracha delivers heat. This version is perfect for summer parties.
Herb‑Infused Crunch
Add chopped fresh rosemary and thyme to the breadcrumb mixture. The herbs infuse the coating with aromatic flavors that pair wonderfully with the honey. Serve with a lemon wedge for a bright finish.
Cheesy Crust
Mix grated Parmesan into the breadcrumbs before coating. The cheese melts into the crust, creating a golden, savory topping. This variation is ideal for cheese lovers.
Citrus‑Honey Fusion
Replace the hot honey with a mixture of honey, orange zest, and a splash of lime juice. The citrus adds brightness, while the honey keeps the glaze sweet. It’s a refreshing twist for brunch.
Asian‑Inspired Sauce
Serve the chicken with a drizzle of sesame‑ginger sauce and a sprinkle of toasted sesame seeds. The sauce adds umami and a nutty flavor that elevates the dish to new heights. Pair it with steamed rice for a complete meal.
Vegan Version
Use plant‑based chicken substitutes and replace eggs with a flaxseed‑egg mixture. Substitute breadcrumbs with crushed nuts for a nutty crunch. This version keeps the sweet‑spicy profile while staying plant‑based.
Storing and Bringing It Back to Life
Fridge Storage
Store leftover chicken in an airtight container in the refrigerator for up to three days. The coating may soften slightly, but it’s still delicious. Reheat gently to restore crispness.
Freezer Friendly
Freeze the chicken in a single layer on a parchment‑lined tray before transferring to a freezer bag. This prevents clumping and preserves texture. Reheat in the oven at 350°F for 15 minutes for best results.
Best Reheating Method
To bring the chicken back to life, preheat the oven to 375°F and bake for 10 minutes. Add a splash of water to the tray before reheating; the steam will help the honey glaze re‑soften into a glossy coating. This trick keeps the chicken moist and the crust crunchy.