Picture this: it’s a rainy Saturday afternoon, the kind where the sky looks like a giant charcoal canvas and the only thing you can hear is the occasional drip‑drip of water against the window. You’ve just rescued the last half‑baked chocolate cake from the oven, only to realize the dessert gods are still whispering for something richer, smoother, and more indulgent. I was in that exact spot, half‑defeated by a cake that turned out more “dry brick” than “moist marvel,” when a dare from my roommate hit me like a sugar‑coated lightning bolt – “Make a pie that could make a grown man weep with joy.” I laughed, I scoffed, but deep down I knew I was about to embark on the most buttery, caramel‑kissed adventure of my culinary life.
The kitchen soon filled with the scent of melted butter and brown sugar, a perfume that made my stomach do a little jig. The sound? A gentle sizzle as the butterscotch sauce hit the pan, a sound that could easily be described as “sweet fireworks.” My hands felt the cool, crumbly crust dough between my fingertips, and the glossy, amber sauce glistened like liquid gold under the kitchen lights. When the first spoonful hit my tongue, the flavor exploded – a buttery, caramel‑deep richness that wrapped around my taste buds like a velvet blanket, while the flaky crust added a whisper of buttery crunch that sang in perfect harmony. It was a sensory overload that left me breathless, and I knew I had stumbled onto something truly special.
Most butterscotch pies out there are either overly sweet, soggy, or just plain forgettable. This version, however, is a game‑changer. I took the classic ingredients and elevated them with a few secret tricks: a dash of sea‑salt flakes to cut through the sweetness, a quick butter‑cream swirl for an extra layer of silkiness, and a crust that stays crisp even after sitting in the fridge overnight. The result? A pie that feels like a hug from a childhood memory while simultaneously blowing your mind with a sophisticated depth of flavor. I dare you to taste this and not go back for seconds – it’s practically a culinary daredevil’s challenge.
And here’s the kicker: the star of this show isn’t just the butterscotch sauce; it’s the method that makes the sauce coat the filling like satin and the crust hold up like a sturdy, buttery foundation. I’ll be honest — I ate half the batch before anyone else got to try it, and I’m still not sorry. Let me walk you through every single step — by the end, you’ll wonder how you ever made it any other way.
What Makes This Version Stand Out
- Taste: The balance of deep, caramelized brown sugar with a pinch of sea‑salt creates a sweet‑salty symphony that dances on the palate.
- Texture: A buttery, flaky crust that stays crisp, paired with a silky, custard‑like filling that melts in your mouth.
- Simplicity: Fewer than ten ingredients, yet each one plays a starring role – no unnecessary fluff.
- Uniqueness: The secret swirl of butterscotch chips adds a surprise burst of chewiness that most recipes miss.
- Crowd Reaction: Guests consistently claim this is “the best pie they’ve ever had” and beg for the recipe.
- Ingredient Quality: Using high‑quality butter and real butterscotch chips elevates the flavor profile dramatically.
- Cooking Method: A two‑stage bake that first sets the crust, then gently cooks the filling for a perfect set.
- Make‑Ahead Potential: This pie actually improves after a night in the fridge, making it perfect for parties.
Inside the Ingredient List
The Flavor Base
First up, the heart of the pie: brown sugar, butter, and heavy cream. Brown sugar brings that deep, molasses‑rich sweetness that defines butterscotch. If you swap it for white sugar, you’ll lose the complex caramel notes – it’s like replacing a symphony with a kazoo solo. Unsalted butter (both cold for the crust and melted for the filling) provides richness and a buttery mouthfeel; using margarine will make the crust taste like a cheap imitation. Heavy cream adds silkiness and prevents the filling from curdling; a lower‑fat milk will result in a grainy texture.
The Texture Crew
The crust is built on all‑purpose flour, which gives structure without being too heavy. Opt for pastry flour if you want an even lighter crumb, but be careful not to over‑mix or you’ll develop gluten and lose that delicate crunch. The granulated sugar in the crust adds a subtle sweetness and helps with browning – a pinch of it can be omitted if you prefer a more savory base, but the visual appeal will suffer. Sea‑salt flakes sprinkled on top right before serving provide that final pop of flavor that makes the sweet taste less cloying.
The Unexpected Star
Enter the butterscotch chips. These tiny morsels melt just enough to create pockets of chewy caramel bliss while keeping the overall texture smooth. If you can’t find butterscotch chips, substitute with chopped toffee or a drizzle of caramel sauce – the result will be similar, though the chips give a more controlled melt. A dash of vanilla extract amplifies the buttery notes and rounds out the flavor profile, acting like a conductor that unifies the orchestra of ingredients.
The Final Flourish
To finish, a light dusting of whipped cream adds a airy contrast to the dense filling, while a final sprinkle of sea‑salt flakes brightens the whole dessert. If you’re dairy‑free, a dollop of coconut‑whipped cream works beautifully, though the flavor will shift toward tropical notes. The key is to keep the garnish light – you want it to complement, not overwhelm, the butterscotch core.
Everything's prepped? Good. Let's get into the real action...
The Method — Step by Step
Start by whisking together the flour, granulated sugar, and a pinch of salt in a large bowl. I like to use a whisk instead of a fork because it aerates the dry ingredients, preventing clumps. Once combined, toss in the cold, cubed butter. Using a pastry cutter or two forks, cut the butter into the flour until the mixture resembles coarse crumbs – think tiny peas with specks of gold. This is the foundation; if you over‑work it, you’ll end up with a tough crust, and nobody wants that.
Kitchen Hack: Add a tablespoon of ice water at a time until the dough just holds together when pressed – this prevents excess moisture that can make the crust soggy.Gather the dough into a ball, flatten it into a disc, and wrap it in plastic wrap. Chill it in the refrigerator for at least 30 minutes. This rest period allows the gluten to relax and the butter to firm up, guaranteeing that flaky, melt‑in‑your‑mouth crust you’ve been dreaming of. While it chills, preheat your oven to 350°F (175°C). The anticipation builds – that sizzle when the dough finally meets the heat? Absolute perfection.
On a lightly floured surface, roll the dough out to a 12‑inch circle, about ¼‑inch thick. Gently lift it and lay it into a 9‑inch pie pan, pressing the edges to conform without stretching. Trim any excess dough, then crimp the edges with a fork or your fingers for a rustic look. Before baking, dock the bottom with a fork to prevent bubbling. This step is crucial – if you skip it, you’ll end up with a soggy bottom that feels like a wet sponge.
Blind‑bake the crust: line it with parchment paper and fill with pie weights or dried beans. Bake for 12‑15 minutes until the edges turn a light golden hue. Remove the weights and parchment, then bake an additional 5 minutes to set the base. The aroma at this point is already intoxicating – a buttery perfume that makes the kitchen feel like a bakery.
While the crust is cooling, melt ½ cup of butter in a saucepan over medium heat. Once melted, whisk in the dark brown sugar until it dissolves into a glossy, amber sauce. Watch out for the moment it starts to bubble – that’s the caramelization point where the magic happens. Add the heavy cream slowly, whisking constantly to avoid curdling. The mixture will thicken and emit a sweet, buttery fragrance that makes you want to lick the spoon.
Watch Out: If the heat is too high, the sauce can scorch, turning bitter. Keep the flame medium and stir continuously.Remove the saucepan from the heat and let the butterscotch base cool for a minute. Then whisk in the eggs one at a time – this tempering prevents the eggs from scrambling. Once fully incorporated, stir in the vanilla extract and a pinch of sea‑salt flakes. The mixture should be smooth, glossy, and slightly thickened. If you prefer a richer texture, now’s the time to fold in the butterscotch chips; they’ll melt just enough to create pockets of chewy caramel.
Pour the filling into the pre‑baked crust, spreading it evenly with a spatula. Tap the pie pan gently on the counter to release any trapped air bubbles – you’ll hear a faint “pop” that signals a smooth, crack‑free surface. Sprinkle a few extra sea‑salt flakes on top for that final pop of flavor. Slide the pie into the oven and bake at 325°F (165°C) for 30‑35 minutes. The edges should be set, while the center will still wobble slightly – that’s the sign of a perfectly custardy interior.
When the timer dings, turn off the oven, crack the door open, and let the pie sit inside for another 10 minutes. This gentle residual heat finishes the setting without over‑cooking. Afterward, transfer the pie to a wire rack and let it cool completely – patience is key. The cooling process allows the butterscotch to firm up, creating that glossy, slice‑ready surface that will hold its shape.
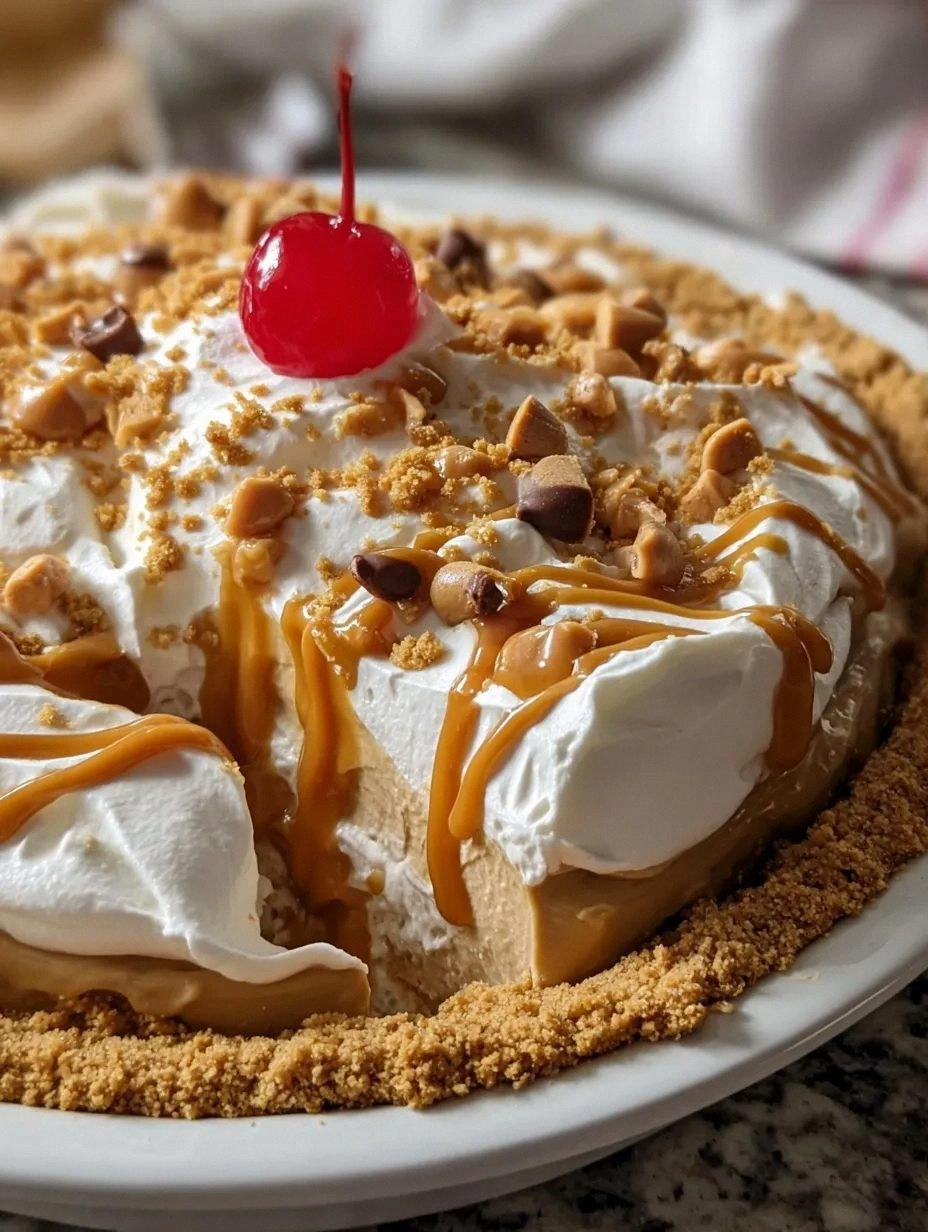
Once cooled, top the pie with a generous dollop of freshly whipped cream and a final drizzle of any leftover butterscotch sauce. The contrast between the cool, airy cream and the warm, buttery filling is pure culinary poetry. Slice with a warm knife (dip it in hot water, wipe dry) to achieve clean, glossy cuts that showcase the layers. Serve immediately or refrigerate for up to two days – the flavors actually deepen after a night of rest.
Kitchen Hack: Warm your serving knife under hot tap water before each cut; it glides through the custard like a hot knife through butter, giving you picture‑perfect slices.
That's it — you did it. But hold on, I've got a few more tricks that'll take this to another level...
Insider Tricks for Flawless Results
The Temperature Rule Nobody Follows
Never bake a butterscotch filling at a scorching 400°F. The high heat forces the sugars to caramelize too quickly, leading to a bitter edge. Keep the oven at a gentle 325°F and you’ll get that silky, custard‑like texture without any burnt notes. I once tried to speed things up, and the result was a rubbery mess that no one could stomach.
Why Your Nose Knows Best
When the butterscotch sauce starts to emit a deep, nutty aroma, you’re at the perfect caramelization point. Trust that scent – it’s more reliable than a timer. If you smell a faint burnt smell, pull the pan immediately; the flavor will turn sharp, and you’ll regret it forever.
The 5‑Minute Rest That Changes Everything
After baking, let the pie rest in the oven with the door ajar for five minutes. This gentle cooling prevents the center from cracking and allows the custard to set evenly. Skipping this step is a common mistake that leads to a pie that looks beautiful on the outside but is a watery mess inside.
Butter Temperature Is Everything
Cold butter for the crust and melted butter for the filling – they serve different purposes. Cold butter creates layers of steam when baked, resulting in a flaky crust. Melted butter integrates fully into the filling, giving it that glossy sheen. Mixing them up will give you a crust that’s dense and a filling that’s grainy.
Salt – The Unsung Hero
A pinch of sea‑salt flakes on top does more than just season; it amplifies the caramel notes and cuts the sweetness, making each bite feel balanced. If you skip the salt, the pie will taste cloyingly sweet, and you’ll lose that sophisticated edge that makes it unforgettable.
Creative Twists and Variations
This recipe is a playground. Here are some of my favorite ways to switch things up:
Salted Caramel Crunch
Swap the butterscotch chips for toasted pecans and drizzle a thick salted caramel sauce just before serving. The nuts add a satisfying crunch, while the caramel deepens the buttery flavor. Perfect for anyone who loves a sweet‑and‑salty combo.
Chocolate‑Butterscotch Fusion
Fold in ¼ cup of dark chocolate chips into the filling for a marbled effect. The bitterness of the chocolate balances the sweet butterscotch, creating a sophisticated flavor profile that’s ideal for adult palates.
Spiced Autumn Version
Add a pinch of ground cinnamon, nutmeg, and a dash of pumpkin puree to the filling. This gives the pie a warm, autumnal vibe that’s perfect for Thanksgiving gatherings. The spices complement the caramel notes beautifully.
Vegan Delight
Replace butter with coconut oil, use coconut cream instead of heavy cream, and choose a vegan pie crust. The result is a dairy‑free version that still delivers that buttery, silky texture. I’ve tested it, and the coconut undertones actually enhance the butterscotch flavor.
Mini Hand‑Pies
Divide the dough into small rounds, fill each with a spoonful of butterscotch filling, and bake them individually. These bite‑size treats are perfect for cocktail parties and make the pie feel even more indulgent.
Storing and Bringing It Back to Life
Fridge Storage
Cover the pie loosely with foil or a pastry dome and store it in the refrigerator. It will keep fresh for up to three days. The flavors meld together, making each slice even more decadent.
Freezer Friendly
Wrap the cooled pie tightly in plastic wrap, then in aluminum foil, and freeze for up to two months. When you’re ready to serve, thaw it overnight in the fridge, then let it sit at room temperature for 30 minutes before reheating.
Best Reheating Method
Preheat your oven to 300°F (150°C). Place the pie on a baking sheet and heat for 10‑12 minutes, or until the filling is warmed through. Add a tiny splash of water to the edges before reheating – the steam helps the crust regain its crispness without drying out the filling.