I was in the middle of a rainy Saturday night, the kind where the clouds press against the windows like a heavy blanket, when my roommate dared me to bake a chocolate cake that could actually compete with the ones you find in fancy downtown bakeries. I laughed, grabbed the pantry, and thought, “Sure, why not? I’ve got a pan, some cocoa, and a craving that’s louder than a marching band.” The kitchen smelled like stale coffee and a hint of burnt toast from my earlier attempt at pancakes, but the moment I opened the cupboard and saw the dark, velvety cocoa powder, I knew this was the start of something legendary. I could already hear the faint hum of the oven, the soft clink of the mixing bowl, and the promise of a cake that would make even the most seasoned pastry chefs nod in approval.
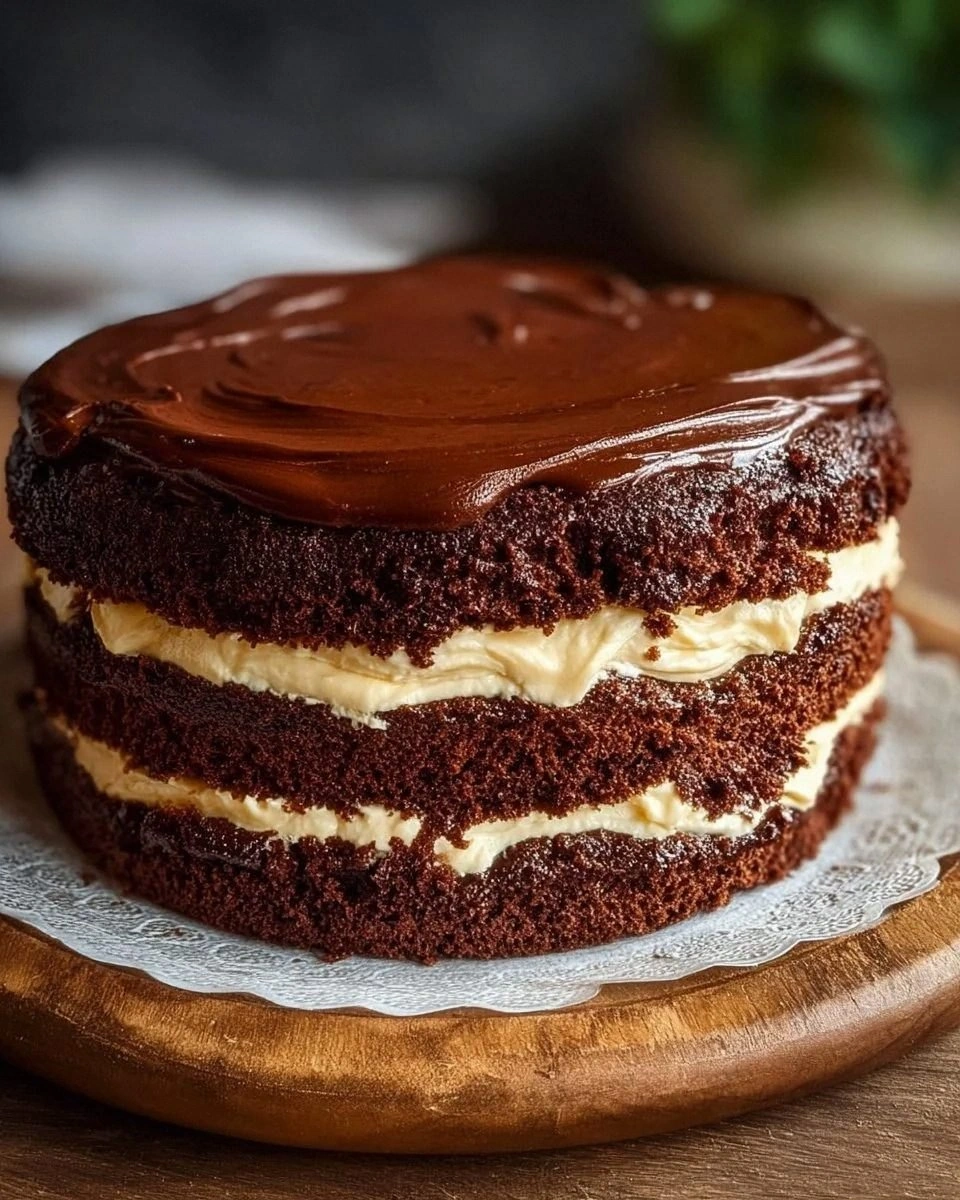
Fast forward a few hours, and the kitchen was a battlefield of flour clouds, bubbling batter, and a cream cheese mixture that looked like a cloud of ivory silk waiting to be folded into the chocolate abyss. The air was thick with the sweet, earthy scent of chocolate, punctuated by a buttery whisper that made my nose tingle like it was getting a gentle massage. When the timer finally dinged, the cake emerged from the oven with a glossy, crackle‑topped surface that caught the light like polished mahogany, and the filling—smooth, tangy, and just sweet enough—spread itself between the layers like a secret love affair. I dared you to taste this and not go back for seconds; I’ll be honest — I ate half the batch before anyone else got a chance to try it.
Most chocolate cake recipes get the balance of richness and fluff wrong, ending up either dense as a brick or so airy that they crumble at the slightest touch. This version, however, hits the sweet spot with a moist crumb that hugs the fork, a frosting that’s creamy without being cloying, and a depth of flavor that feels like a midnight truffle melting on your tongue. The secret? A splash of boiling water that awakens the cocoa’s full potential, a dash of buttermilk that adds tender acidity, and a cream cheese filling that brings a subtle tang that cuts through the chocolate’s intensity. Picture yourself pulling this out of the oven, the whole kitchen smelling incredible, and the anticipation building as the steam rises like a curtain before a grand performance.
Okay, ready for the game‑changer? I’m about to walk you through every single step — by the end, you’ll wonder how you ever made it any other way. Stay with me here — this is worth it. Let’s dive in, and I promise you’ll end up with a cake that’s not just dessert, but a celebration on a plate.
What Makes This Version Stand Out
- Moisture Mastery: The combination of boiling water and buttermilk creates steam that penetrates every crumb, ensuring the cake stays soft for days. No dry patches, just pure, melt‑in‑your‑mouth texture.
- Flavor Depth: Unsweetened cocoa powder paired with a touch of espresso powder (optional) amplifies the chocolate’s richness without bitterness, giving you that deep, almost wine‑like complexity.
- Velvety Filling: The cream cheese filling isn’t just a frosting; it’s a luscious, slightly tangy layer that balances the sweetness and adds a luxurious mouthfeel that ordinary buttercreams can’t match.
- Simplicity Meets Sophistication: With just a handful of pantry staples and a few smart techniques, you achieve bakery‑level results without the need for fancy equipment.
- Crowd‑Pleaser Factor: This cake has the power to turn a casual gathering into an unforgettable memory—people will ask for the recipe, and you’ll have the bragging rights.
- Make‑Ahead Magic: The cake can be assembled a day ahead, and the flavors actually improve, making it perfect for birthdays, potlucks, or a surprise treat.
Inside the Ingredient List
The Flavor Base
The backbone of any great chocolate cake is quality cocoa powder. I use unsweetened cocoa that’s 100% pure, which delivers a robust, almost smoky flavor that’s the hallmark of a true chocolate lover’s dessert. Skipping the cocoa or substituting it with a cheap, Dutch‑process version will leave you with a flat taste that feels more like chocolate‑flavored cake than chocolate cake. If you can’t find unsweetened cocoa, look for a brand that lists “natural cocoa” on the label; the darker the color, the richer the flavor.
Granulated sugar does more than sweeten; it also helps tenderize the crumb by breaking down the gluten strands formed by the flour. Using a fine‑grained sugar ensures it dissolves completely, preventing that gritty texture you sometimes get with coarse sugar. For a subtle caramel note, you could swap half the granulated sugar for light brown sugar, but be mindful that it will introduce a hint of molasses.
The Texture Crew
All‑purpose flour provides the structure, while the combination of baking soda and baking powder gives the cake its lift. Baking soda reacts with the acidic buttermilk, creating bubbles that make the cake airy, whereas baking powder adds a secondary rise for extra fluffiness. If you’re out of buttermilk, you can create a quick substitute: add one tablespoon of white vinegar or lemon juice to a cup of milk, let it sit for five minutes, and you’ve got a perfect stand‑in that still reacts with the soda.
Vegetable oil is the secret weapon for moisture. Unlike butter, oil stays liquid at room temperature, ensuring the cake stays soft even after cooling. If you’re aiming for a richer flavor, you can replace half the oil with melted butter, but keep the total fat content the same to avoid a dense crumb.
The Unexpected Star
Buttermilk brings a gentle tang that brightens the chocolate, preventing it from feeling overly sweet or heavy. The acidity also helps the baking soda do its job, creating a tender crumb that’s almost melt‑in‑your‑mouth. When you’re in a pinch, the milk‑and‑vinegar combo works just as well, though the flavor will be a touch milder.
Cream cheese filling: This is where the magic truly happens. The cream cheese, softened to room temperature, creates a silky base that blends seamlessly with butter and powdered sugar. The result is a frosting that’s thick enough to hold its shape yet soft enough to melt on your tongue. If you want a lighter version, swap half the cream cheese for Greek yogurt, but expect a slightly tangier finish.
The Final Flourish
Vanilla extract, though used in small amounts, adds a fragrant backdrop that elevates the overall flavor profile. It’s the quiet hero that rounds out the sharp edges of cocoa and sugar, making the cake taste more cohesive. For an extra layer of depth, try a splash of bourbon or espresso; just a teaspoon will do, and you’ll notice a subtle complexity that makes the cake unforgettable.
Finally, the boiling water. It might sound counterintuitive to add hot liquid to a batter, but it actually “blooms” the cocoa, releasing its full aromatic potential. When you pour it in, you’ll hear a faint sizzle, and the batter will thin out—don’t panic, that’s exactly what you want. The result is a cake that’s moist, glossy, and packed with chocolate flavor that lingers long after the last bite.
Everything’s prepped? Good. Let’s get into the real action...
The Method — Step by Step
Preheat your oven to 350°F (175°C). Grease two 9‑inch round cake pans with a thin layer of butter and dust them with a little flour, tapping out the excess. This creates a non‑stick barrier that ensures the cakes release cleanly, leaving the edges smooth and the tops perfectly flat. While the pans are warming up, gather all your dry ingredients in a large bowl: flour, cocoa powder, sugar, baking soda, baking powder, and salt. I dare you to taste the dry mix before adding wet ingredients—it’s a chocolatey preview of what’s to come.
Kitchen Hack: Sift the flour and cocoa together three times; this aerates the mixture and prevents clumps, giving you a finer crumb.In a separate bowl, whisk together the wet ingredients: eggs, buttermilk, vegetable oil, and vanilla extract. The eggs should be at room temperature; this helps them incorporate more fully, creating a smoother batter. Once combined, pour the wet mixture into the dry ingredients and stir until just combined—don’t overmix, or you’ll develop gluten that makes the cake tough. The batter will look thick and a little lumpy, which is exactly what you want.
Now comes the dramatic moment: slowly drizzle the boiling water into the batter while stirring gently. You’ll hear a faint hiss as the hot water meets the cocoa, and the batter will loosen dramatically, turning into a silky, glossy mixture. This is the moment of truth—if you’ve done it right, the batter should be smooth enough to pour but still thick enough to hold its shape for the pans.
Divide the batter evenly between the two prepared pans, using a spatula to scrape every last bit of chocolate goodness from the bowl. Tap the pans gently on the counter to release any trapped air bubbles; you’ll see the batter settle and the surface smooth out. Pop the pans into the oven and bake for 30‑35 minutes, or until a toothpick inserted into the center comes out with just a few moist crumbs attached.
Watch Out: Opening the oven door too early can cause the cake to sink; trust the timer and resist the urge to peek.While the cakes are baking, prepare the cream cheese filling. In a large mixing bowl, beat the softened cream cheese and butter together until the mixture is light, fluffy, and pale in color—this usually takes about 2‑3 minutes on medium speed. The goal is to incorporate air, which will give the filling a silky texture that spreads easily without tearing the cake layers.
Kitchen Hack: If the cream cheese is too cold, run the mixing bowl over a warm water bath for 30 seconds to soften it without melting.Add the powdered sugar to the cream cheese‑butter mixture a cup at a time, beating on low speed after each addition. This prevents the sugar from flying everywhere and ensures it fully incorporates. Once all the sugar is in, add the second teaspoon of vanilla extract and beat on high for another minute until the frosting is glossy and smooth. If the mixture looks too thick, drizzle in the milk—one tablespoon at a time—until you reach a spreadable consistency that’s thick enough to hold its shape but soft enough to glide over the cake.
When the cakes are done, let them cool in the pans for 10 minutes, then run a thin knife around the edges to loosen them. Invert the cakes onto a cooling rack and let them cool completely; this step is crucial because a warm cake will melt the filling, turning it into a runny mess. While the cakes are cooling, you can prep any decorative toppings—shaved chocolate, fresh berries, or a dusting of cocoa powder.
Once the cakes are fully cooled, place one layer on a serving platter and spread a generous dollop of the cream cheese filling over the top, using an offset spatula to smooth it out to the edges. Place the second layer on top, and then spread the remaining filling over the top and sides of the cake, creating a smooth, even coat. For an extra touch of drama, pipe a swirl of extra frosting around the edges or drizzle melted chocolate over the top. Let the cake sit for at least 30 minutes before slicing so the flavors meld together—trust me, the wait is worth it.
That's it — you did it. But hold on, I've got a few more tricks that'll take this to another level...
Insider Tricks for Flawless Results
The Temperature Rule Nobody Follows
Never bake a chocolate cake straight from the fridge. Let the batter sit at room temperature for at least 10 minutes before pouring it into the pans. This small pause equalizes the temperature of the batter, ensuring an even rise and preventing the dreaded “domed” top that can happen when the edges bake faster than the center. One of my friends tried skipping this step once—her cake came out lopsided, and the frosting slid off the sides like a waterfall.
Why Your Nose Knows Best
When the cake is about 5 minutes from finishing, start sniffing the kitchen. A deep, toasted chocolate aroma means the cake is nearly done, while a faint buttery scent signals you might need a minute or two more. Trust your nose more than the timer; ovens can vary by up to 25°F, and the smell is a reliable indicator of doneness.
The 5‑Minute Rest That Changes Everything
After you pull the cakes from the oven, let them rest in the pans for exactly five minutes. This short pause lets the steam finish cooking the interior without over‑drying the edges. Then, invert them onto a wire rack—if you try to flip them too early, the crumb will crumble, and you’ll lose that beautiful, smooth surface.
Frosting Consistency Check
When your cream cheese frosting reaches a glossy, thick‑but‑spreadable stage, do the “spoon test.” Drop a spoonful onto a plate; if it holds its shape but spreads slowly when you tilt the plate, you’ve nailed the perfect consistency. Too runny, and it will slide off the cake; too stiff, and it will crack when you try to spread it.
Layer Alignment Trick
To ensure your layers are perfectly aligned, place a piece of parchment paper on the countertop, lay one cake layer on it, then gently set the second layer on top, using the parchment as a guide. This prevents any wobble and guarantees a uniform thickness, which is essential for an even frosting coat.
Creative Twists and Variations
This recipe is a playground. Here are some of my favorite ways to switch things up:
Mocha Madness
Add one tablespoon of instant espresso powder to the dry ingredients and a splash of coffee liqueur to the frosting. The result is a deep, coffee‑infused chocolate cake that feels like a sophisticated dessert for a brunch date.
Berry Burst
Fold a cup of fresh raspberries into the batter just before baking, and top the finished cake with a raspberry coulis drizzle. The tart berries cut through the richness, offering a bright contrast that’s perfect for summer gatherings.
Nutty Crunch
Stir in half a cup of toasted chopped hazelnuts or pecans into the batter, and sprinkle a handful on top of the frosting before it sets. The nuts add a delightful crunch and a buttery flavor that pairs beautifully with chocolate.
White Chocolate Whisper
Replace half of the cocoa powder with white chocolate chips, and swap the cream cheese filling for a mascarpone‑based frosting flavored with a hint of vanilla. This creates a lighter, sweeter cake that still feels decadent.
Spiced Holiday
Add a teaspoon of ground cinnamon, a pinch of nutmeg, and a dash of clove to the dry mix for a warm, festive twist. Top with a dusting of powdered sugar shaped like snowflakes for a holiday-ready centerpiece.
Storing and Bringing It Back to Life
Fridge Storage
Cover the cake tightly with plastic wrap or store it in an airtight container and refrigerate for up to five days. The cream cheese filling stays fresh, and the cake retains its moisture thanks to the butter and oil content. Before serving, let the cake sit at room temperature for 20‑30 minutes so the frosting softens and the flavors become more pronounced.
Freezer Friendly
Wrap each layer separately in a double layer of plastic wrap, then place them in a freezer‑safe zip‑top bag. They’ll keep for up to three months. When you’re ready to enjoy, thaw overnight in the fridge, then bring to room temperature before re‑assembling and frosting.
Best Reheating Method
To revive a slice, microwave it for 10‑15 seconds on medium power, but first sprinkle a tiny splash of water on the surface; the steam will bring back the cake’s softness without drying it out. For whole‑cake reheating, place it in a preheated oven at 300°F for about 10 minutes, again with a little water in a shallow pan on the rack to generate steam.