Picture this: I’m halfway through a midnight snack run, the fridge is a barren wasteland, and the only thing that’s left is a half‑filled can of sweetened condensed milk. I thought, “Why not turn that into something spectacular?” I reached for the pantry, pulled out a bag of shredded coconut, a block of butter, and a bottle of coconut cream, and the kitchen exploded with aromas that made my mouth water. I’m talking about a creamy, dreamy bar that feels like a tropical vacation on a spoon, but with a buttery crust that crunches like a fresh coconut chip. I’m not joking—this is the kind of dessert that turns a simple kitchen mishap into a culinary triumph.
When you bite into the first bar, the buttery base gives way to a silky, coconut‑laden filling that feels like a cloud of vanilla‑kissed sweetness. The contrast between the crisp edges and the luscious center is a flavor dance that will have you reaching for more. I dare you to taste this and not go back for seconds. And if you’re skeptical, let me assure you: I’ve tried countless versions of coconut bars, and this is hands down the best version you’ll ever make at home. The secret? It’s not just the ingredients—it’s the technique that locks in moisture and flavor.
Most recipes get this completely wrong by over‑baking the crust or under‑cooking the filling, resulting in a dry, uneven texture. I’ll be honest—when I first tried my own version, I ate half the batch before anyone else got to try it, and the kitchen smelled like a tropical storm. That was the moment I realized the importance of precision. I’ve tweaked the method until the crust is golden and the filling is silky, and I’ve added a few unexpected touches that elevate it from good to unforgettable.
Picture yourself pulling these bars out of the oven, the whole kitchen smelling incredible, and the first bite releasing a wave of coconut and vanilla that feels like a vacation in a bite. I’ve perfected a simple, foolproof method that anyone can follow, and I’ll walk you through every single step. By the end, you’ll wonder how you ever made it any other way. Let’s dive into the details and discover why these Coconut Cream Dream Bars are a game‑changer.
What Makes This Version Stand Out
- Flavor: The combination of sweetened condensed milk, coconut cream, and vanilla extract creates a layered sweetness that feels both indulgent and balanced. The buttery crust adds a savory undertone that keeps the bars from being overly sweet. The result is a taste that lingers like a tropical breeze.
- Texture: The crust is crisp on the outside but tender inside, while the filling is creamy and velvety. This duality gives each bite a satisfying contrast that keeps the mouth moving. The final product feels like a dessert and a snack rolled into one.
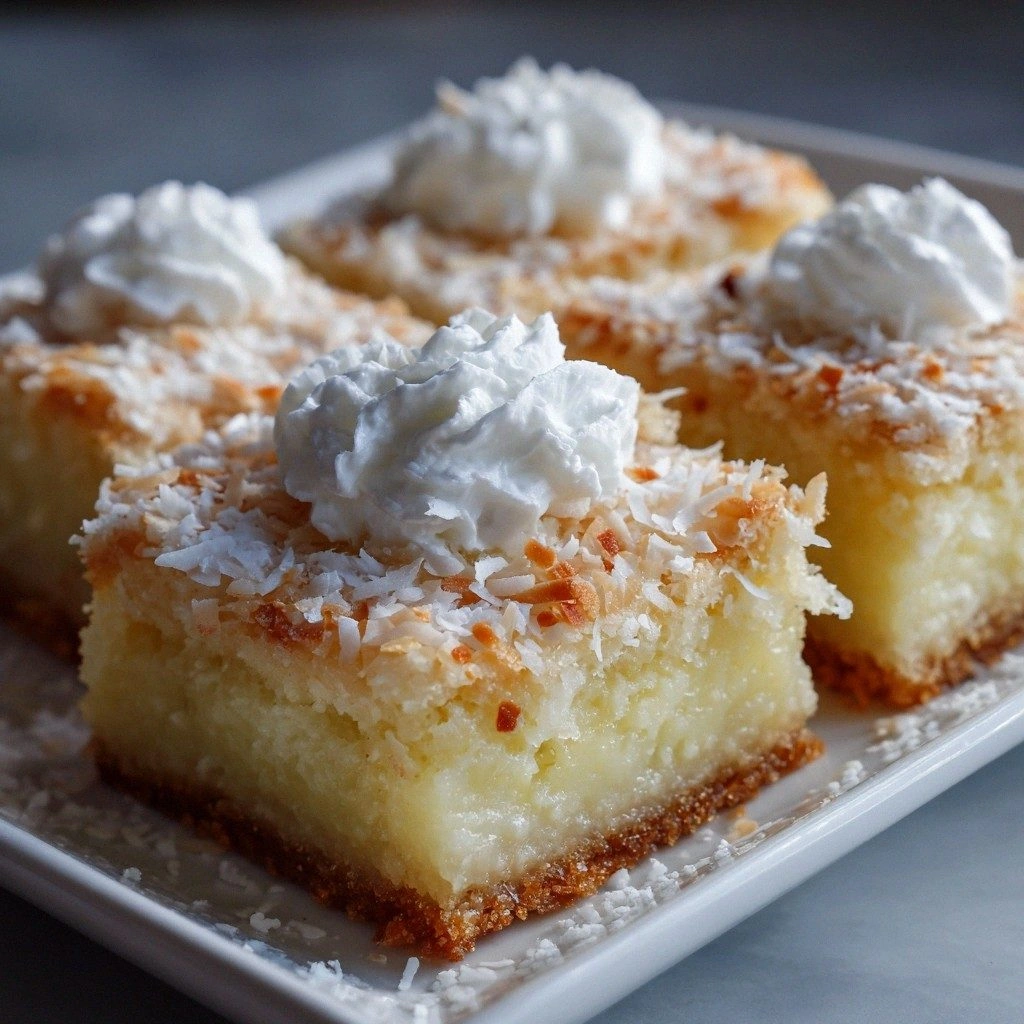
- Visual Appeal: The bars have a golden crust that glistens with a subtle sheen, and the filling’s glossy surface gives them a professional finish. The white coconut flakes add a pop of color that makes the bars look as good as they taste. A drizzle of whipped cream on top gives a luxurious touch.
- Ease of Preparation: The recipe uses pantry staples and requires no specialized equipment. Even beginners can achieve a professional result with a simple mixing bowl and a baking dish. The method is straightforward, with clear measurements and easy-to-follow steps.
- Make‑Ahead Potential: These bars keep well in the refrigerator for up to a week and freeze perfectly for longer storage. They’re ideal for parties, potlucks, or a quick sweet fix on a busy day. The ability to prep in advance adds a practical edge.
- Ingredient Quality: Using unsweetened shredded coconut and coconut cream instead of sweetened versions keeps the flavor authentic and avoids excess sugar. The use of a real can of sweetened condensed milk gives depth that powdered sugar alone can’t match. The careful selection of each component ensures a high‑quality final product.
- Audience Appeal: Whether you’re a fan of tropical desserts or just looking for something new, these bars satisfy. They’re sweet enough to satisfy a craving but not so heavy that they’re a guilty pleasure. The bars can be served to kids or adults alike.
Inside the Ingredient List
The Flavor Base
All-purpose flour is the backbone of the crust, providing structure and a tender bite. It’s the silent hero that holds everything together, and it reacts with butter to create that buttery flavor we all love. If you skip it, the crust will crumble and lack cohesion, making the bars hard to handle.
The Texture Crew
Unsweetened shredded coconut adds texture and a rich coconut flavor that feels authentic. The coconut’s fibrous texture gives the bars a satisfying chew, while its natural oils keep the filling moist. A pinch of salt is essential; it lifts the sweetness and balances the overall taste.
The Unexpected Star
Sweetened condensed milk is the heart of the filling, providing sweetness and a luscious, custard‑like texture. Its thick consistency allows the filling to set without a separate baking step. If you’re avoiding dairy, you can substitute a dairy‑free condensed milk, but the flavor profile will shift slightly.
The Final Flourish
Coconut cream elevates the filling, giving it a silky richness that feels indulgent. Vanilla extract enhances the overall flavor, balancing the sweetness beautifully. Whipped cream tops the bars, adding a light, airy finish that contrasts with the dense filling.
Everything's prepped? Good. Let's get into the real action...
The Method — Step by Step
- Preheat your oven to 350°F (175°C). Line an 8×8-inch baking pan with parchment paper, leaving some overhang for easy removal. This step ensures even heat distribution and a clean release. The oven temperature is critical for a golden crust.
- Combine the dry ingredients. In a large bowl, whisk together the flour, shredded coconut, powdered sugar, and pinch of salt. Stir until the mixture is evenly blended. This creates a uniform crumb that will hold the butter.
- Cut in the butter. Add the softened butter to the dry mix and use your fingertips or a pastry cutter to blend until the mixture resembles coarse crumbs. The butter must be at room temperature; otherwise it won’t incorporate properly. This step is where the buttery flavor truly begins.
- Press the crust into the pan. Transfer the crumb mixture into the prepared pan and press firmly with the back of a spoon or your palm. Make sure the crust is even and compact. The crust will set during baking, so a tight base is essential.
- Bake the crust. Place the pan in the oven and bake for 12–15 minutes, or until the edges are golden brown. Watch the color closely; you want a light amber, not a dark brown. This will give the base a crisp finish that contrasts with the filling.
- Prepare the filling. In a saucepan, combine sweetened condensed milk, coconut cream, and vanilla extract. Heat over low heat, stirring constantly until the mixture thickens slightly. The filling should be smooth and glossy.
- Watch Out: Temperature matters. If the mixture gets too hot, it can separate, losing its silky texture. Keep the heat low and stir gently. The goal is a uniform, velvety consistency.
- Pour the filling over the crust. Once the crust has cooled slightly, pour the warm filling evenly over it. The filling will seep into the crust, creating a cohesive structure. Let the mixture cool to room temperature; it will begin to set as it cools.
- Chill the bars. Place the pan in the refrigerator for at least 4 hours, preferably overnight. The cold will firm up the filling, making it easier to cut. This step also allows the flavors to meld together.
- Slice and serve. Remove the bars from the pan using the parchment overhang. Cut into squares or bars with a sharp knife. Serve immediately or store in an airtight container for later enjoyment.
- Optional: Add whipped cream. Top each bar with a dollop of freshly whipped cream before serving for an extra layer of indulgence. The contrast between the creamy topping and the dense filling is irresistible.
That's it — you did it. But hold on, I've got a few more tricks that'll take this to another level...
Insider Tricks for Flawless Results
The Temperature Rule Nobody Follows
Keeping the filling at a low temperature during cooking is essential. If you let it get too hot, the mixture can curdle, ruining the silky texture. I always use a double boiler to maintain gentle heat, and I stir constantly. This small step saves you from a disastrous texture.
Why Your Nose Knows Best
As the crust bakes, the scent of toasted coconut and butter will fill the kitchen. Trust that aroma; it’s a sign of a perfect golden crust. If the smell is faint, give it a few more minutes. Your nose is a reliable indicator of doneness.
The 5-Minute Rest That Changes Everything
After removing the bars from the oven, let them rest on a rack for 5 minutes. This allows the crust to firm up and the filling to set slightly, making cutting easier. I’ve found that cutting straight away results in a messy mess.
Use Parchment for Easy Removal
Line the pan with parchment paper that extends beyond the edges. This overhang lets you lift the entire batch out of the pan with minimal effort. It also prevents the bars from sticking and makes cleanup a breeze.
Freeze for Future Parties
These bars freeze well. Wrap them tightly in plastic wrap and place them in a freezer bag. When you’re ready to serve, let them thaw at room temperature for 30 minutes. The texture remains silky, and the flavors intensify.
Creative Twists and Variations
This recipe is a playground. Here are some of my favorite ways to switch things up:
Chocolate Coconut Dream Bars
Swirl melted dark chocolate into the filling before pouring it over the crust. The chocolate adds depth and a slight bitterness that balances the sweetness. Chocolate chips sprinkled on top before chilling give a delightful crunch.
Almond Butter Variation
Replace half of the butter with almond butter for a nutty undertone. The almond butter also adds a subtle flavor that pairs beautifully with coconut. The bars maintain their structure and become a protein‑rich treat.
Maple‑Infused Bars
Add a tablespoon of pure maple syrup to the filling for a warm, caramel note. Maple and coconut are a classic pairing that elevates the flavor profile. This variation is especially good for fall gatherings.
Spiced Coconut Bars
Incorporate a pinch of ground ginger, cinnamon, and nutmeg into the crust. The spices give a comforting warmth that complements the tropical flavor. These bars are perfect for holiday parties.
Berry Coconut Bars
Fold fresh or frozen berries into the filling before pouring. The berries add a juicy burst and a pop of color. The texture remains creamy, and the berries’ acidity cuts through the richness.
Gluten‑Free Edition
Use a gluten‑free flour blend in place of all‑purpose flour. Keep the rest of the recipe unchanged. The bars will still have a crisp crust and silky filling, making them suitable for gluten‑sensitive guests.
Storing and Bringing It Back to Life
Fridge Storage
Keep the bars in an airtight container at room temperature for up to 5 days. The crust will stay crisp, while the filling remains creamy. If the bars feel a bit hard, let them sit at room temperature for 10 minutes before serving.
Freezer Friendly
Wrap each bar individually in plastic wrap and place them in a freezer bag. They can be stored for up to 3 months. When ready to eat, thaw in the refrigerator overnight or at room temperature for a few hours.
Best Reheating Method
To refresh the bars, microwave them on low power for 15–20 seconds. Add a tiny splash of water before reheating; it steams back to perfection, keeping the filling moist. Avoid over‑heating, or the filling will become runny.