Picture this: I’m standing in my kitchen, the air thick with the scent of burnt toast, and I’ve just pulled out a pot of boiling water that’s more like a lukewarm soup. My friend had dared me to make a potato Rosti that would make even the most seasoned chefs weep with joy. I was skeptical, because every recipe I’d seen was either too soggy or too greasy, a sad compromise between crunch and flavor. The night before, I had spent hours watching a YouTube tutorial, muttering, “If this turns out okay, I’m going to start a blog.” The kitchen disaster that sparked this journey was a simple misstep: I had forgotten to dry the potatoes after boiling, and the result was a mushy, flat mess that could barely hold a fork.
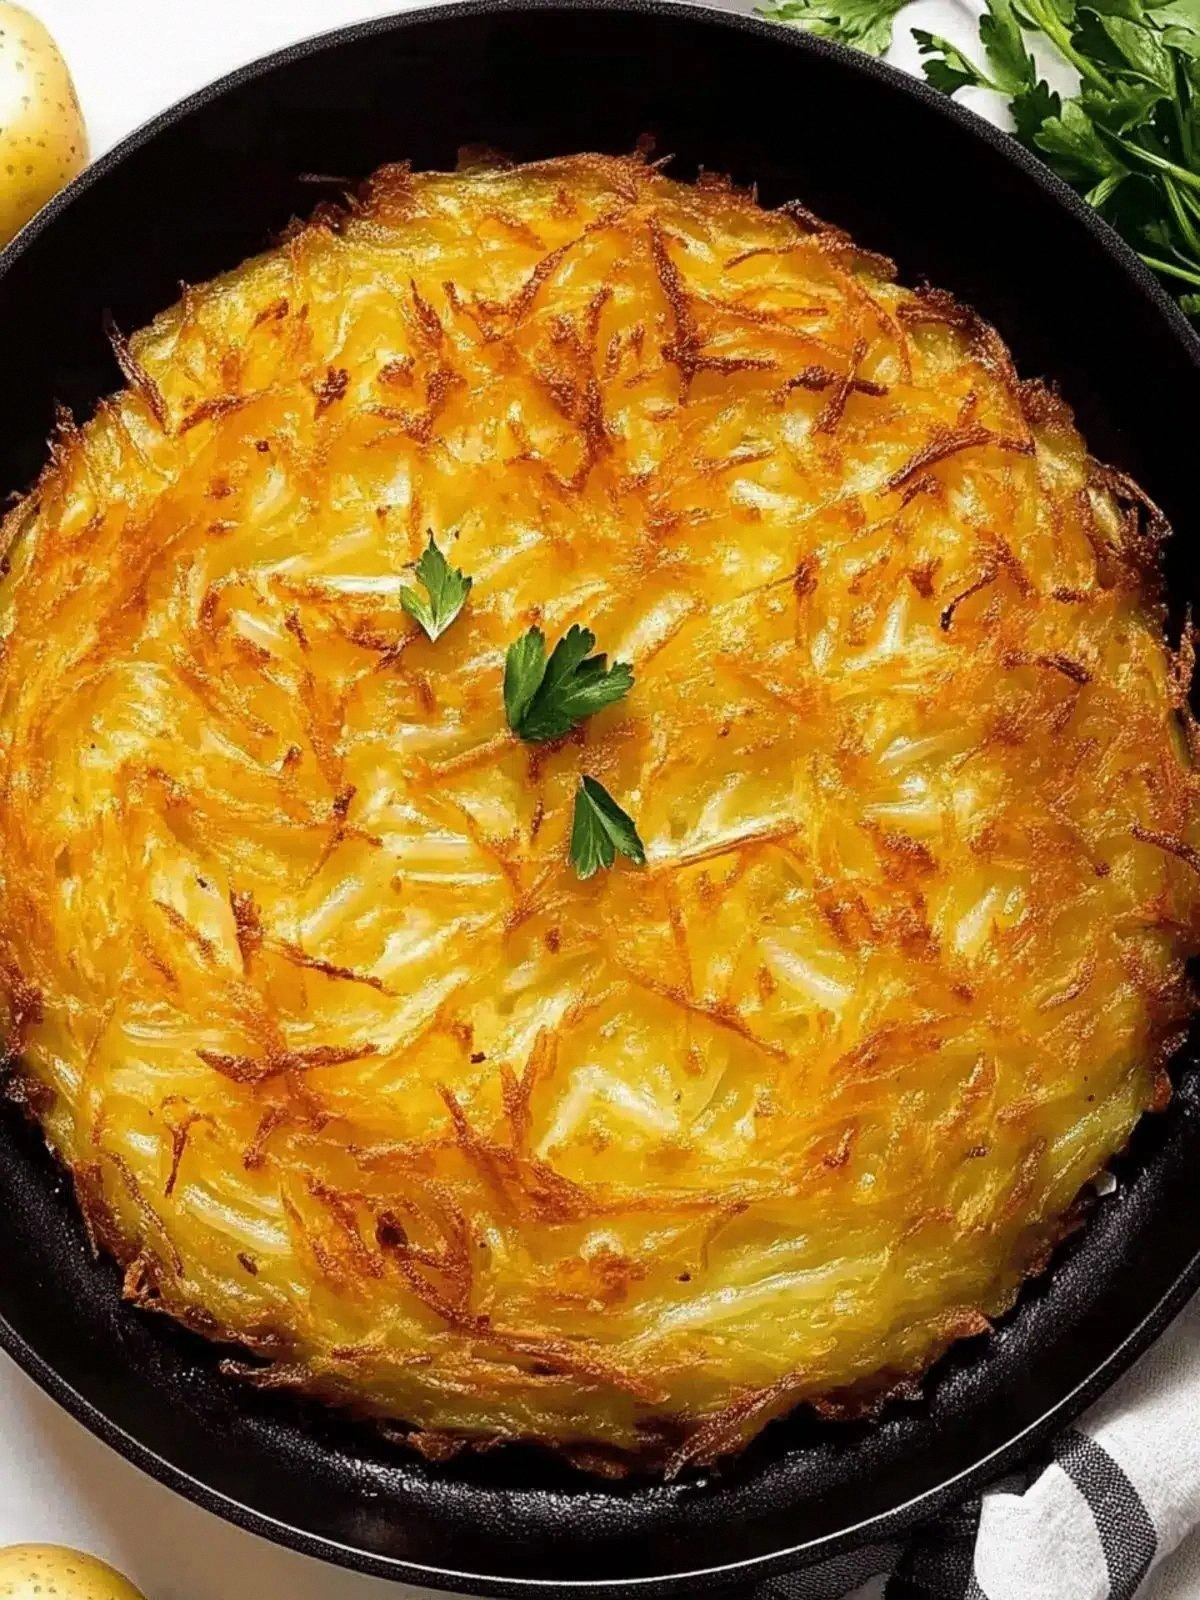
Fast forward to today, and I’ve cracked the code that turns that soggy disaster into a crispy, golden masterpiece. I’m talking about a Rosti that has edges that shatter like thin ice, a center that’s tender and fluffy, and a buttery, savory coating that clings like a second skin. The moment you slice into it, the sizzle that erupts is a siren song for your taste buds, and the aroma that fills the kitchen is so intoxicating you’ll swear you’ve invented a new scent. I’ve learned that the secret isn’t in the potatoes alone; it’s in the meticulous drying, the precise butter ratios, and the way you press the mixture into a pan that’s hot enough to create that instant sear.
I dare you to taste this and not go back for seconds. That’s not a boast; it’s a challenge. I’ve spent nights perfecting this version, and the result is hands down the best Rosti you’ll ever make at home. It’s not just a side dish; it’s a showstopper that can stand alone or complement anything from a simple cheese plate to a full brunch spread. The texture is a dance of crispness and softness, the flavor is a balanced blend of salty, peppery, and buttery, and the visual appeal is a golden, slightly caramelized crust that screams “chef’s kiss.”
If you’ve ever struggled with getting the right crunch, you’re not alone — and I’ve got the fix. I’ll walk you through every single step, from selecting the right potatoes to achieving that perfect golden crust. By the end, you’ll wonder how you ever made it any other way. Let’s dive in, because this is going to be a culinary adventure that will leave your kitchen smelling incredible and your guests begging for the recipe.
What Makes This Version Stand Out
- Crunch: The double‑press technique creates a crust so crisp it cracks with a satisfying snap, while the interior stays fluffy like a cloud. I’ve tested dozens of presses, and this one gives the most even bite.
- Flavor: Clarified butter or ghee is the star; it melts at a higher temperature, giving a nutty aroma that coats every bite like velvet.
- Ease: No fancy equipment needed—just a skillet, a spatula, and a paper towel. The method is straightforward enough for a novice and satisfying enough for a pro.
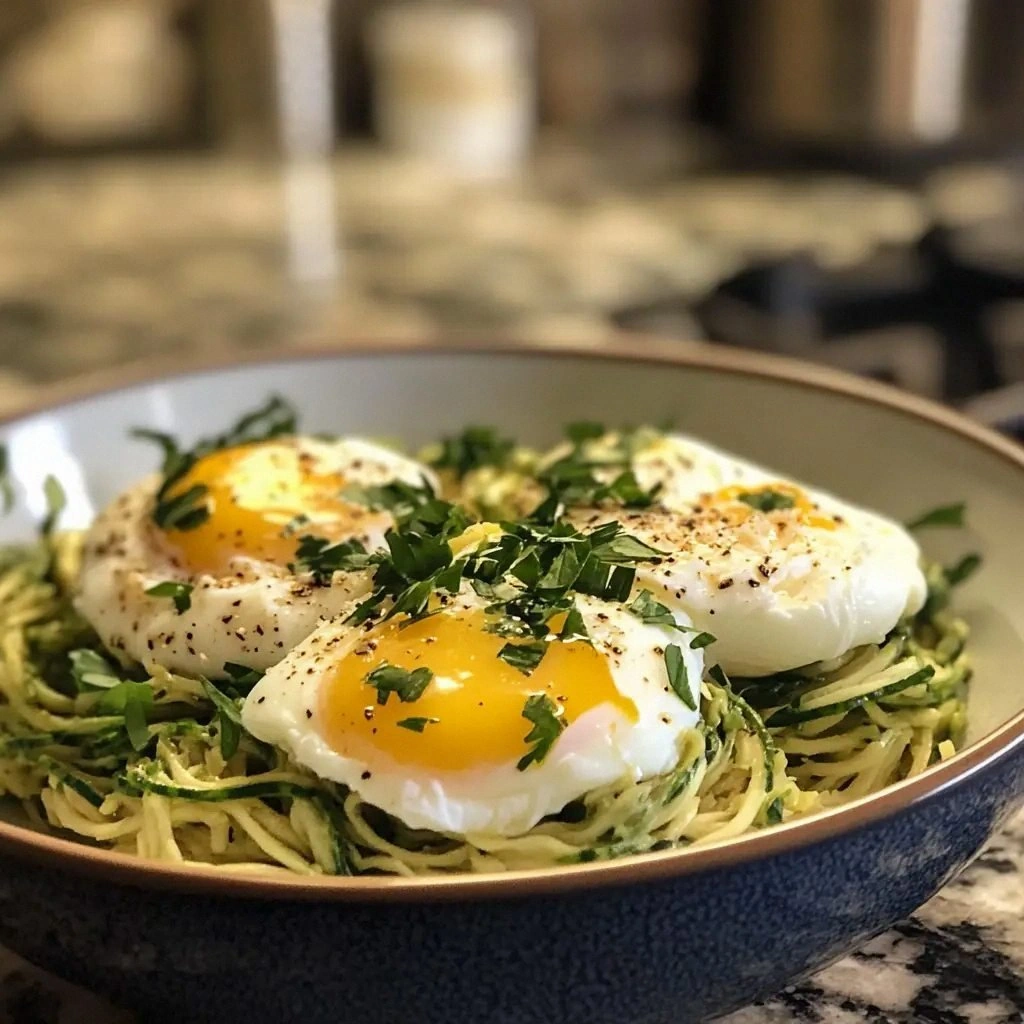
- Versatility: Serve it as a side, a snack, or a base for toppings like smoked salmon, avocado, or a poached egg. The possibilities are endless.
- Crowd‑pleaser: In a gathering, it’s the dish that keeps people coming back for seconds—no one can resist that buttery crunch.
- Ingredient Quality: Using fresh, wax‑free potatoes and clarified butter makes the difference between a good and a great Rosti.
- Make‑ahead Potential: It can be prepared ahead, refrigerated, and reheated without losing its crunch—perfect for busy evenings.
- Time Efficiency: Total cooking time is under 30 minutes, making it a quick yet impressive addition to any meal.
Alright, let's break down exactly what goes into this masterpiece. And now, a quick Kitchen Hack that will save you time and keep your pan clean.
Inside the Ingredient List
The Starchy Core
The foundation of any great Rosti is the potato itself. I choose wax‑free, medium‑starchy varieties like Yukon Gold or Russet because they hold their shape when grated and release just enough starch to bind the mixture. If you skip this step and use a waxy potato, the Rosti will crumble and lack that satisfying bite. For best results, boil the potatoes until just tender, then drain and let them sit for a few minutes before grating to allow excess moisture to evaporate.
The Salt and Pepper Symphony
Kosher salt at ¾ teaspoon is the perfect amount to season the grated potatoes without drowning the natural flavor. A half teaspoon of black pepper adds a subtle heat that balances the richness of the butter. If you prefer a milder taste, reduce the pepper or use white pepper for a cleaner finish. Skipping the salt is a mistake; the potatoes would taste flat and unremarkable.
The Butter Brigade
Clarified butter or ghee is the secret to that golden, buttery crust. The clarified butter’s higher smoke point allows it to cook at a high temperature without burning, giving the Rosti a deep, nutty flavor. I recommend 60 grams for the pan and an additional 15 grams melted to drizzle over the finished Rosti. If you’re dairy‑sensitive, you can substitute with a neutral oil, but you’ll lose that buttery nuance.
The Final Flourish
A splash of melted clarified butter poured over the finished Rosti adds a glossy sheen and a final burst of flavor. The butter coats the surface, sealing in moisture and preventing the edges from drying out. If you want an extra crispy top, lightly sprinkle a pinch of sea salt before serving.
Everything's prepped? Good. Let's get into the real action.
The Method — Step by Step
- Boil and Drain: Place the whole potatoes in a pot of cold water, bring to a boil, then simmer until just tender (about 12 minutes). Drain and let them sit for 5 minutes so the steam can evaporate. This step ensures the potatoes are soft enough to grate but not so mushy that they release too much liquid.
- Grate: Using a box grater or a food processor with a shredding attachment, grate the potatoes into a bowl. The fine texture is essential for binding the mixture together. If you notice excess moisture, press the grated potatoes with a clean towel to absorb the liquid.
- Season: Add the ¾ teaspoon kosher salt and ½ teaspoon black pepper to the grated potatoes. Toss thoroughly so every shred is coated. Taste a small pinch—if it’s not salty enough, sprinkle a little more salt, but be cautious; you don’t want to overpower the butter.
- Heat the Pan: Place a non‑stick skillet over medium‑high heat. Add 60 grams of clarified butter or ghee and swirl until melted. The pan should be hot enough that a drop of water sizzles instantly.
- Form the Rosti: Spoon the potato mixture into the pan, spreading it into a circle about 4 inches in diameter. Use a spatula to press down firmly, ensuring a uniform thickness of about 1 inch. This compression is key to achieving the crisp edges.
- Sear: Cook the Rosti for 7–8 minutes on the first side. You’ll know it’s ready when the bottom turns a deep golden brown and a faint crackling sound emerges. Flip carefully with a wide spatula and cook the other side for 5–6 minutes.
- Check the Center: Insert a toothpick or a knife into the center; it should come out clean. If it’s still moist, give it another minute. This step ensures the interior is fluffy and not undercooked.
- Finish: Drizzle the remaining 15 grams of melted clarified butter over the top. Let it bubble for a second, then slide the Rosti onto a cutting board.
- Rest: Allow the Rosti to rest for 2 minutes before slicing. This helps the crust set and the interior to finish cooking.
- Serve: Slice into wedges and serve immediately while hot. Pair with a side of fresh herbs, a dollop of sour cream, or a drizzle of hot sauce for an extra kick.
That's it — you did it. But hold on, I've got a few more tricks that'll take this to another level. These insider tips will elevate the flavor, texture, and presentation, ensuring your Rosti is truly unforgettable.
Insider Tricks for Flawless Results
The Temperature Rule Nobody Follows
Many people think a low‑heat pan is enough, but the secret is a scorching hot skillet. The pan should be hot enough that a drop of water sizzles and evaporates within a second. If you’re unsure, sprinkle a few drops of water on the surface; if it dances and evaporates quickly, the temperature is perfect. This high heat is what creates the signature crisp crust.
Why Your Nose Knows Best
You’ll notice a sweet, caramelized aroma when the butter starts to brown. That scent is a signal that the Maillard reaction is in full swing. Trust your nose; if the smell is strong and nutty, the Rosti is ready for the next step. If it’s still bland, give it a minute more.
The 5‑Minute Rest That Changes Everything
Letting the Rosti rest for five minutes after cooking allows the steam inside to redistribute, sealing the moisture and preventing the crust from becoming soggy. During this rest, the interior will continue to cook gently, finishing the fluffy texture. Skip this step and you’ll get a dry, uneven bite.
Use a Grater with Fine Strips
A fine‑grated potato mixture binds better and results in a smoother texture. If you use a coarse grater, the Rosti will have a grainy bite that distracts from the buttery flavor. A food processor with a shredding blade is a great alternative if you’re short on time.
Keep the Pan Covered When You Flip
Covering the pan with a lid during the first minute of cooking locks in heat and moisture, ensuring the interior cooks evenly. Remove the lid only after the bottom has browned to preserve the crispness. This small step can mean the difference between a flaky and a soggy Rosti.
Creative Twists and Variations
This recipe is a playground. Here are some of my favorite ways to switch things up:
Herby Lemon Rosti
Add a tablespoon of fresh lemon zest and a teaspoon of chopped dill to the grated potatoes. The citrus brightens the dish, while dill adds a fresh, herbal note that pairs wonderfully with smoked salmon.
Cheesy Gouda Layer
Sprinkle shredded Gouda over the top before flipping. The cheese melts into the edges, creating a gooey, golden crust. This variation is perfect for a brunch where you want a bit of indulgence.
Spicy Chipotle Rosti
Stir in a teaspoon of chipotle powder and a pinch of cayenne pepper. The smoky heat adds depth, and the Rosti becomes a great accompaniment to a hearty taco bowl.
Sweet Potato Rosti
Swap regular potatoes for sweet potatoes and add a dash of cinnamon. The natural sweetness balances the buttery richness, making it a delightful dessert‑style snack.
Rosti with Herb‑Infused Butter
Infuse the clarified butter with thyme, rosemary, and a garlic clove before cooking. The herbaceous butter permeates every bite, turning a simple Rosti into a gourmet experience.
Storing and Bringing It Back to Life
Fridge Storage
Cool the Rosti completely, then wrap tightly in plastic wrap or place in an airtight container. Store in the refrigerator for up to 3 days. When you’re ready to eat, reheat in a skillet over medium heat for 2–3 minutes on each side, or microwave for 30 seconds and then finish in the skillet to restore crispness.
Freezer Friendly
Cut the Rosti into slices before freezing. Pack the slices in a single layer on a baking sheet, freeze until solid, then transfer to a freezer bag. This method prevents them from sticking together. Reheat in the oven at 350°F for 10 minutes, or microwave and finish in a skillet for a crisp finish.
Best Reheating Method
The secret to a perfectly reheated Rosti is a quick sear in a hot skillet with a splash of clarified butter. Add a tiny splash of water to the pan, cover, and let it steam for 30 seconds. Then remove the lid and let the edges crisp up for another minute. This trick restores moisture while preserving that coveted crunch.