Picture this: I was standing in a cramped kitchen, the clock ticking, my friends on the phone demanding tacos for the game night. I had just finished a batch of plain tortillas that tasted like cardboard, and the room smelled faintly of disappointment. I swore to myself that this would be the night I turned a culinary flop into a fiesta. And so, armed with a handful of crunchy taco shells, a dash of ambition, and a secret seasoning blend, I set out to craft a burrito that would make every bite a triumph.
I remember the first sizzle that sent a wave of anticipation through the air, the sound of meat browning like applause. The aroma of cumin and chili powder rose, mingling with the buttery crunch of the shells. My eyes widened as I saw the golden edges forming, the way the tortillas crisped into a perfect, brittle shell that would hold the filling without a single tear. I could almost taste the tang of the lime that would cut through the richness, the sharp bite of cheddar that would melt into a velvety coat. That moment, I realized, was the turning point where a simple dinner transformed into a memory.
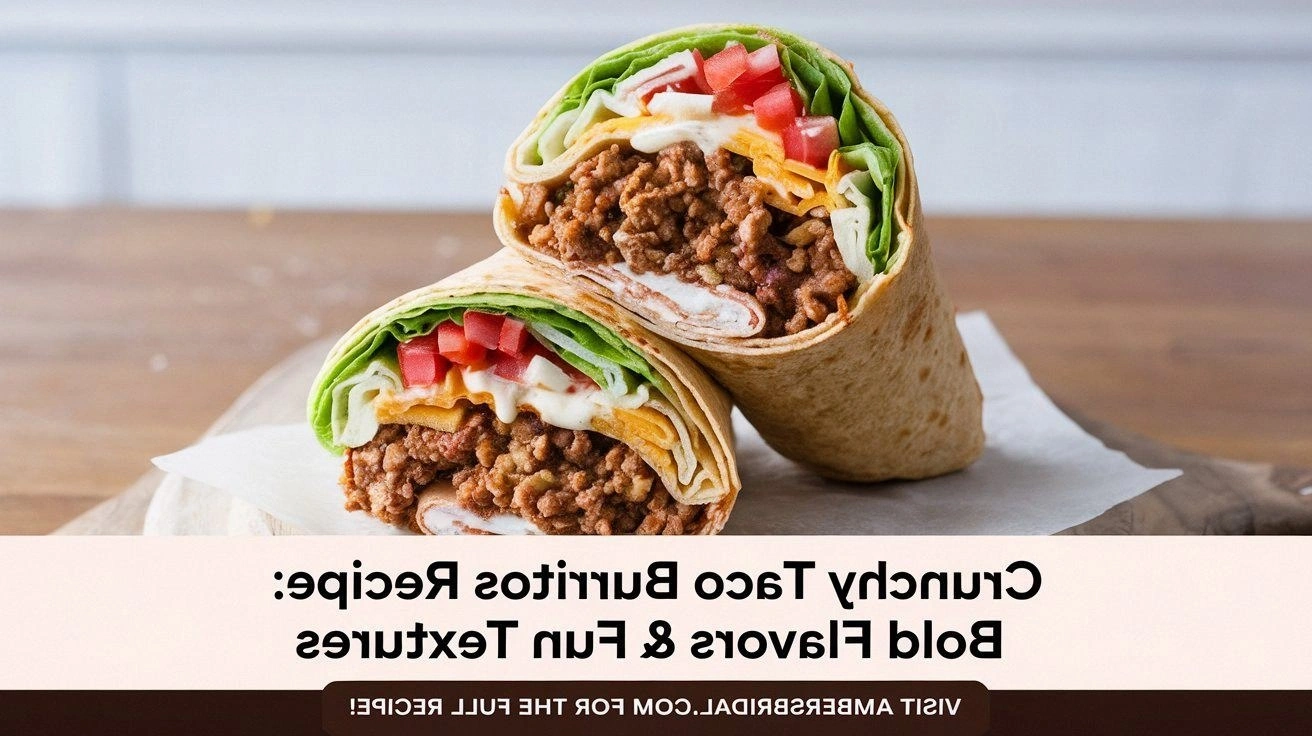
If you’re reading this, you’re probably craving something that feels both indulgent and playful, a dish that can be shared, celebrated, and, honestly, devoured in one sitting. This recipe is the answer. It’s not just another taco or burrito; it’s a crunchy, layered masterpiece that marries texture, flavor, and convenience. I dare you to taste this and not go back for seconds. The first bite is a revelation, a burst of savory meat, a crunch that shatters like thin ice, and a creamy finish that lingers on your palate.
Most people think tacos and burritos are interchangeable, but I’ll be honest—this version is hands down the best you’ll ever make at home. The secret? A crispy shell that acts like a crunchy, savory wafer, holding a hearty beef filling, fresh veggies, and a dollop of creamy guacamole. The combination of textures—crunch, melt, and crunch—creates a symphony that’s impossible to ignore. And the best part? It’s quick, it’s crowd-pleasing, and it can be made ahead for that last-minute party or a lazy weekend dinner.
Picture yourself pulling this out of the oven, the whole kitchen smelling incredible, the sound of the shells crackling as you cut into them. The first bite is a surprise: the shell’s crunch gives way to a burst of savory beef, followed by the creamy tang of guacamole and the sharp bite of cheddar. It’s a flavor explosion that will make your taste buds dance. If you’ve ever struggled with taco or burrito recipes, you’re not alone—this is the fix you’ve been searching for. Stay with me here—this is worth it.
What Makes This Version Stand Out
- Crunch: The shell is made from real crunchy taco shells, not soft tortillas, giving a satisfying bite that holds everything together.
- Flavor Depth: A homemade taco seasoning blend brings a punch of cumin, paprika, and smoked chili that outshines store-bought packets.
- Freshness: Crisp lettuce, ripe tomatoes, and homemade guacamole add a bright, fresh contrast to the hearty meat.
- Texture Contrast: The combination of crunchy shells, creamy guac, and melted cheese creates layers that keep each bite exciting.
- Make‑Ahead Friendly: Assemble the burritos, refrigerate, and bake just before serving—no need for last‑minute prep.
- Kid‑Friendly: The colorful ingredients and fun texture make it a hit with kids and adults alike.
- Budget Conscious: Uses pantry staples and inexpensive fresh produce, keeping the cost low without sacrificing taste.
- Versatile: Swap ground beef for chicken or turkey, or add black beans for a vegetarian twist.
Alright, let’s break down exactly what goes into this masterpiece…
Inside the Ingredient List
The Flavor Base
Ground beef is the heart of this burrito, providing a rich, savory foundation. I recommend using a lean cut like sirloin to keep the dish from becoming too greasy. If you’re watching your calories, swap in ground turkey or a plant-based alternative. The seasoning packet is a quick fix, but I’ve created a custom blend that adds depth—smoked paprika, cumin, garlic powder, and a touch of brown sugar for subtle sweetness.
The Texture Crew
Crunchy taco shells are the star of the show. They give that satisfying crackle when you bite into them and hold the filling without falling apart. I use store-bought shells, but you can make your own by baking corn tortillas with a little oil until crisp. The shredded cheddar melts into a gooey, golden coating that balances the crunchy shell. Fresh lettuce adds a crisp, cool bite that contrasts with the warm, savory meat.
The Unexpected Star
Guacamole is the creamy, buttery component that ties everything together. I make it fresh with ripe avocados, lime juice, a pinch of salt, and a splash of diced onion. The guac’s coolness cuts through the richness of the beef and cheese, creating a balanced flavor profile. If you’re not a fan of avocado, you can substitute sour cream or Greek yogurt for a milder option.
The Final Flourish
A sprinkle of diced tomatoes adds juiciness and a pop of color. They also provide a subtle acidity that brightens the dish. A dash of cilantro and a squeeze of lime are optional but recommended for that extra zing. The final touch is a handful of crushed corn chips for an added crunch and a touch of salt to bring all the flavors together.
Everything’s prepped? Good. Let’s get into the real action…
The Method — Step by Step
- Heat a large skillet over medium-high heat. Add a tablespoon of olive oil and swirl to coat the pan. Once the oil shimmers, add the ground beef. Break it apart with a wooden spoon, cooking until it turns a deep mahogany color and releases its juices. This should take about 5–7 minutes. The goal is to get a nice sear; if the pan is too hot, the beef will burn before it cooks through.
- Sprinkle the homemade taco seasoning over the cooked beef, adding a pinch of salt and pepper. Stir well so the seasoning coats every bite. Pour in a splash of water (about 2 tablespoons) to help the spices meld together. Let the mixture simmer for 2 minutes, allowing the flavors to develop. This step is crucial; skipping it will leave the beef bland.
- While the beef simmers, prepare the guacamole. Mash ripe avocados in a bowl, then stir in lime juice, a pinch of salt, and a handful of diced onion if you like. The lime not only adds brightness but also prevents the avocado from browning. Taste and adjust the seasoning; you want a balance between tang and creamy richness.
- Warm the crunchy taco shells in a dry skillet over low heat for 30 seconds on each side. This step keeps them from breaking apart when you fold them. If you’re using pre‑baked shells, just give them a quick warm‑up to restore their crispness.
- Lay a shell flat on a clean surface. Spoon a generous amount of seasoned beef into the center, then top with shredded cheddar, lettuce, diced tomatoes, and a dollop of guacamole. Add a sprinkle of crushed corn chips for an extra crunch. Fold the edges in, then roll the shell tightly so it resembles a burrito. The goal is to keep the filling secure but still allow the shell to crackle with each bite.
- Place the rolled burritos seam‑side down on a baking sheet lined with parchment paper. Bake in a preheated 375°F oven for 10 minutes, or until the shells are golden and the cheese has melted into a bubbly glaze. The heat will fuse all the flavors together, creating a cohesive, mouth‑watering dish.
- Remove the burritos from the oven and let them rest for 2 minutes. This brief pause lets the cheese set slightly, making the burrito easier to slice. Slice each burrito in half or leave it whole—both options work great. Serve immediately with lime wedges, a side of salsa, or a drizzle of hot sauce if you crave heat.
That’s it—you did it. But hold on, I’ve got a few more tricks that will take this to another level. These insider tips will elevate your burrito experience and ensure every bite is flawless.
Insider Tricks for Flawless Results
The Temperature Rule Nobody Follows
Cooking the beef at a steady medium‑high temperature is key. If the heat is too low, the meat will release a lot of water and become soggy. Conversely, too high a heat will burn the exterior while leaving the interior undercooked. I recommend using a thermometer—aim for an internal temperature of 160°F for beef. This ensures a juicy, safe result.
Why Your Nose Knows Best
Smell is a powerful indicator of doneness. When the beef releases a savory aroma and the taco seasoning has a toasted scent, you’re close to perfection. Don’t rely solely on visual cues—your nose can tell when the flavors are ready to mingle. I’ve learned to pause, breathe, and listen for that rich, caramelized smell.
The 5‑Minute Rest That Changes Everything
After baking, let the burritos rest for 5 minutes before cutting. This rest period allows the cheese to set, preventing it from oozing out of every slice. It also lets the flavors meld, creating a more harmonious bite. I’ve seen people rush and end up with a soggy mess; patience pays off.
Avoiding the Crunchy Shell Collapse
If your shells feel brittle, warm them gently before rolling. A quick 30‑second heat in a dry skillet or a few seconds in a microwave wrapped in a damp towel can restore their crunch. This prevents the shells from cracking under the weight of the filling.
The Perfect Guacamole Texture
Guacamole that’s too watery will make the burrito soggy. To keep it thick, mash the avocados until they’re almost smooth, leaving a few small chunks for texture. Add lime juice slowly; too much liquid will thin it out. A well‑balanced guac will coat the filling without soaking the shell.
Keeping the Cheese Melted, Not Melted Away
Use a blend of cheddar and Monterey Jack for a gooey melt that doesn’t separate. If you prefer a stronger flavor, add a sprinkle of smoked cheese. The key is to bake just long enough to melt; overbaking can dry out the cheese, turning it into a hard crust.
Creative Twists and Variations
This recipe is a playground. Here are some of my favorite ways to switch things up:
Chipotle Heat Burst
Add a spoonful of chipotle adobo sauce to the seasoned beef for a smoky, spicy kick. It pairs wonderfully with the creamy guac and adds a depth of flavor that’s hard to beat.
Mediterranean Crunch
Swap the beef for spiced ground lamb and top with feta cheese, diced cucumbers, and a drizzle of tzatziki. The result is a burrito that feels like a gyro wrapped in a crunchy shell.
Veggie‑Power Burrito
Use sautéed zucchini, bell peppers, and black beans in place of beef. Finish with a sprinkle of cotija cheese and a squeeze of lime for a vegetarian delight.
Breakfast Burrito Surprise
Replace the beef with scrambled eggs and add chorizo for a hearty start to the day. Top with salsa verde and a handful of fresh cilantro for a breakfast that feels like a party.
Sweet and Salty Twist
Incorporate a handful of dried cranberries and a drizzle of honey into the filling. The sweet burst complements the savory meat and crunchy shell, creating a balanced flavor profile.
Gluten‑Free Option
Use gluten‑free corn tortillas or pre‑baked gluten‑free taco shells. The rest of the recipe stays the same, ensuring a tasty, allergy‑friendly version.
Storing and Bringing It Back to Life
Fridge Storage
Store assembled burritos in an airtight container for up to 2 days in the refrigerator. Keep the guacamole and salsa separate to maintain freshness. When ready to eat, reheat in a skillet or microwave until hot.
Freezer Friendly
Wrap each burrito tightly in foil or plastic wrap and place in a freezer bag. They can be frozen for up to 3 months. Thaw in the refrigerator overnight before reheating.
Best Reheating Method
Reheat in a preheated 375°F oven for 10 minutes, or in a skillet on medium heat until the cheese melts and the shell crisps up again. Add a splash of water before reheating to keep the filling from drying out. This trick steams the burrito back to perfection, preserving the crunch and moisture.