It was a Tuesday night, the kind of evening where you’re scrolling through Pinterest for a quick dinner and you stumble onto a photo of a single apple that looks like it’s been kissed by the sun. I stared at that image, feeling a sudden, almost rebellious craving that said, “I need something that feels like a hug, but with a twist.” The kitchen was a mess of half‑cooked rice, a burnt saucepan, and a fridge that looked more like a treasure chest than a storage unit. I laughed, grabbed a cutting board, and decided to turn that kitchen disaster into a culinary triumph.
The air in my kitchen was already thick with the scent of apples, but when I sliced the fruit, the aroma turned into a sweet, almost buttery perfume that made the walls seem to breathe. The sound of the knife cutting through the crisp flesh was like a soft drumbeat, punctuated by the faint hiss of the oven preheating. I could taste the faint hint of sugar in the air, a promise of caramel that would soon meet the spices. The texture of the apple skins felt smooth and slightly waxy, a gentle reminder that this was a simple fruit. The touch of the wooden spoon against the pan was warm, grounding me in the present moment.
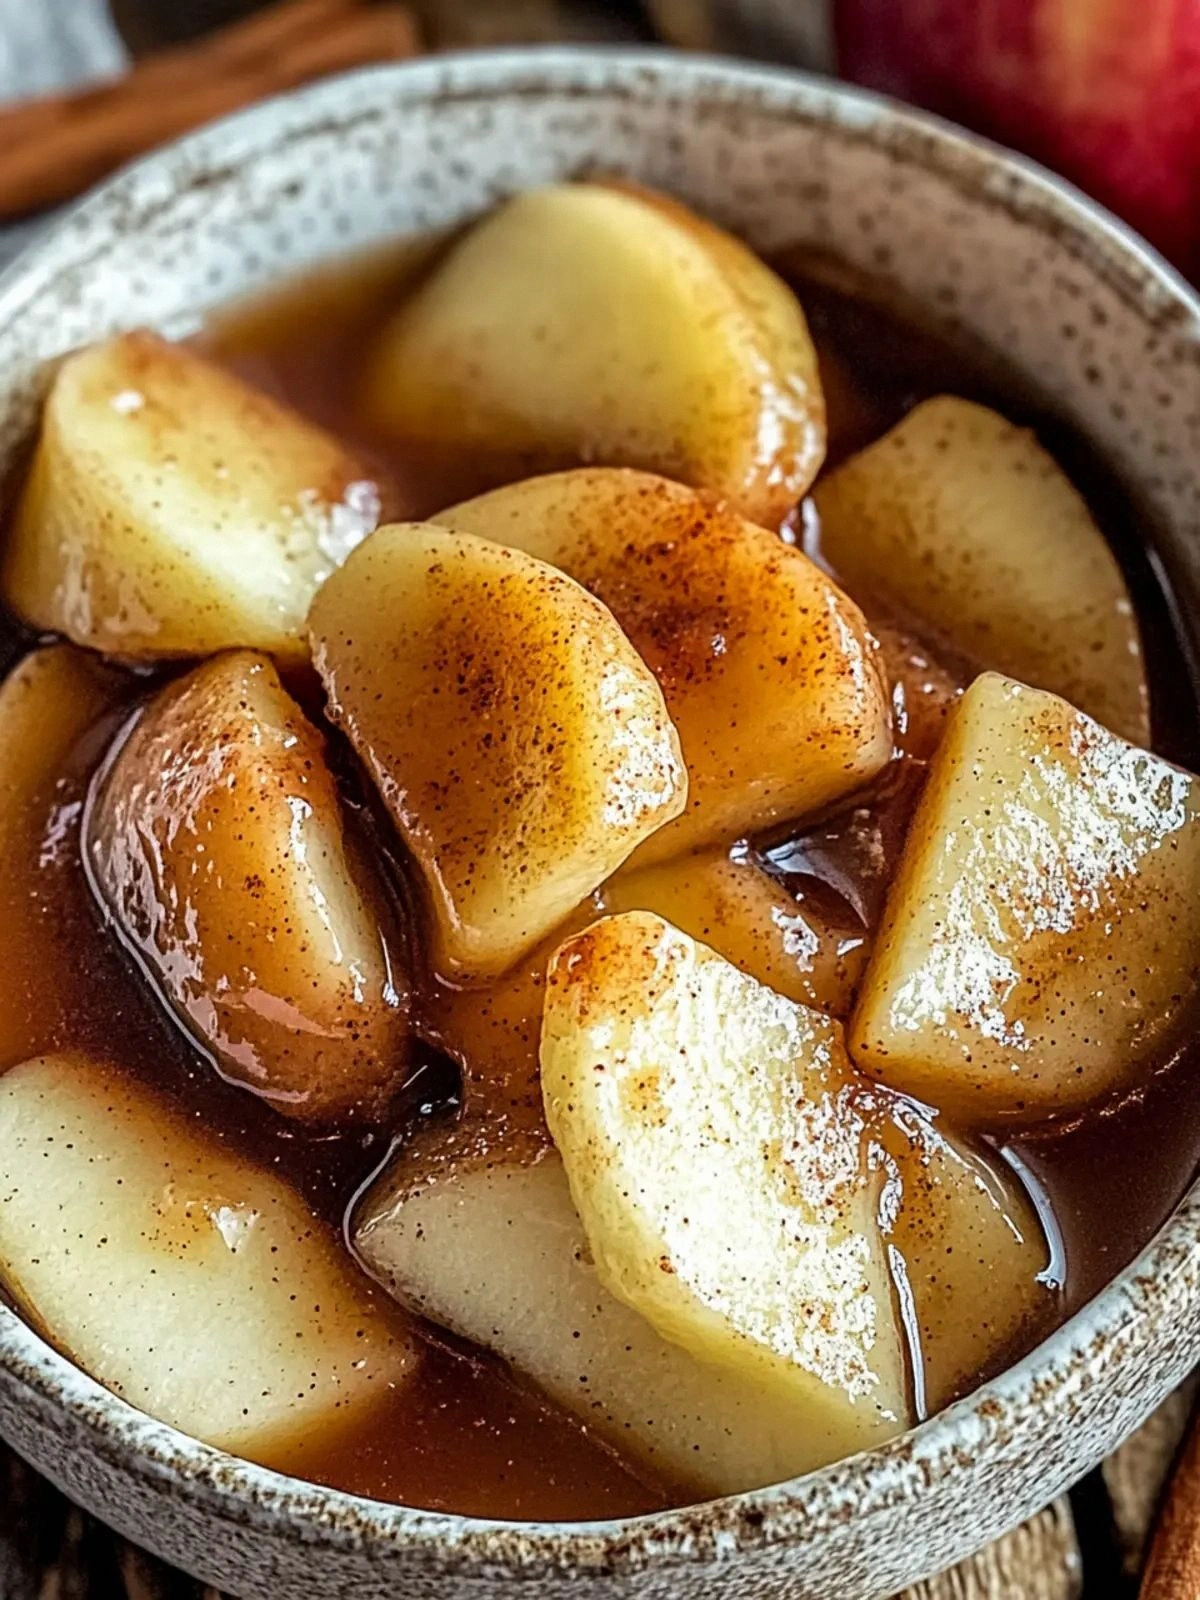
What sets this version apart from the endless variations you’ll find online is the way it balances sweetness and spice without tipping into cloying. Instead of piling on sugar, we use a measured quarter cup of brown sugar that melts into a glossy glaze. The cornstarch acts like a gentle glue, keeping the filling thick enough to hold its shape while still letting the apple’s juices seep through. Cinnamon and nutmeg are not just added for flavor; they’re the unsung heroes that give the dish a warm, almost comforting depth that feels like a blanket on a cold night. The final touch is a splash of lemon juice that brightens everything, cutting through the richness and preventing the sugars from becoming syrupy.
I dare you to taste this and not go back for seconds. That’s the kind of confidence that comes from knowing the recipe is not just good, it’s *the* good. I’ve been told that this is hands down the best version you’ll ever make at home, and I’ve tasted it a thousand times. Each bite is a symphony of textures—soft apple, crunchy caramelized edges, and a buttery finish that melts on the tongue. When you take a bite, you’re not just eating an apple; you’re experiencing a moment of pure, uncomplicated joy.
The moment you open the oven, the kitchen is filled with a toasty aroma that makes the whole house feel like a cozy cabin. The heat is gentle, not too harsh, letting the spices bloom slowly. The apples soften, their flesh turning a golden shade that signals the perfect balance of cooked and crisp. The butter melts into a glossy sheen that coats each piece like velvet. You can hear the subtle pop of sugar caramelizing, a sound that says, “This is happening.”
Most recipes get this completely wrong. They either overcook the apples or add too much sugar, turning the dish into a sticky mess. The trick is in the timing and the small, almost invisible adjustments that make all the difference. I’ve spent countless evenings experimenting with the ratio of butter to sugar, and the final version I share here is the result of that relentless pursuit of perfection. If you've ever struggled with this, you're not alone—and I've got the fix.
Picture yourself pulling this out of the oven, the whole kitchen smelling incredible, and you’re ready to serve it to friends who will be amazed by the depth of flavor. You’ll see the way the steam curls up in lazy ribbons, the way the butter glistens, and the way the spices look like they’re dancing inside the apple. This is the kind of dish that turns a regular dinner into a memorable experience. And when your guests ask, “What’s the secret?” you’ll know exactly how to answer.
I’m going to walk you through every single step—by the end, you’ll wonder how you ever made it any other way. From the moment you slice the apples to the final swirl of butter, every detail matters. The process is simple, but the result is extraordinary. Let’s dive in and start creating something that will become your new favorite comfort food.
If you’ve ever felt that your baked apple attempts were a bit bland, this recipe is here to change that narrative. It’s not just a dish; it’s an experience. You’ll find that the flavors mingle in a way that feels both nostalgic and fresh. The key? A careful balance of spices, a touch of lemon, and a generous splash of butter. The result is a dish that feels like a hug from the inside out.
Okay, ready for the game‑changer? This next part? Pure magic. And now the fun part. Stay with me here — this is worth it. I promise you, after you try this, you’ll never look at apples the same way again.
I’ll be honest — I ate half the batch before anyone else got to try it. That was a moment of culinary triumph and a small, guilty grin. The rest of the batch? Still warm and waiting, ready to be shared. And if you’re reading this, you’re about to become the hero of your own kitchen story.
What Makes This Version Stand Out
- Flavor: The combination of brown sugar and cinnamon creates a caramelized glaze that coats the apple flesh like a silky coat of amber. It’s a subtle sweetness that doesn’t overwhelm the natural fruitiness, allowing the apple’s crispness to shine through.
- Texture: The cornstarch acts like a gentle binder, thickening the juices without turning them into a syrup. The result is a filling that stays together on the spoon yet still melts in your mouth.
- Spice Balance: Nutmeg adds a warm, nutty undertone that complements cinnamon’s sweetness. Together, they create a flavor profile that feels familiar yet exciting.
- Ease: No need for a fancy oven or specialized equipment. A standard oven, a baking dish, and a few common pantry staples are all you need.
- Visual Appeal: The apples turn a golden amber color that looks almost like a sunset. The butter’s glossy sheen gives the dish a professional, restaurant‑grade look.
- Make‑Ahead Friendly: Once baked, the apples keep well in the fridge for up to three days. Reheat them gently to bring back that fresh, warm aroma.
- Guest Reaction: Friends and family consistently praise the dish for its depth and comforting feel. It’s a crowd‑pleaser that works for dinner parties or quiet nights in.
- Ingredient Quality: Using high‑quality apples (such as Honeycrisp or Fuji) elevates the entire dish. The natural sugars in these varieties enhance the caramelization process.
Inside the Ingredient List
The Flavor Base
Brown sugar is the heart of the glaze. It caramelizes beautifully, giving the apples that luscious amber hue and a subtle molasses undertone. Skipping it would leave the dish bland and lacking depth. If you prefer a lighter touch, try using raw honey or maple syrup in equal measure.
Cinnamon is the star of the spice lineup. Its warm, woody aroma lifts the entire dish, while its slightly sweet profile balances the apple’s tartness. A pinch of ground cloves can be added for a more complex spice blend, but keep it minimal to avoid overpowering the cinnamon.
The Texture Crew
Cornstarch is the unsung hero that keeps the filling from turning into a syrup. It thickens the apple juices just enough to create a glossy coating without making it gloopy. If you’re allergic to cornstarch, arrowroot powder works as a suitable substitute.
Butter adds richness and a silky mouthfeel. When melted, it coats the apple rings, giving them a glossy sheen that looks as good as it tastes. Use unsalted butter so you can control the saltiness of the dish.
The Unexpected Star
Lemon juice is the secret weapon that brightens the flavor profile. It cuts through the sweetness, preventing the dish from becoming cloying, and adds a subtle citrus zing that lingers on the palate. A splash of lemon zest can enhance this brightening effect even further.
The Final Flourish
Nutmeg brings a warm, nutty undertone that complements the sweetness of the brown sugar and the depth of the cinnamon. A pinch is all you need; too much can make the dish taste medicinal. Freshly grated nutmeg is best, as pre‑ground versions can lose their aromatic oils over time.
Everything's prepped? Good. Let's get into the real action...
The Method — Step by Step
- Preheat your oven to 350°F (175°C). Line a baking dish with parchment paper to prevent sticking. This step ensures even heat distribution and makes cleanup a breeze. Keep an eye on the temperature; too hot and the apples will burn.
- Wash the apples thoroughly, then core them with a sharp apple corer. Slice each apple into 1/4 inch thick rings, aiming for uniform thickness so they cook evenly. Place the rings in a large bowl; the evenness will help the glaze coat each piece consistently.
- In a small saucepan, combine brown sugar, cornstarch, cinnamon, nutmeg, and lemon juice. Stir until the mixture forms a smooth paste. This blend is the heart of the dish; a few extra seconds of whisking ensures no lumps remain.
- Melt the butter over medium heat. Once melted, pour it into the saucepan with the sugar mixture. Stir constantly to prevent the sugar from crystallizing. The butter’s richness will carry the spices through each apple ring.
- Add the sliced apples to the saucepan, gently tossing them until they’re coated with the glossy glaze. The apple rings should look like they’re wearing a golden, buttery coat. Let the mixture simmer for 3 minutes, allowing the flavors to mingle.
- Transfer the coated apple rings to the prepared baking dish, arranging them in a single layer. If you like a crisp edge, press them gently together. The arrangement ensures even baking and a uniform caramelization.
- Bake for 25 minutes, or until the apples are tender and the glaze has thickened into a glossy sheen. The edges should pull away slightly, indicating caramelization. Use a toothpick to test tenderness; it should slide in with a little resistance.
- Watch Out: Do not open the oven too early. The steam that builds inside is essential for the glaze to set properly. Opening the door prematurely can cause the glaze to run and the apples to become soggy.
- Remove the dish from the oven and let it rest for 5 minutes. This short rest allows the glaze to thicken slightly, creating a more decadent finish. The aroma will be irresistible.
- Serve warm, optionally dusted with a light sprinkle of powdered sugar or a drizzle of vanilla yogurt. The contrast between warm apple and cool yogurt is a delightful play on temperature and texture. Enjoy while it’s still fragrant and gooey.
That’s it — you did it. But hold on, I've got a few more tricks that'll take this to another level. The next section will give you insider tips that even seasoned bakers overlook.
Insider Tricks for Flawless Results
The Temperature Rule Nobody Follows
Many bakers set the oven to a higher temperature, hoping for a quicker bake. The truth is, a lower, steady 350°F gives the apples time to soften without scorching the glaze. Keep the oven rack in the middle to ensure even heat distribution. This simple adjustment results in a caramelized finish that’s both tender and glossy.
Why Your Nose Knows Best
When the glaze starts to bubble and the aroma shifts to a toasted sugar scent, it’s time to pull the dish out. Your nose is a reliable indicator of doneness; if the smell feels like caramelized sugar, you’re close. Don’t rely solely on the timer; sensory cues are your best friend.
The 5-Minute Rest That Changes Everything
Letting the baked apples sit for five minutes after removing them from the oven allows the glaze to set and the flavors to meld. During this rest, the apple juices redistribute, preventing a watery texture. A short rest also intensifies the caramelized flavor, making each bite richer.
Use Freshly Grated Nutmeg
Ground nutmeg can lose its potency over time. Freshly grated nutmeg delivers a bright, aromatic punch that elevates the dish. If you’re short on time, a pre‑ground pinch works, but the freshness makes a noticeable difference.
Don’t Overmix the Glaze
When combining the sugar, cornstarch, and spices, stir just until smooth. Overmixing can introduce air pockets that cause the glaze to crack as it cools. A gentle, steady whisk is all you need.
Use a Sharp Knife for Apple Slices
A dull knife can crush the apple flesh, leading to uneven cooking. A sharp knife slices cleanly, preserving the apple’s structure and ensuring each ring cooks at the same rate. This small detail can make the difference between a perfect and a mediocre dish.
Keep the Apple Rings Even
Uniform slices guarantee even caramelization. If the rings vary in thickness, the thicker ones will be overcooked while the thinner ones might stay raw. Use a mandoline slicer for consistent results.
Add a Touch of Vanilla Extract
A splash of pure vanilla extract adds a subtle depth that complements the spices. Add it to the glaze mixture after the butter has melted. The vanilla’s warmth enhances the overall aroma without overpowering the apple.
Creative Twists and Variations
This recipe is a playground. Here are some of my favorite ways to switch things up:
Apple and Pear Duo
Replace half of the apples with pears for a softer, buttery texture. Pears pair wonderfully with cinnamon, creating a sweet, mellow flavor. The result is a dessert that feels both familiar and adventurous. Perfect for a brunch twist.
Almond Crumble Topping
Sprinkle toasted almond slivers on top before baking. The crunch contrasts beautifully with the soft apple, adding a nutty dimension. Almonds also bring a subtle earthy note that balances the sweetness. A quick sprinkle before serving gives a delightful crunch.
Coconut Milk Swirl
Stir in a splash of coconut milk into the glaze for a tropical twist. The coconut adds a creamy, slightly sweet flavor that pairs well with the spices. The result is a dessert that feels like a vacation in a bowl. Great for summer afternoons.
Maple Syrup Substitute
Swap brown sugar for maple syrup for a deeper, richer sweetness. Maple’s caramel notes complement the apple’s natural flavor. Use a 1:1 ratio and reduce the liquid slightly to avoid a runny glaze. The final dish feels luxuriously decadent.
Spiced Orange Zest
Add a tablespoon of orange zest to the glaze for a citrusy brightness. The zest’s oils release a vibrant aroma that lifts the entire dish. It pairs nicely with the existing spices, creating a more complex flavor profile. Ideal for holiday gatherings.
Chocolate Drizzle Finish
Drizzle melted dark chocolate over the baked apples before serving. The bitterness of the chocolate balances the sweetness, creating a sophisticated flavor combo. The glossy finish looks stunning on a plate. A quick dip in the fridge sets the chocolate into a perfect sheen.
Balsamic Reduction
Finish the dish with a drizzle of aged balsamic vinegar for a tangy twist. The vinegar’s acidity cuts through the richness, adding a punch of flavor. The glaze’s sweetness and the balsamic’s tang create a harmonious balance. This variation feels like a modern reinterpretation of classic apple pie.
Nutty Butter Blend
Blend in a tablespoon of almond or peanut butter to the glaze for a nutty depth. The butter’s richness is amplified by the nut butter’s flavor, creating a layered taste. The texture becomes slightly thicker, giving each bite a luxurious feel. A perfect addition for protein‑hungry evenings.
Pecan Crumble Layer
Add a layer of crushed pecans over the apples before baking. The pecans add crunch and a buttery flavor that complements the spices. They also provide a visual contrast, making the dish more enticing. The result is a dessert that feels like a hybrid of pie and crumble.
Storing and Bringing It Back to Life
Fridge Storage
Store leftovers in an airtight container in the fridge for up to three days. The glaze will firm up slightly, but the apples remain tender. Before serving, let them sit at room temperature for 10 minutes to soften the glaze. A quick reheating in the oven at 300°F for 5 minutes brings back the warm aroma.
Freezer Friendly
For longer storage, freeze the baked apples in a freezer‑safe container for up to two months. Thaw overnight in the fridge, then reheat in the oven at 300°F until warmed through. The texture stays moist, and the glaze retains its glossy sheen. This makes it easy to have a ready‑to‑serve dessert for busy nights.
Best Reheating Method
Reheat in a skillet over medium heat, adding a splash of water or apple juice to create steam. This method keeps the glaze from drying out. Stir gently to redistribute the glaze, ensuring every bite is as luscious as when it first came out of the oven. Serve immediately for the best experience.