I still remember the Sunday I almost set my kitchen on fire attempting what I thought would be the crown jewel of pot roasts. The smoke alarm was screaming, my dog was howling, and my in-laws were due in forty-five minutes. Traditional recipes had failed me spectacularly—too many steps, too many dishes, and a roast that emerged drier than my attempt at small talk. That culinary disaster became my obsession. I spent months testing, tweaking, and taste-testing until I cracked the code for the easiest, most foolproof pot roast that tastes like you spent all day slaving over it while you actually binge-watched your favorite show.
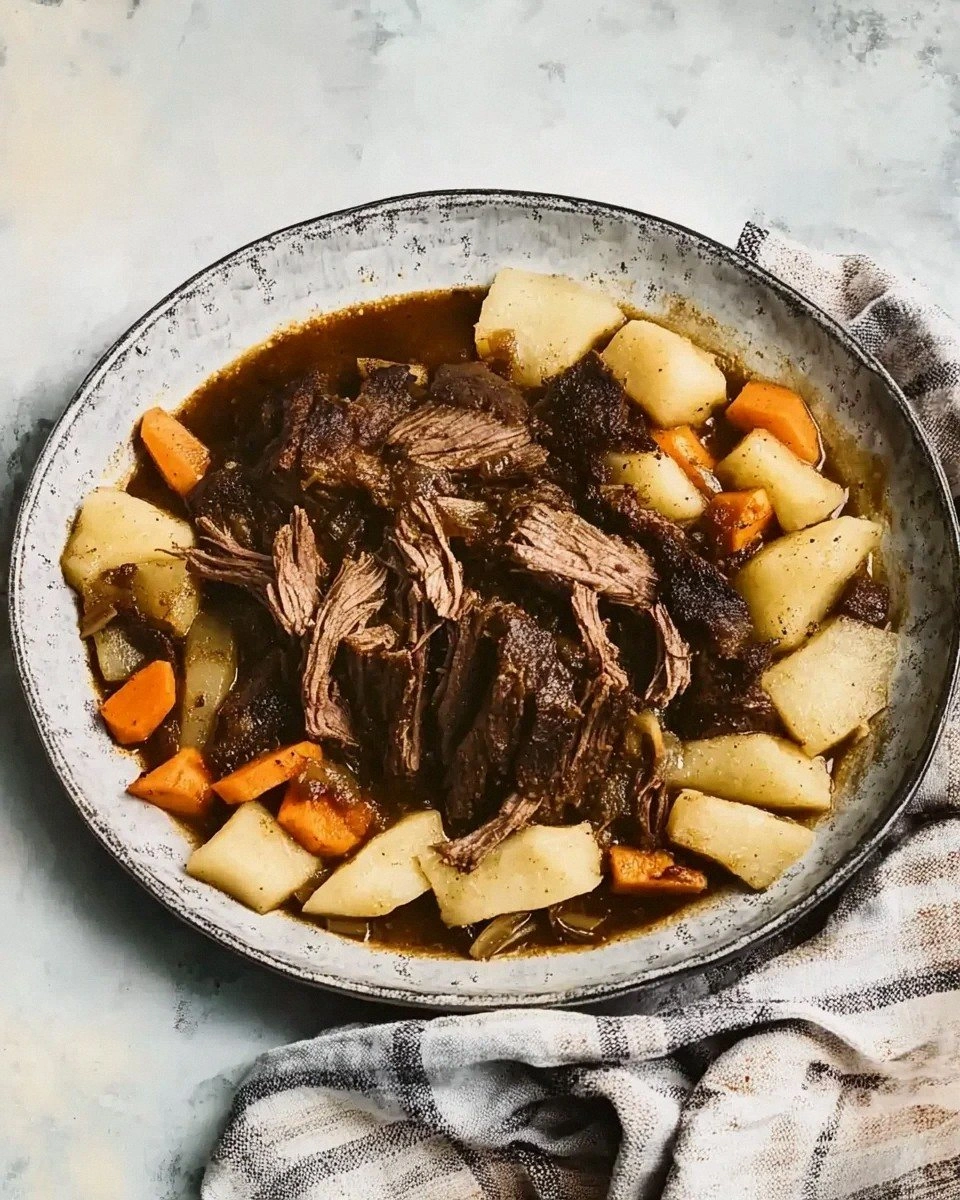
Picture this: tender beef that surrenders at the touch of a fork, swimming in a gravy so rich it could make a grown man weep. Imagine walking through your front door after work to the aroma of a meal that says "I love you" louder than words ever could. This pot roast delivers that magic with exactly fifteen minutes of hands-on time, one pot, and zero culinary stress. The secret lies in a technique so simple you'll wonder why every cookbook doesn't use it. We're talking about a set-it-and-forget-it method that transforms a humble chuck roast into something worthy of a holiday table.
What makes this version different? We're ditching the complicated searing dance, the endless vegetable chopping marathon, and the constant temperature checking that turns cooking into a second job. Instead, we're embracing a method so streamlined it feels like cheating. The result is meat so tender it falls apart if you look at it wrong, vegetables that soak up all that beefy goodness, and a sauce that will have you licking the plate when nobody's watching. Trust me, I've been there.
Before you scroll away thinking this is just another pot roast recipe, let me stop you right there. This isn't your grandmother's Sunday dinner (though she'd definitely approve). This is the pot roast that saved my marriage during our busiest season, the meal that impressed my foodie friends who think they've tasted everything, and the recipe that turned my kitchen-phobic brother into the family dinner hero. Stay with me here—this next part is where the magic happens.
What Makes This Version Stand Out
One-Pot Wonder: Everything cooks in a single Dutch oven, which means fewer dishes and more flavor since nothing gets lost down the drain. The vegetables steam above the meat, catching all those incredible drippings while staying perfectly tender.
No-Sear Method: We're skipping the traditional browning step that splatters grease everywhere and sets off smoke alarms. Instead, we build flavor through a different technique that actually works better and keeps your kitchen clean.
Fail-Proof Timing: Once it goes in the oven, you literally cannot overcook it. The low and slow method means it's ready when you are, whether that's exactly three hours or whenever you remember you have dinner cooking.
Gravy Built Right In: No separate gravy making required. The cooking liquid transforms into the silkiest sauce you've ever tasted, coating every bite like liquid comfort.
Leftover Gold: This tastes even better the next day, and the possibilities for leftovers are endless—sandwiches, shepherd's pie, even breakfast hash that will ruin you for plain old bacon forever.
Feeding a Crowd: This recipe scales beautifully for Sunday dinner or meal prep, and it's fancy enough for company but easy enough for Tuesday night.
Budget-Friendly Bliss: Using an inexpensive chuck roast means you can feed six people restaurant-quality comfort for less than the cost of takeout pizza. Your wallet and your taste buds will thank you.
Alright, let's break down exactly what goes into this masterpiece that will have your family thinking you secretly attended culinary school while they weren't looking.
Inside the Ingredient List
The Foundation Players
Every great dish starts with the right building blocks, and this pot roast is no exception. The chuck roast is the star here—not the expensive cuts that break the bank, but the humble, well-marbled chuck that becomes fork-tender with the right technique. Look for one with good fat marbling throughout; those white streaks are flavor insurance that keeps the meat juicy during the long cook. If you can only find a leaner cut, don't panic—it'll still work, but you might want to add an extra pat of butter on top before it goes in the oven.
The potatoes aren't just filler—they're little flavor bombs that soak up all the beefy goodness. Skip those waxy red potatoes that hold their shape too well; we want the starchy russets that break down slightly and thicken the sauce naturally. Cut them into big chunks because nobody wants potato confit in their pot roast. If you're feeding carb-conscious folks, cauliflower florets work surprisingly well, though they'll cook faster and need to go in during the last hour.
The Aromatics Alliance
Onions are the unsung heroes here, melting down into sweet, jammy perfection that flavors everything they touch. I use yellow onions because they're reliable and affordable, but if you want to get fancy, a mix of yellow and shallots adds depth. Don't you dare use pre-minced garlic from a jar—fresh garlic makes all the difference, and you'll thank me when your kitchen smells like an Italian grandmother's embrace.
Carrots bring more than color and vitamins; they add natural sweetness that balances the richness of the beef. Cut them into thick coins so they don't turn to mush during the long cook. Baby carrots are acceptable in a pinch, but they lack the flavor of whole carrots. Pro tip: if you have picky eaters who claim to hate carrots, they'll never notice them in the final dish—they just taste like sweet, beefy goodness.
The Flavor Amplifiers
Beef broth forms the liquid base, but not all broths are created equal. Skip the sodium-reduced versions that taste like dishwater, and go for full-flavored broth or better yet, bone broth if you can find it. The collagen in bone broth adds body to the sauce that regular broth can't match. If you're feeling ambitious, make this with homemade stock and prepare for your family to nominate you for a cooking award.
Worcestershire sauce is the umami bomb that makes people ask "what's your secret ingredient?" It's like liquid gold that deepens the flavor without announcing its presence. A little goes a long way—too much and your pot roast tastes like a British pub, just enough and it's pure magic.
The Unexpected Game-Changer
Here's where I lose some of you: we're adding a packet of dry onion soup mix. I know, I know, it's not artisanal or organic or whatever trendy adjective food bloggers use. But here's the thing—it works. It delivers concentrated flavor that would take hours of caramelizing and reducing to achieve naturally. If you're morally opposed to the packet, you can approximate it with dried onions, beef bouillon, and a touch of sugar, but honestly, life's too short for pot roast snobbery.
Tomato paste might seem odd in a pot roast, but it's the secret weapon for depth and color. Just a tablespoon adds richness without making it taste like spaghetti sauce. The acidity helps break down the meat fibers too, contributing to that fall-apart tenderness we're after.
Everything's prepped? Good. Let's get into the real action—because this is where the magic happens and your kitchen starts smelling like heaven.
The Method — Step by Step
- Preheat your oven to 275°F (135°C). Yes, that low. I know it seems like nothing will happen at this temperature, but trust the process. While the oven heats, take your chuck roast out of the fridge and let it sit on the counter. Cold meat going into a hot pot means uneven cooking, and we want every bite to be equally tender. Season it generously with salt and pepper on both sides—be bold here, most of the seasoning will end up in the sauce anyway.
- In your Dutch oven, whisk together the beef broth, Worcestershire sauce, tomato paste, and that controversial onion soup mix. This liquid gold is going to transform into the most incredible gravy you've ever tasted. Make sure the tomato paste is fully dissolved—nobody wants a blob of concentrated tomato hitting them in the face when they dig in. The mixture should smell rich and savory already; if it doesn't, your broth might be past its prime.
- Now for the fun part: layer those vegetables. Start with the onions on the bottom—they'll caramelize slightly and add sweetness to the sauce. Add the carrots in a single layer, then nestle the potatoes on top. This isn't just random stacking; the vegetables that cook longest go closest to the heat source. Think of it as vegetable Jenga, except everyone wins when it topples.
- Place your seasoned roast right on top of the vegetable layer, fat side up. That fat cap will slowly baste the meat as it renders, keeping everything moist and adding flavor. If your roast is too big and the lid won't close, you can cut it in half—just make sure both pieces get that fat-side-up treatment. Pour any accumulated juices from the cutting board over the top; that's pure flavor you don't want to waste.
- Cover the Dutch oven with its lid and slide it into the preheated oven. Now walk away. Seriously, just leave it alone for at least three hours. Don't peek, don't stir, don't even think about it. This is where the low and slow magic happens, and every time you open the door, you're adding 15 minutes to the cooking time. Go read a book, take a nap, or binge-watch that show everyone's talking about.
- After three hours, it's time for the moment of truth. Carefully remove the lid—watch out for the steam—and check the meat. It should be starting to pull apart with gentle pressure from a fork. If it's still tough as shoe leather, congratulations, you bought a really lean roast. Put the lid back on and give it another hour. This is why we start early; pot roast is forgiving, but it can't defy physics.
- Once the meat is tender, remove it to a cutting board and let it rest for about 10 minutes. This isn't just chef fluff—the juices redistribute, making every slice (or shred, because let's be honest, it's probably falling apart) incredibly moist. While it rests, turn your attention to the vegetables and sauce. They should be swimming in a pool of liquid that's starting to thicken from the potato starch.
- The sauce might seem thin at this point, and that's perfect. We're going to reduce it slightly, but not too much—think silky coating rather than heavy gravy. Place the Dutch oven on the stovetop over medium heat and let it bubble gently for about 5 minutes. Stir occasionally, making sure to scrape up any flavorful bits stuck to the bottom. The sauce will darken and thicken slightly, coating a spoon when it's ready.
That's it—you did it. But hold on, I've got a few more tricks that'll take this to another level and ensure you nail it every single time.
Insider Tricks for Flawless Results
The Temperature Rule Nobody Follows
Here's the thing about pot roast: it's done when it's done, not when the clock says so. I don't care if your recipe says three hours—if it's still tough, it needs more time. The magic happens between 195-205°F internal temperature, when collagen breaks down into gelatin and transforms tough meat into spoon-tender perfection. Invest in a simple probe thermometer and insert it into the thickest part of the roast. When it slides in like butter, you're golden. A friend tried rushing this step once—let's just say we ended up ordering pizza while the roast went back in for another hour of humble pie.
Why Your Nose Knows Best
Your kitchen will tell you when this is ready. About two hours in, your house will start smelling like the best diner you ever visited. By hour three, neighbors might start dropping by with suspicious timing. But here's the real secret: when you open that oven door and the aroma hits you like a warm hug, you're probably 30 minutes from perfection. The scent changes from raw ingredients to something magical—that's your cue to start checking for doneness. Don't rely solely on time; let your senses guide you.
The 5-Minute Rest That Changes Everything
I know you're hungry. I know the smell is driving you crazy. But resist the urge to shred that meat immediately. Those five minutes of rest aren't chef pretension—they're the difference between juicy perfection and dry disappointment. While the meat rests, the juices redistribute throughout the fibers instead of running out onto the cutting board. Cover it loosely with foil and use the time to finish your sauce or set the table. Patience here is the difference between good and unforgettable.
The Fork Test That Never Fails
Forget everything you've heard about knives sliding in easily. For pot roast, grab two forks and try to pull the meat apart. If it resists like an overzealous gym buddy, it needs more time. If it yields with gentle pressure and the fibers separate into glorious shreds, congratulations—you've achieved pot roast nirvana. This test works because it mimics exactly how you'll serve it, giving you real-world results rather than arbitrary knife tests.
Creative Twists and Variations
This recipe is a playground. Here are some of my favorite ways to switch things up when you're feeling adventurous or need to accommodate different tastes:
The Italian Job
Swap the onion soup mix for a packet of Italian dressing mix, add a can of diced tomatoes along with the broth, and throw in some oregano and basil. The result tastes like Sunday gravy with pot roast instead of meatballs. Serve it over polenta or with crusty bread for sopping up that tomato-herb sauce. My Italian neighbor swears this version is better than his nonna's (but don't tell her I said that).
The Southwestern Star
Add a can of green chiles, swap the Worcestershire for soy sauce with a splash of lime juice, and throw in some cumin and smoked paprika. The potatoes become almost like breakfast hash, and the whole thing takes on this amazing smoky-spicy personality. Top with fresh cilantro and serve with warm tortillas instead of traditional sides. It's like pot roast went on vacation to Santa Fe and came back with stories.
The French Connection
Replace half the broth with red wine, add thyme and bay leaves, and swap the potatoes for pearl onions and mushrooms. The wine reduces into this luxurious sauce that tastes like you spent all day making beef bourguignon. Use a decent wine—nothing fancy, but nothing that comes in a box with a tap either. This version will make you want to speak French and wear a beret while cooking.
The Asian Fusion Fantasy
Trade the Worcestershire for soy sauce and hoisin, add ginger and star anise, and throw in some bok choy during the last 30 minutes. The sauce becomes this incredible umami bomb that pairs perfectly with rice instead of potatoes. Green onions sprinkled on top at the end add freshness and color. It's comfort food meets takeout, and it's absolutely magical.
The Herb Garden Hero
Skip the onion soup mix entirely and create your own herb blend with fresh rosemary, thyme, sage, and a bay leaf or two. Add them during the last hour of cooking so they stay bright and don't turn bitter. The fresh herbs make the whole dish taste like it came from a farm-to-table restaurant. If you have an herb garden, this is its moment to shine.
The Root Vegetable Remix
Replace some or all of the potatoes with parsnips, turnips, sweet potatoes, or celery root. Each brings its own personality—parsnips add sweetness, turnips bring a peppery bite, sweet potatoes create a caramelized edge, and celery root adds this amazing earthy depth. Mix and match for a rainbow of flavors and colors. It's like a root vegetable party where everyone's invited.
The Keto Convert
Skip the potatoes entirely and load up on low-carb vegetables like cauliflower, turnips, and extra onions. The sauce thickens beautifully from the collagen in the meat, so you won't miss the starch. If you're really missing that potato texture, add cauliflower florets during the last hour—they'll absorb all the flavor without the carbs. Serve it over cauliflower rice or just enjoy it as a hearty stew.
Storing and Bringing It Back to Life
Fridge Storage
Let the pot roast cool completely before storing—hot food in the fridge creates condensation that leads to soggy vegetables and diluted sauce. Store the meat and vegetables together in an airtight container, but keep the sauce separate if possible. The meat will continue to absorb flavor from the sauce, but the vegetables stay firmer when stored separately. It keeps beautifully for up to four days in the refrigerator, though honestly, mine never lasts past day two because people keep "sampling" it.
Freezer Friendly
This freezes like a dream for up to three months, making it perfect for meal prep or those nights when you need comfort food but don't want to cook. Freeze in portion-sized containers so you can thaw exactly what you need. The sauce may separate slightly when thawed, but a gentle reheating brings it right back together. Pro tip: freeze some of the sauce in ice cube trays for instant flavor bombs in soups or stews later.
Best Reheating Method
Forget the microwave—it turns the meat rubbery and the potatoes grainy. Instead, reheat gently on the stovetop with a splash of broth or water. Cover and heat over medium-low, stirring occasionally, until everything is heated through. The sauce will be just as silky as the first day. If you're reheating from frozen, thaw overnight in the fridge first for best results. For a quick lunch, I'll sometimes just heat the meat and pour the sauce over fresh bread—it tastes like the best hot roast beef sandwich you ever had.