Okay, picture this: I was halfway through a Netflix binge, the room was dark, and my stomach started growling louder than the TV drama. I raided the pantry, grabbed a bag of store‑bought crackers, and took a bite that could only be described as “disappointed crunch.” That moment sparked a dare from my roommate—“Make something that actually makes you want to keep eating the whole bag!” I accepted, and after a few kitchen mishaps involving burnt dough and a smoke alarm that thought it was a fire drill, I finally nailed the ultimate flatbread cracke. This version is the result of a marathon of trial‑and‑error, a sprinkle of stubbornness, and a secret technique that turns a simple dough into a sheet of crisp, buttery clouds that shatter like thin ice when you bite into them.
The first time I pulled these out of the oven, the whole kitchen smelled like a Mediterranean market on a sunny afternoon—warm olive oil, toasted flour, and a whisper of rosemary that made my neighbors peek through the window. The texture? Imagine a cracker that’s light enough to float but sturdy enough to hold a generous dollop of hummus without crumbling. The flavor? A perfect balance of salty, nutty, and just a hint of herb that makes your taste buds do a little happy dance. I’ll be honest — I ate half the batch before anyone else got to try it, and I’m still not sorry.
What really sets this flatbread cracke apart is the way I treat the dough: I let it rest just long enough for the gluten to relax, then roll it out ultra‑thin, brush it with a mix of olive oil and a dash of sea salt, and bake it at a blistering 425°F until the edges turn a golden‑amber that looks like a sunrise. Most recipes get this completely wrong by either over‑mixing or under‑baking, resulting in either tough, bread‑like discs or limp, soggy sheets that never achieve that satisfying snap. I dare you to taste this and not go back for seconds; the crunch is addictive, the flavor is unforgettable, and the simplicity will make you wonder why you ever settled for anything less.
Now, there’s a tiny twist that most home cooks overlook: a splash of sparkling water in the dough. That fizz introduces tiny air pockets that expand during baking, giving the crackers an airy lift without any leavening agents. I’m not saying you need a science degree to bake, but this little secret is the game‑changer that elevates the whole thing from “good” to “hands‑down the best version you'll ever make at home.” Let me walk you through every single step — by the end, you'll wonder how you ever made it any other way.
What Makes This Version Stand Out
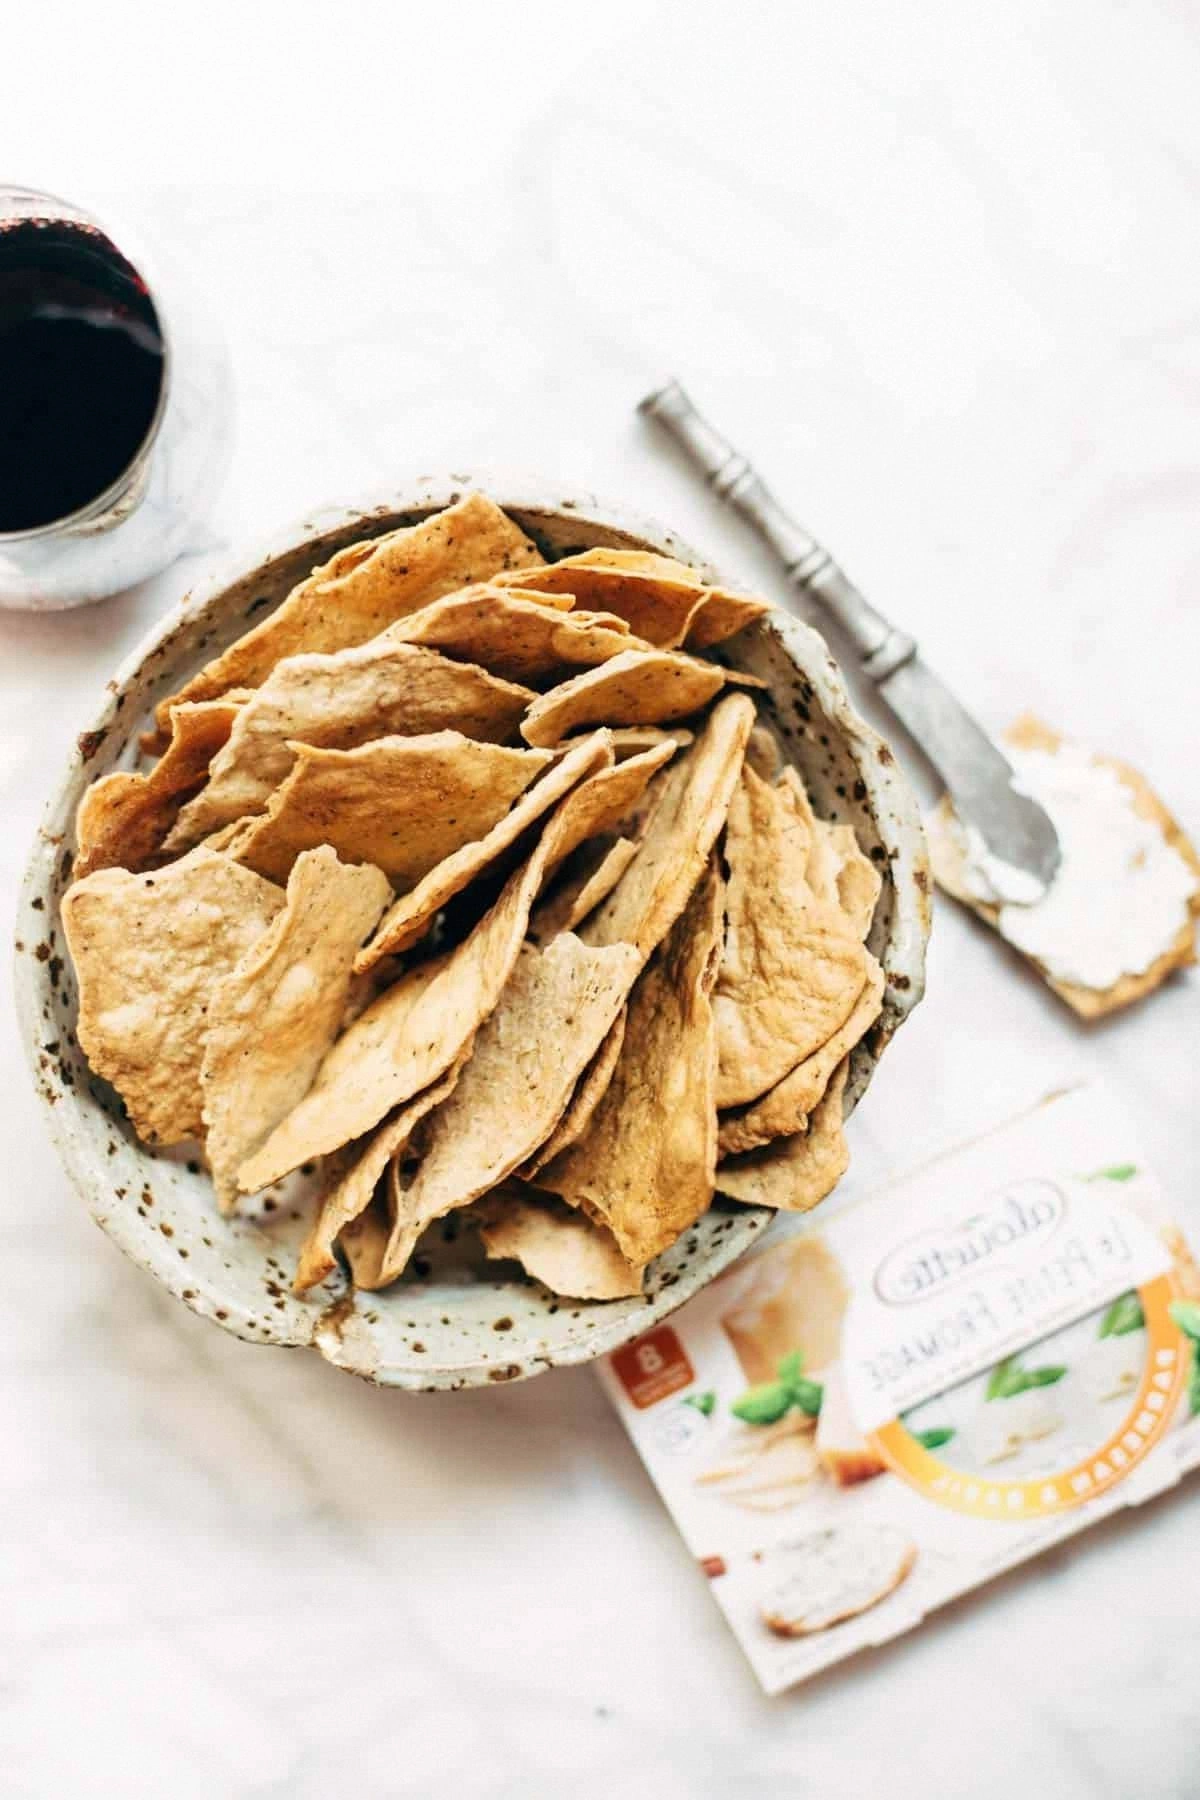
- Texture: The crackers are feather‑light yet sturdy enough to scoop dip. The ultra‑thin roll‑out and high‑heat bake create a crackle that shatters like thin ice, giving you that satisfying snap with every bite.
- Flavor: A subtle blend of olive oil, sea salt, and rosemary coats the dough like velvet, delivering a nuanced taste that’s both savory and aromatic.
- Simplicity: With just five core ingredients and a 30‑minute hands‑on time, this recipe is perfect for busy weeknights or spontaneous snack attacks.
- Ingredient Quality: Using high‑protein flour and extra‑virgin olive oil ensures a crisp bite and a rich mouthfeel that cheap substitutes can’t match.
- Crowd Reaction: Guests invariably ask for the recipe, and the crackers disappear faster than you can say “more please.”
- Cooking Method: Baking at 425°F creates a rapid Maillard reaction, giving the edges a caramelized depth that a lower temperature simply can’t achieve.
- Make‑Ahead Potential: Store them in an airtight container for up to a week, or freeze for a month—reheat, and they’re as fresh as the day they left the oven.
Inside the Ingredient List
The Flavor Base
Flour is the backbone of any flatbread, and for this recipe, I recommend a high‑protein all‑purpose flour. The extra protein forms a stronger gluten network, which, when rolled thin, yields that delicate snap without turning chewy. If you skip the flour or use a low‑protein variety, you’ll end up with a dense, bread‑like texture that defeats the purpose of a cracker. A quick tip: give the flour a light toast in a dry skillet for a minute—this adds a subtle nuttiness that deepens the overall flavor.
The Texture Crew
Olive oil does more than just add richness; it coats the flour particles, reducing surface tension and allowing the dough to spread thinly without sticking. This results in a uniformly crisp surface. If you’re out of olive oil, a neutral oil like grapeseed works, but you’ll miss the fruity undertone that makes these crackers sing. Salt is the unsung hero—it not only seasons the dough but also strengthens the gluten, giving the final product a tighter bite. A pinch too much, however, can make the crackers overly salty, so stick to the measured teaspoon.
The Unexpected Star
Sparkling water might sound like a party trick, but its carbonation introduces micro‑air bubbles that expand in the oven, creating a lighter texture. If you substitute still water, the crackers will be a touch denser, though still tasty. This is where the magic happens—those tiny bubbles are the secret behind the airy lift that makes each bite feel like you’re biting into a cloud.
The Final Flourish
A sprinkle of dried rosemary and a dusting of garlic powder add an aromatic punch without overwhelming the palate. These herbs are optional, but they elevate the crackers from plain to gourmet. If you’re allergic or don’t like rosemary, try thyme or a pinch of smoked paprika for a smoky twist. The sesame seeds add a subtle nutty crunch and a visual appeal that makes the crackers look as good as they taste.
Everything's prepped? Good. Let's get into the real action...
The Method — Step by Step
In a large mixing bowl, whisk together 2 cups of high‑protein flour and 1 tsp salt until fully combined. The dry mixture should look like fine sand—no clumps, no pockets. This is the foundation; a well‑mixed base ensures even seasoning throughout the dough.
Make a well in the center and pour in 2 tbsp extra‑virgin olive oil, ½ cup sparkling water, and ½ cup warm water. Using a wooden spoon, stir until the mixture forms a shaggy dough that pulls away from the sides of the bowl. At this point you should see tiny bubbles forming—those are the fizz doing its work.
Turn the dough onto a lightly floured surface and knead gently for about 1 minute. Just enough to bring it together; over‑kneading will develop too much gluten and make the crackers tough. This is the moment of truth—the dough should feel smooth, slightly tacky, and pliable.
Cover the dough with a clean kitchen towel and let it rest for 5 minutes. This short rest relaxes the gluten, making the dough easier to roll out thinly without snapping back. Trust me, if you skip this, you’ll be fighting the dough and the final product will be uneven.
Preheat your oven to 425°F (220°C) and line two baking sheets with parchment paper. While the oven heats, roll the dough out to a uniform thickness of about 1/8 inch (3 mm). The thinner, the crispier—if you like a bit more chew, you can leave it at 1/4 inch.
Brush the rolled‑out dough on both sides with a mixture of 2 tbsp olive oil and a pinch of sea salt. Then, sprinkle on 1 tsp dried rosemary, ½ tsp garlic powder, and 1 tbsp sesame seeds for that final flourish. The oil helps the herbs adhere and promotes an even golden‑brown color.
Using a sharp pizza cutter or a kitchen shears, cut the dough into squares or your preferred shape. Transfer the pieces to the prepared baking sheets, leaving a small gap between each to allow airflow. The gaps prevent the edges from sticking together, ensuring each cracker gets its own space to crisp.
Slide the trays into the preheated oven and bake for 12‑15 minutes, rotating halfway through. You’ll know they’re done when the edges pull away from the parchment and emit a toasty aroma that fills the kitchen like a warm hug.
Remove the crackers from the oven and let them cool on a wire rack for at least 5 minutes. As they cool, they’ll crisp up even more, turning from soft‑warm to a firm, snap‑ready texture. This is the part where you’ll hear that satisfying crack as you break a piece in half.
That's it — you did it. But hold on, I've got a few more tricks that'll take this to another level. Stay with me here — this is worth it.
Insider Tricks for Flawless Results
The Temperature Rule Nobody Follows
Most home bakers set the oven to a moderate 350°F, thinking slower is safer. In reality, the high heat of 425°F triggers rapid caramelization, giving the crackers that deep golden hue and complex flavor. If your oven runs cool, use a pizza stone to boost the bottom heat—this prevents soggy centers and ensures a uniform crunch.
Why Your Nose Knows Best
Your sense of smell is a more reliable indicator than a timer. When the crackers start emitting a fragrant, nutty scent, that’s the cue that the Maillard reaction is in full swing. Trust that nose; a minute or two can be the difference between perfectly crisp and over‑browned.
The 5‑Minute Rest That Changes Everything
After you bake, let the crackers rest on a wire rack for exactly five minutes before storing. This short cooling period lets excess steam escape, locking in the crunch. I once tried to skip this step, and the crackers turned out a bit soggy—lesson learned.
The Oil‑Brush Technique
Instead of drizzling oil, use a pastry brush to coat both sides of the dough evenly. This ensures every bite has a consistent flavor and prevents greasy spots. A friend tried a quick splash of oil and ended up with uneven browning—don’t be that person.
Seasoning at the End
If you love a punchy flavor, sprinkle a tiny pinch of flaky sea salt right after the crackers come out of the oven. The residual heat will melt the crystals slightly, creating little flavor bursts as you bite.
Creative Twists and Variations
This recipe is a playground. Here are some of my favorite ways to switch things up:
Cheesy Parmesan Burst
Add ¼ cup finely grated Parmesan to the dough before rolling. The cheese melts into the surface, creating a nutty, salty crust that pairs beautifully with wine.
Spicy Chili Lime
Mix ½ tsp chili powder and the zest of one lime into the olive oil brush mixture. The result is a bright, fiery cracker that’s perfect for tacos or guacamole.
Sweet Cinnamon Sugar
Swap the rosemary for 1 tsp ground cinnamon and brush with melted butter instead of olive oil. Sprinkle a light dusting of sugar after baking for a sweet snack that’s still crisp.
Herb Garden Medley
Combine dried thyme, oregano, and basil (¼ tsp each) for an herbaceous version that feels like a stroll through a garden. Great with creamy cheese spreads.
Nutty Seed Crunch
Replace sesame seeds with a mixture of poppy seeds and toasted sunflower seeds. The extra crunch adds texture and a subtle earthy flavor.
Storing and Bringing It Back to Life
Fridge Storage
Place the cooled crackers in an airtight container with a paper towel at the bottom to absorb any stray moisture. They’ll stay crisp for up to a week, and the fridge’s cool environment prevents staleness.
Freezer Friendly
If you’ve made a big batch, layer the crackers between parchment sheets and seal them in a zip‑top freezer bag. They freeze beautifully for up to three months. When you’re ready, pop them into the oven at 350°F for 5 minutes.
Best Reheating Method
To revive stored crackers, preheat the oven to 300°F, arrange them on a baking sheet, and mist them lightly with a spray bottle of water (just a few droplets). The steam re‑hydrates the surface, and the heat restores that original crunch in 5‑7 minutes.