I was standing in my kitchen, half‑asleep, with a half‑eaten slice of store‑bought apple pie staring back at me like a culinary dare. The crust was soggy, the caramel was more syrup than sauce, and the whole thing tasted like it had been microwaved in a rush hour elevator. I muttered, “If this is what dessert looks like on a Tuesday, I’m going to make something that will make you forget the word ‘average’ forever.” That’s when I grabbed a bag of crisp apples, a jar of buttery caramel, and a wild idea that would become the most addictive bite you’ll ever meet.
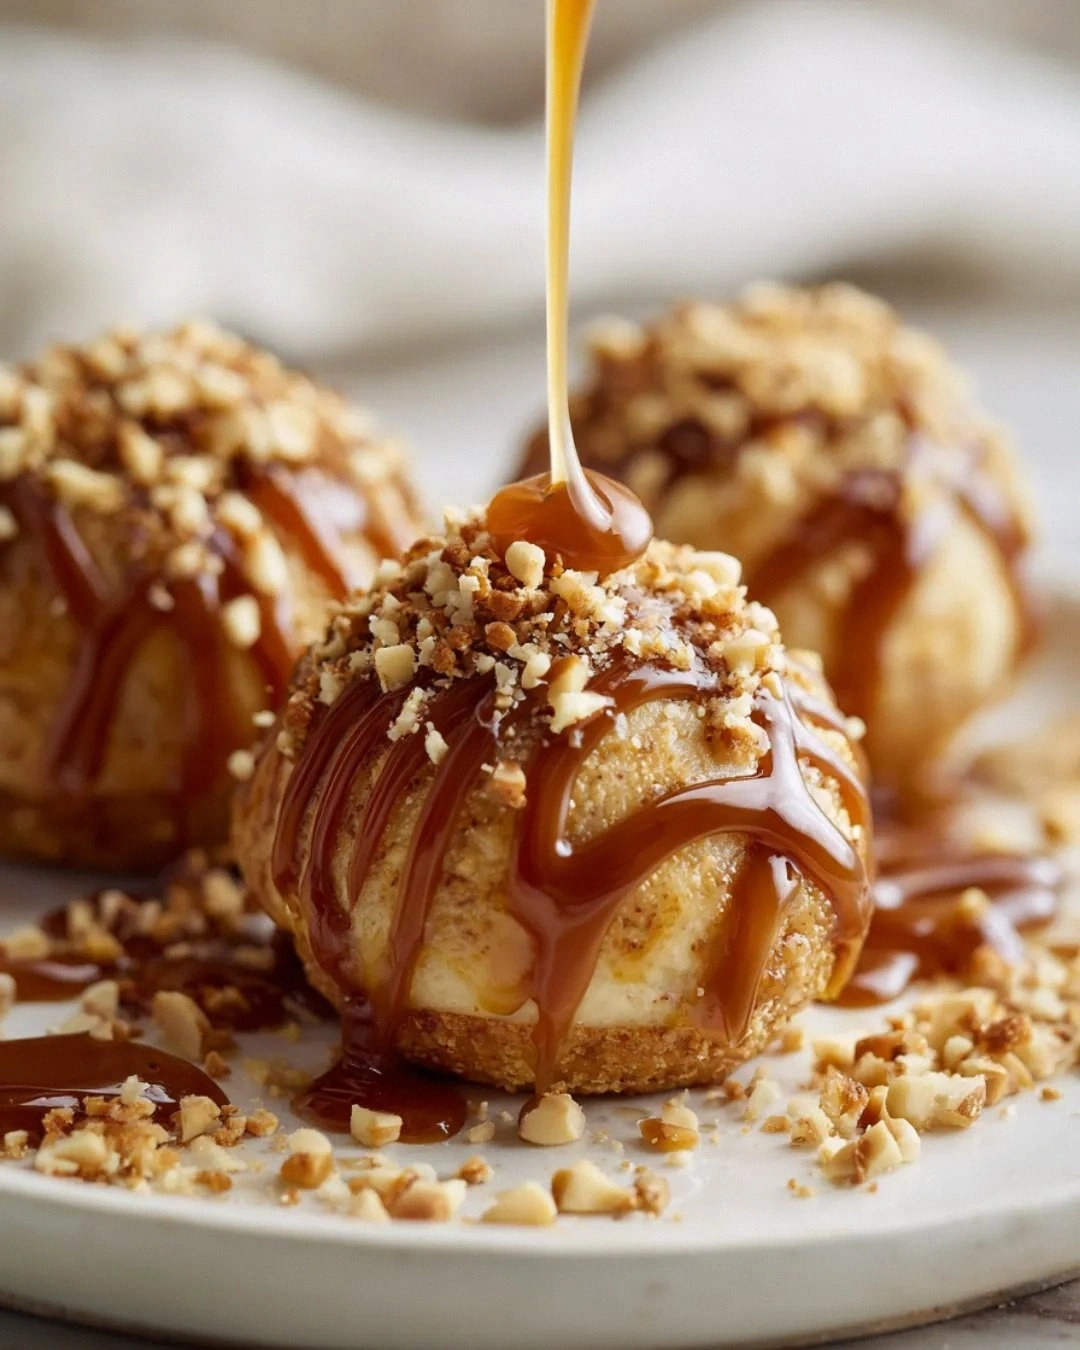
Picture this: the kitchen fills with the sweet perfume of apples caramelizing, a golden river of sauce bubbling like a tiny sun in a pan, and the faint crackle of butter melting into a glossy glaze. The air is warm, the oven hums like a contented cat, and every surface is slick with a sheen that promises pure decadence. When you finally pull the bombs out, they look like tiny, caramel‑kissed moons, their tops glistening, the edges just a whisper of crispness, and the centers oozing a molten apple‑caramel core that stretches like pulled taffy. The first bite? It’s a symphony of buttery crunch, tender apple, and caramel that sings louder than any pop‑song you’ve ever heard.
Most recipes for apple‑caramel pastries either skimp on the caramel or drown the apples in a soggy batter. I’ve tried the “quick” versions that leave you with a gummy mess, and the “fancy” ones that require a pastry chef’s degree and a kitchen full of gadgets. This version, however, is the Goldilocks of the dessert world: it’s simple enough for a Sunday afternoon, yet it delivers a texture contrast that would make a Michelin inspector weep with joy. The secret? A splash of heavy cream in the caramel, a dash of baking powder for lift, and a technique I call “the caramel seal” that locks in the apple juices while giving the exterior that perfect snap.
Okay, ready for the game‑changer? I’m about to walk you through every single step — by the end, you’ll wonder how you ever made anything else without this recipe. I dare you to taste this and not go back for seconds. Let’s get started, because the only thing standing between you and the ultimate sweet treat is a few minutes of attention and a pinch of confidence.
What Makes This Version Stand Out
- Flavor Explosion: The caramel is enriched with heavy cream, giving it a silky mouthfeel that coats each bite like velvet, while the apples keep it fresh and tart.
- Texture Tango: A crisp, buttery crust meets a gooey, molten center, creating a contrast that feels like crunchy fireworks followed by a smooth, buttery waterfall.
- Simplicity Unleashed: Only twelve ingredients, no fancy pastry dough, and a single pan—perfect for anyone who’s ever burned a croissant.
- Unique Caramel Seal: By brushing the batter with caramel before the final bake, you lock in moisture and create a glossy, caramel‑crusted top that shatters like thin ice.
- Crowd Magnet: Guests will stare, sniff, and then dive in, often asking for the “secret” before they’ve even finished the first bite.
- Ingredient Quality: Using crisp, tart apples and high‑quality butter makes the difference between “good” and “mind‑blowing.”
- Cooking Method: Baking at a high initial temperature creates that coveted caramelized edge, while a lower finish ensures the interior stays molten.
- Make‑Ahead Magic: These bombs keep for three days in the fridge and re‑heat beautifully, meaning you can prep ahead for parties.
Inside the Ingredient List
The Flavor Base
Apples are the heart of this bomb. I use Granny Smith for that perfect tartness that cuts through the caramel’s sweetness, but a mix of Fuji and Honeycrisp adds a subtle honey note. If you skip the apples, you’ll lose the juicy contrast that makes each bite feel like a fresh bite of autumn. Swap suggestion: Pears work in a pinch, but they’ll give a softer texture and a milder flavor.
Caramel sauce is the second star. I recommend a thick, buttery caramel made with brown sugar, butter, and a splash of heavy cream. Store‑bought sauces can be watery, which leads to soggy tops. If you’re feeling adventurous, make your own by melting sugar until it turns amber, then whisk in butter and cream for that glossy finish.
The Texture Crew
All‑purpose flour provides the structural backbone, giving the bombs a tender crumb that holds the molten center. Using cake flour would make them too delicate, while bread flour would create a tough crust. The baking powder adds lift, ensuring the bombs rise just enough to create a light interior without becoming cake‑like.
Butter, melted and folded in, creates a buttery richness that makes the crust crackle like a fresh autumn leaf. If you substitute margarine, you’ll notice a greasy aftertaste and a loss of that signature snap.
The Unexpected Star
Heavy cream in the caramel isn’t just for richness; it stabilizes the sauce, preventing it from crystallizing when it cools. Without it, you’d end up with a grainy mess that looks like a caramel disaster. If you’re dairy‑free, coconut cream works surprisingly well, adding a faint tropical note that pairs nicely with the apples.
A pinch of salt is the silent hero. It amplifies the sweetness, balances the buttery flavor, and brings out the apple’s natural brightness. Skipping salt is a rookie mistake that leaves the dish flat.
The Final Flourish
Cinnamon and vanilla extract are the aromatic finishers. Cinnamon adds warmth, while vanilla rounds out the flavor profile, making the bombs feel cozy and comforting. If you love spice, a dash of nutmeg or a pinch of ground ginger can elevate the flavor to a whole new level.
Eggs act as a binder, ensuring the batter holds together during the high‑heat sear and the slower bake. Using just one egg would make the bombs crumbly; two eggs give a cohesive, tender crumb.
Everything's prepped? Good. Let's get into the real action...
The Method — Step by Step
Preheat your oven to 425°F (220°C). While the oven warms, line a baking sheet with parchment paper and set a large mixing bowl nearby. This high heat will give the bombs an initial burst of caramelization, creating that coveted golden crust.
Kitchen Hack: Place the parchment paper on a baking sheet and then set the sheet in the freezer for 10 minutes; the cold surface helps the batter spread evenly when you drop the bombs.Dice the apples into ½‑inch cubes. Toss them with 1 tablespoon of lemon juice, ¼ cup brown sugar, and ½ teaspoon cinnamon. The lemon prevents browning, the brown sugar adds depth, and the cinnamon creates a fragrant backdrop.
Heat a skillet over medium‑high heat, melt 2 tablespoons butter, and add the apple mixture. Sauté for 4‑5 minutes until the apples are just tender and the sugar starts to caramelize. You’ll hear a gentle sizzle that signals the magic is beginning.
While the apples cook, whisk together 2 cups flour, 1 tsp baking powder, ½ tsp baking soda, ¼ tsp salt, and 1 tsp cinnamon in a separate bowl. This dry blend ensures even distribution of leavening agents and spices.
In another bowl, combine ½ cup melted butter, 1 cup brown sugar, ½ cup granulated sugar, 2 large eggs, 1 tsp vanilla, and ¼ cup heavy cream. Beat until the mixture is smooth and glossy—think of a liquid gold that will coat the apples like a glossy varnish.
Gently fold the dry ingredients into the wet mixture, being careful not to over‑mix. Over‑mixing develops gluten, leading to a tough crust. The batter should be thick but pourable, resembling a chunky pancake batter.
Stir the sautéed apples into the batter, ensuring every piece is coated. The apples should be evenly distributed, not sinking to the bottom.
Scoop the batter onto the prepared parchment using a ¼‑cup measuring cup, spacing each mound about 2 inches apart. This spacing allows the bombs to expand without merging.
Immediately drizzle 2 tablespoons of caramel sauce over each mound, then use a silicone spatula to swirl the caramel into the top. This step creates the “caramel seal” that will lock in the apple juices during baking.
Place the sheet in the oven and bake for 12 minutes at 425°F. You’ll notice the edges turning a deep amber and the tops bubbling with caramel. This is the moment of truth—the aroma should fill the kitchen like a warm hug.
Watch Out: Do not open the oven door before the 12‑minute mark, or the sudden temperature drop can cause the caramel to harden and the bombs to collapse.Reduce the oven temperature to 350°F (175°C) and continue baking for another 10‑12 minutes. The interior should set but remain gooey; a toothpick inserted near the edge should come out with a few moist crumbs.
While they bake, melt the remaining ½ cup caramel with ¼ cup heavy cream in a small saucepan over low heat, stirring constantly. This “glaze” will be brushed on after baking to give a glossy finish.
Remove the bombs from the oven and immediately brush the warm glaze over each one. The glaze will set in seconds, creating a shiny, caramel‑crusted top that shatters with a gentle tap.
Let the bombs cool on the sheet for 5 minutes, then transfer them to a wire rack. This short rest lets the interior settle while keeping the crust crisp.
Serve warm, optionally dusted with powdered sugar or a drizzle of extra caramel. The first bite should release a river of molten apple‑caramel that pools on the plate—a sight that will make anyone say, “I’m never going back to store‑bought desserts again.”
That’s it — you did it. But hold on, I’ve got a few more tricks that’ll take this to another level...
Kitchen Hack: For an extra‑crunchy top, sprinkle a thin layer of sea salt flakes on the glaze before it sets; the salty crunch contrasts beautifully with the sweet caramel.
Insider Tricks for Flawless Results
The Temperature Rule Nobody Follows
Never bake the entire batch at one temperature. The high‑heat start creates the caramelized crust, while the lower finish preserves the molten interior. If you bake too low from the beginning, you’ll end up with a dense, cake‑like texture that defeats the purpose of “bombs.”
Why Your Nose Knows Best
When the caramel starts to turn a deep amber, trust your nose. A nutty, buttery scent means the sugars have reached the perfect stage. If you smell a burnt odor, the caramel is overcooked and will impart a bitter flavor.
The 5‑Minute Rest That Changes Everything
Letting the bombs sit for five minutes after baking allows the interior to settle without solidifying the caramel. Skipping this rest leads to a runny center that can spill over the plate, making a mess and ruining the presentation.
Butter Temperature is Not Optional
Melted butter should be warm, not hot. If it’s too hot, it can partially cook the eggs when you combine them, resulting in a grainy batter. Warm butter blends smoothly, giving you that glossy batter that spreads evenly.
The “Caramel Seal” Technique
Brushing caramel on the batter before the final bake is the secret that locks in moisture. I once tried skipping this step, and the bombs turned out dry and crumbly—lesson learned. The seal creates a glossy, crackling top that’s both beautiful and functional.
Creative Twists and Variations
This recipe is a playground. Here are some of my favorite ways to switch things up:
Nutty Caramel Crunch
Fold ½ cup toasted chopped pecans or walnuts into the batter. The nuts add a buttery crunch that complements the caramel and adds a rustic feel. Perfect for those who love a bit of texture contrast.
Spiced Autumn
Add a pinch of ground nutmeg and a dash of all‑spice to the dry mix. These warm spices deepen the flavor profile, turning the bombs into a quintessential fall dessert that pairs beautifully with a cup of chai.
Chocolate‑Swirl Delight
Stir ¼ cup dark chocolate chips into the batter before baking. The chocolate melts into pockets of rich cocoa, creating a surprise burst that balances the caramel’s sweetness.
Salted Caramel Pretzel
Crush a handful of pretzel sticks and sprinkle them over the glaze just before it sets. The salty crunch adds a playful contrast that makes each bite feel like a carnival treat.
Vegan Velvet
Swap butter for coconut oil, use flax‑egg (1 tbsp ground flaxseed + 3 tbsp water) in place of eggs, and replace heavy cream with coconut cream. The result is a dairy‑free version that still delivers that gooey, caramel‑kissed goodness.
Storing and Bringing It Back to Life
Fridge Storage
Place the cooled bombs in an airtight container and store them in the refrigerator for up to three days. The caramel may thicken slightly, but a quick microwave reheating will bring it back to its glossy glory.
Freezer Friendly
Wrap each bomb individually in parchment, then seal the whole batch in a zip‑top freezer bag. They’ll keep for up to two months. When you’re ready to enjoy, thaw overnight in the fridge and reheat as described below.
Best Reheating Method
Preheat your oven to 350°F (175°C). Place the bombs on a parchment‑lined tray, add a splash (about 1 tablespoon) of water to the tray, and cover loosely with foil. Heat for 8‑10 minutes; the steam revives the interior while the foil protects the caramel crust. The result? As gooey as fresh‑out‑of‑the‑oven.