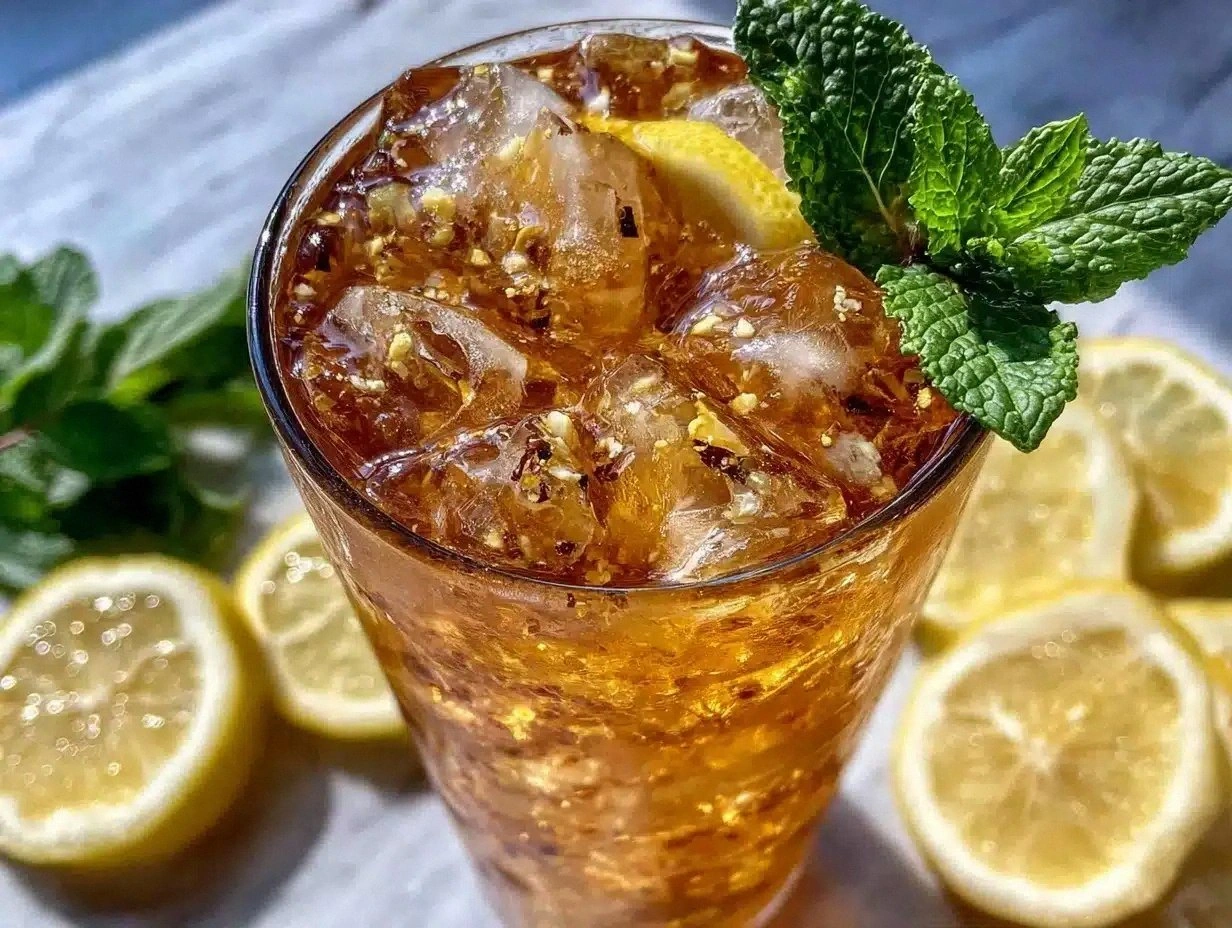
I still remember the Halloween party where I showed up with a tray of these milkshakes and watched grown adults fight over the last glass like it was the last lifeboat on the Titanic. The host—a friend who prides herself on her annual spooky soirée—took one sip, looked me dead in the eye, and whispered, "You've ruined all other milkshakes for me forever." That dramatic declaration was followed by a standing ovation from a room full of people wearing witch hats and vampire teeth. The whole scene felt like something out of a movie, except the star was a creamy, purple-tinged confection that tasted like someone had bottled childhood nostalgia and added a mischievous twist.
Picture this: it's late October, the air carries that crisp bite that makes you want to wear oversized sweaters and binge-watch Hocus Pocus for the hundredth time. You're craving something that tastes like fall but feels like magic. Most recipes would have you throwing some ice cream and food coloring in a blender and calling it a day. But here's the thing—those sad, artificial shakes taste exactly like what they are: an afterthought. The hocus pocus milkshake I'm about to share with you is the polar opposite. It's got layers of flavor that dance on your tongue like the Sanderson sisters casting spells, with a richness that coats your mouth like liquid velvet and surprises that pop up like unexpected plot twists.
What makes this version different? We're talking about a shake that starts with homemade brown sugar ice cream (don't panic—it's easier than parallel parking), gets depth from charred marshmallow syrup, and finishes with a cloud of toasted meringue that looks like a witches' cauldron bubble. The first time I served it to my nephew, he literally gasped when the dry ice fog rolled off the top. His eyes went wide as saucers, and for a moment, I felt like the cool aunt who could actually perform magic. That's the kind of reaction we're aiming for here—pure wonder wrapped in a mason jar.
I'll be honest with you: I drank three of these while testing the recipe, and I'm not even sorry. My neighbors started dropping by "just to say hi" every time they saw my blender come out. One even brought her own straw. That's the power of this milkshake—it turns rational adults into strategic planners who calculate the perfect moment to casually walk past your kitchen window. But here's the secret ingredient that takes it from delicious to legendary: a pinch of smoked sea salt that makes all the sweet elements sing in harmony like a perfectly tuned choir. Let me walk you through every single step—by the end, you'll wonder how you ever made it any other way.
What Makes This Version Stand Out
Theatrical Presentation: This isn't just a milkshake—it's a full sensory experience that starts with dry ice fog cascading down the sides of the glass and ends with edible glitter that swirls like tiny galaxies. When you set these down in front of guests, conversation stops mid-sentence. The visual drama alone is worth the price of admission, but the real magic happens when they taste it and realize the flavor lives up to the spectacle.
Depth of Flavor: Most milkshakes taste one-dimensional—sweet, cold, done. This one builds complexity like a symphony, starting with caramelized brown sugar notes, moving through vanilla bean warmth, hitting you with smoky marshmallow undertones, and finishing with that whisper of sea salt that makes your taste buds sit up and pay attention. Each sip reveals something new, like watching your favorite movie and noticing background details you'd missed before.
Textural Wonderland: We're not just blending and pouring here. The combination of ultra-creamy homemade ice cream, tiny bubbles from the carbonated base, and the ethereal lightness of toasted meringue creates a texture that's simultaneously rich and somehow weightless. It's like drinking a cloud that's been to finishing school—refined but still playful.
Make-Ahead Magic: Here's the beautiful part—you can prep almost every component days ahead. The ice cream keeps for a week, the marshmallow syrup lasts a month, and the meringue can be made the morning of your party. Assembly takes three minutes when you're ready to serve, which means you get to enjoy your own party instead of being trapped in the kitchen like a modern-day Cinderella.
Crowd Psychology: I dare you to serve these at your next gathering and not feel like a rock star. People lose their minds over them in the best possible way. I've witnessed proposal-level excitement, job-offer celebrations, and one memorable moment where a shy teenager used one as a conversation starter with their crush. Food memories are powerful, but magical food memories? Those last forever.
Ingredient Integrity: Every single component matters here. We're using real vanilla beans, not extract. Brown sugar we caramelize ourselves. Marshmallows we torch to order. This attention to quality means the final product tastes like nothing you can buy in a store—it's bespoke dessert at its finest, the difference between a tailored suit and something off the rack.
Interactive Element: Part of the fun is the build-your-own aspect. Set up a station with different colored sugars, various sprinkle blends, and flavored popping candies. Guests become co-creators, and suddenly your party has an activity built right in. Kids go absolutely feral for this, but I'll let you in on a secret: adults love it even more.
Inside the Ingredient List
The Foundation Builders
Heavy cream forms the backbone of our homemade ice cream, and here's why you shouldn't cheap out: the fat content determines how silky your final texture will be. We're looking for 36% milk fat minimum—anything less and you'll get ice crystals that feel like tiny daggers on your tongue. The cream carries all our other flavors like a luxury limousine, and trust me, your taste buds can absolutely tell the difference between premium and bargain basement. When you pour it into the saucepan, it should coat the back of a spoon like liquid silk, leaving a trail that slowly disappears like a secret.
Whole milk might seem like an afterthought, but it's actually the great equalizer that keeps our ice cream from becoming a frozen butter brick. The proteins in the milk create a network that traps air during churning, giving us that light, scoopable texture that bends rather than breaks. Skim milk won't work here—it's like trying to build a castle with wet cardboard. You need those milk solids to work their quiet magic in the background, turning what could be a dense frozen custard into something that melts on your tongue like snowflakes.
The Flavor Alchemists
Brown sugar is where we start building our flavor cathedral, and the key is taking it past its comfort zone. When we caramelize it in the pan, we're not just melting—we're conducting a Maillard reaction symphony that creates hundreds of new flavor compounds. The smell when it hits 320°F is what I imagine heaven smells like if heaven had a bakery. Dark brown sugar works better than light here because it already has more molasses, giving us deeper notes of toffee and burnt caramel that make people close their eyes involuntarily when they taste it.
Vanilla beans are non-negotiable in my book, and here's the hill I'll die on: extract tastes like vanilla's flat, one-dimensional cousin. Real beans have over 250 flavor compounds that create this complex orchestra of taste. When you split the pod and scrape out those tiny black seeds, you're looking at nature's version of caviar—except this caviar makes everything it touches taste like it was kissed by angels. Save the empty pods to make vanilla sugar; your morning coffee will thank you for months.
The Texture Magicians
Egg yolks are our secret weapon for achieving that custard-style richness that makes commercial ice cream taste like frozen sadness in comparison. The lecithin in the yolks acts like a natural emulsifier, creating a smooth, unified texture that doesn't separate into icy and fatty layers. We're using six yolks here—not because we're trying to kill anyone with cholesterol, but because that's the magic number where the texture transforms from good to legendary. The color they impart is this gorgeous pale yellow that looks like captured sunshine, and the mouthfeel is what I imagine it would taste like if clouds were edible.
Corn syrup might seem like a strange addition, but it's our insurance policy against ice crystals. Unlike regular sugar, corn syrup doesn't crystallize, which means your ice cream stays scoopable straight from the freezer instead of requiring a chisel and prayer. It also adds a subtle sweetness that doesn't hit you over the head like granulated sugar can. Think of it as the supporting actor who makes the star look even better—present but never stealing the show.
The Surprise Elements
Marshmallows for toasting are where we start venturing into mad scientist territory. When you torch them (and yes, you absolutely need to torch them fresh for each serving), something magical happens. The outside caramelizes into this deep, smoky sweetness while the inside stays gooey and stretchy. The contrast between the bitter char and sweet interior creates a flavor profile that reminds me of campfires and childhood summers. Don't even think about using those stale marshmallows from the back of your pantry—fresh, soft ones create the best texture for that Instagram-worthy cheese-pull moment.
Smoked sea salt is the ingredient that makes people ask, "What is that amazing flavor I can't quite place?" It's like regular salt went to finishing school and came back with stories. The smoke adds this whisper of complexity that makes all the sweet elements pop like 3D in a movie theater. Just a pinch—literally, between your thumb and forefinger—distributed across the whole batch. Too much and you've got a savory dessert, too little and you miss that addictive quality that keeps people coming back for "just one more sip."
The Showstoppers
Popping candy (yes, the stuff that explodes on your tongue) adds a playful element that makes adults feel like kids and kids feel like they've discovered actual magic. When it hits the cold milkshake, it starts crackling like tiny fireworks, creating a sensory experience that goes beyond taste into pure entertainment. The trick is adding it right before serving so it maintains its pop. I like to offer small containers on the side so people can add their own—there's something delightful about watching a serious businessman gleefully sprinkle what is essentially edible fireworks onto his dessert.
Edible glitter serves no purpose except to make everything feel more magical, and honestly? That's reason enough. When the light catches those tiny sparkles suspended in the purple shake, it looks like you're drinking a galaxy. The key is finding glitter that's actually edible (craft glitter will send you to the emergency room) and using it sparingly. You want subtle shimmer, not disco ball. A little goes a long way toward creating that "how did you even make this?" reaction that makes all the effort worthwhile.
Everything's prepped? Good. Let's get into the real action...
The Method — Step by Step
- Start by making the brown sugar ice cream base because this needs time to chill before churning. In a heavy-bottomed saucepan, combine 2 cups heavy cream, 1 cup whole milk, and 3/4 cup dark brown sugar. Heat this mixture over medium heat, stirring constantly with a wooden spoon (not metal—it conducts heat too quickly and can scorch your cream). You want to see tiny bubbles forming around the edges—what chefs call "scalding"—but never let it boil. The smell should remind you of caramel and comfort. This takes about 8-10 minutes, and patience here is your friend.
- While the cream heats, whisk together 6 egg yolks and 1/4 cup granulated sugar in a heat-proof bowl until the mixture becomes pale yellow and falls off the whisk in thick ribbons. This is called the "ribbon stage," and it's crucial for texture. You're essentially creating a stable emulsion that will prevent curdling when we add the hot cream. The color should remind you of fresh corn, and the texture should be thick enough to write your name in it with the whisk. Don't rush this step—proper aeration here means the difference between silky and scrambled.
- Now comes the moment of truth—tempering the eggs. Slowly drizzle the hot cream mixture into the egg yolks while whisking constantly. Start with just a few tablespoons, whisking like your life depends on it, then gradually increase to a thin stream. This prevents the eggs from scrambling, which would turn your dreams of dessert into a sad, lumpy reality. The mixture should thicken slightly and coat the back of a spoon. Run your finger through it—you should see a clear trail that holds its shape for a few seconds. That's how you know you've achieved custard perfection.
- Return the custard to the saucepan and cook over low heat, stirring constantly with a heat-proof spatula. Scrape the bottom and sides continuously to prevent sticking. You're looking for the mixture to thicken enough to coat the spatula, about 5-7 minutes. The temperature should reach 170°F on an instant-read thermometer—any higher and you risk curdling. The transformation is subtle but magical: suddenly the custard will feel heavier, more luxurious, like liquid velvet. Remove from heat immediately and strain through a fine-mesh sieve to catch any rogue bits that might have overcooked.
- Stir in 1 tablespoon corn syrup, 2 teaspoons vanilla bean paste, and a generous pinch of smoked sea salt. The vanilla should swirl in like black gold flecks, creating tiny galaxies in your custard. Cover the surface directly with plastic wrap (this prevents a skin from forming) and refrigerate until completely cold, at least 4 hours or overnight. I know waiting is torture, but cold custard churns better and gives you that professional texture. While you wait, the flavors meld and deepen, like they're getting to know each other better.
- Churn the custard in your ice cream maker according to the manufacturer's instructions. This usually takes 20-25 minutes, during which the mixture will increase in volume and lighten in color. It should look like soft-serve when finished—thick enough to mound but still pliable. Transfer to a freezer-safe container and freeze until firm, about 2 hours. The ice cream will keep for up to a week, but let's be real—it won't last that long. While it firms up, make your marshmallow syrup by combining 1 cup granulated sugar and 1/4 cup water in a small saucepan.
- Cook the sugar syrup over medium-high heat, swirling occasionally but never stirring, until it reaches a deep amber color. This is where most people panic and pull it too early—resist! You want it almost to the point where it looks burnt. Remove from heat and carefully stir in 1/2 cup heavy cream (it will bubble violently—this is normal). Return to low heat and stir until smooth, then add 6 large marshmallows and stir until melted. The syrup should be thick enough to coat a spoon but still pourable. Let cool completely—it will thicken as it cools and develop this incredible toasty flavor that tastes like campfires and comfort.
- For the meringue topping, combine 3 egg whites, 3/4 cup granulated sugar, and a pinch of cream of tartar in the bowl of a stand mixer. Set this over a pot of simmering water (double boiler style) and whisk constantly until the sugar dissolves and the mixture reaches 160°F. This creates a stable, safe meringue that won't weep or collapse. Transfer to the mixer and beat on high speed until stiff, glossy peaks form. The meringue should look like glossy clouds and hold its shape when you lift the whisk. You can make this up to 4 hours ahead—just cover and refrigerate until ready to use.
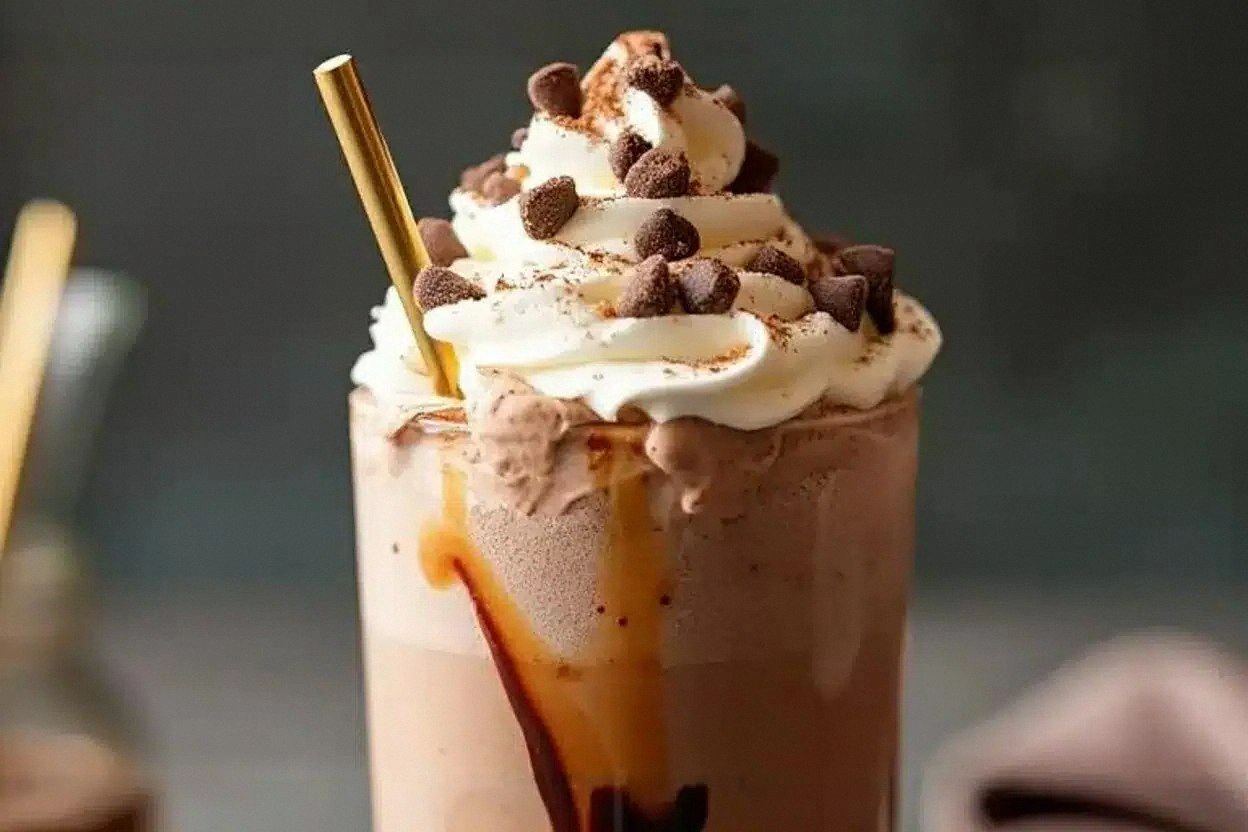
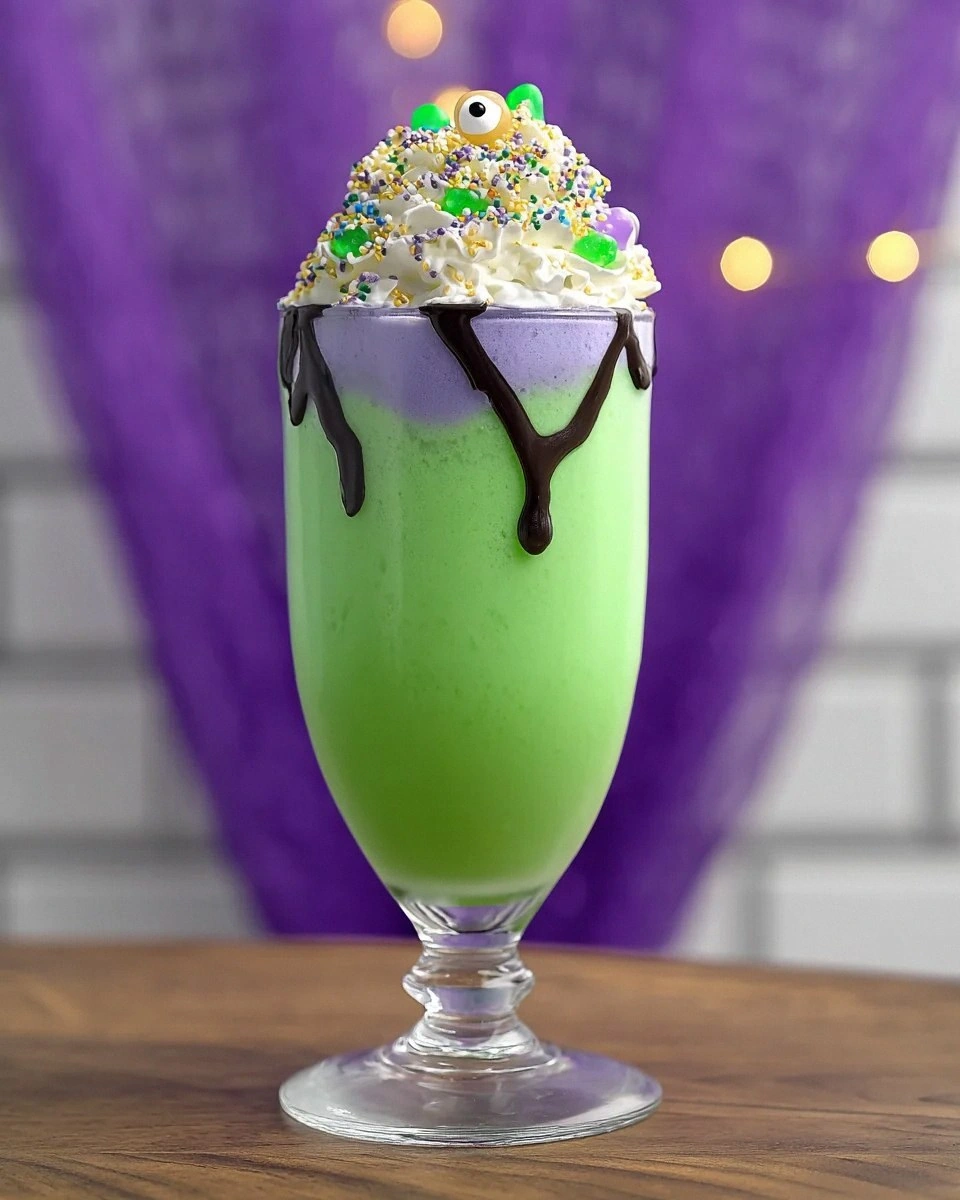
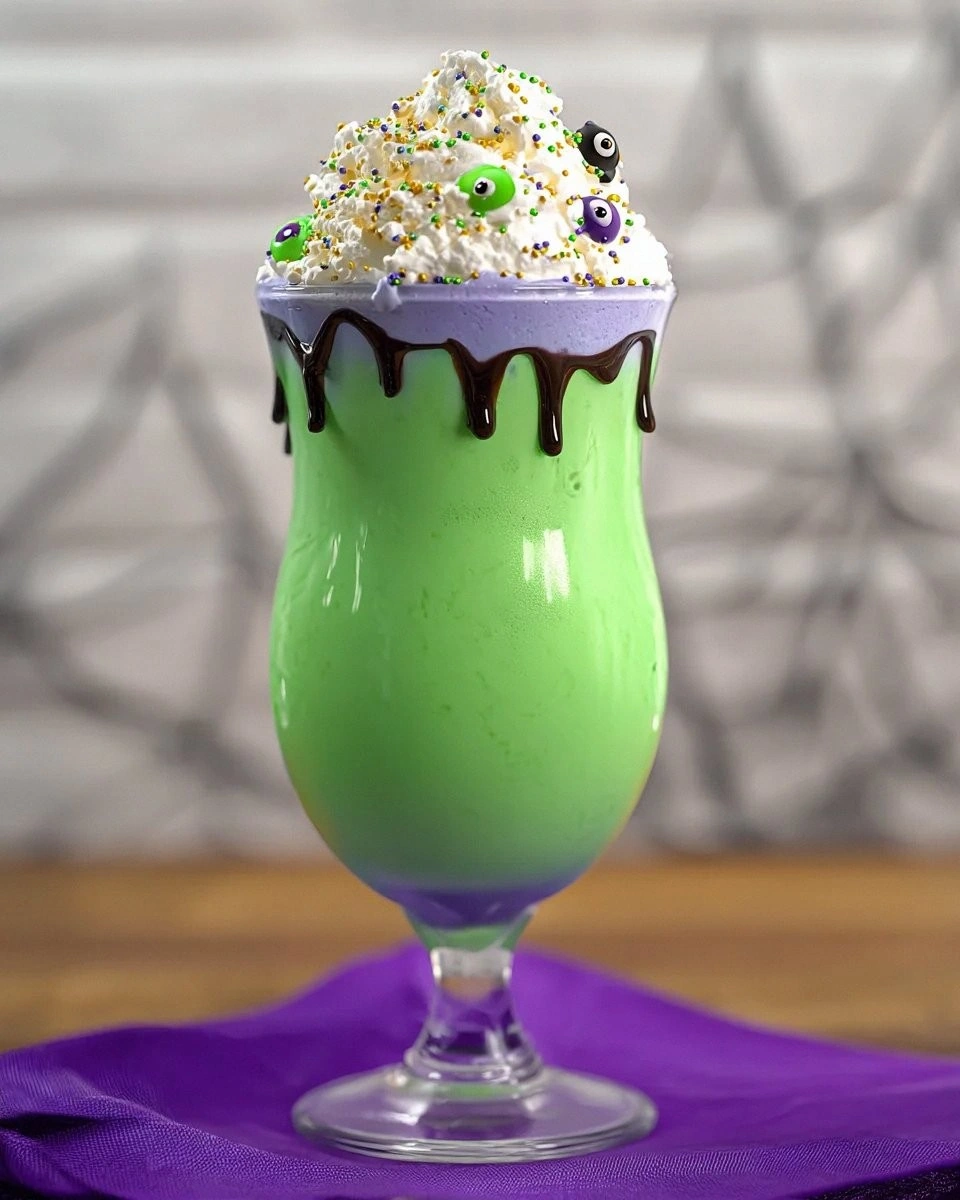
- Assembly time—this is where the magic happens! In a blender, combine 2 cups of your homemade ice cream, 1/2 cup whole milk, 2 tablespoons of the marshmallow syrup, and 4-5 drops of purple food coloring. Blend just until smooth and creamy—over-blending melts the ice cream and gives you a thin, sad shake. The color should be a deep, mystical purple that shifts in the light. Pour into chilled glasses (this keeps everything thick and prevents immediate melting), leaving about an inch at the top for our magical additions.
- Top each shake with a generous dollop of meringue, creating peaks and swirls that look like a witch's hat. Use a kitchen torch to toast the meringue until golden brown in spots—this adds that campfire flavor that makes grown adults make involuntary happy sounds. Drizzle with more marshmallow syrup, letting it cascade down the sides like a caramel waterfall. Finally, add a small piece of dry ice to each glass (using tongs—safety first!) and watch as fog rolls dramatically down the sides. Hand out straws and stand back as people lose their minds over the theater of it all.
That's it—you did it. But hold on, I've got a few more tricks that'll take this to another level...
Insider Tricks for Flawless Results
The Temperature Rule Nobody Follows
Here's the thing that separates amateur milkshakes from the ones that make people write poetry: everything needs to be cold, cold, cold. I'm talking ice cream straight from the freezer, milk that's been chilling for at least an hour, glasses that have been in the freezer overnight. When warm milk hits cold ice cream, you get a watery, separated mess that tastes like disappointment. I keep a dedicated "milkshake milk" in the coldest part of my fridge, and my glasses live in the freezer between uses. The difference is dramatic—your shake stays thick and creamy instead of deflating into sweet soup within minutes.
Why Your Nose Knows Best
Don't underestimate the power of aroma in creating a truly memorable experience. Right before serving, I like to add a tiny drop of vanilla extract to the rim of each glass—just enough that people smell it when they lift the glass to drink. It primes their brain for the flavor experience and adds another layer to the sensory journey. You could also experiment with other complementary scents: a whisper of cinnamon for warmth, a hint of orange oil for brightness, or even a touch of lavender for that mystical quality. The key is subtlety—you want people to notice something special without being able to put their finger on exactly what it is.
The 5-Minute Rest That Changes Everything
After you blend your shake, let it rest for exactly 5 minutes before pouring. I know this sounds counterintuitive—won't it melt? But here's what's actually happening: during blending, you incorporate a lot of air bubbles that initially make the shake seem fluffy but quickly collapse, leaving you with a thinner texture. That 5-minute rest allows the foam to stabilize and the temperature to equalize throughout. The result is a milkshake with body and structure that holds up longer. I've tested this dozens of times, and the rested shakes always have better texture and a more integrated flavor. Set a timer and resist the urge to rush—good things come to those who wait.
The Secret Weapon: Salt Timing
Most people add salt to sweet dishes as an afterthought, but timing matters tremendously. For this recipe, I add a tiny pinch to the custard base, another whisper to the marshmallow syrup, and just a few grains on top of the finished meringue. Each addition serves a different purpose: the first enhances the overall sweetness, the second balances the caramel notes, and the final sprinkle heightens the toasted flavor of the meringue. It's like having three different types of lighting in a room—each one serves a specific function in creating the overall ambiance. Your taste buds can detect these subtle differences even if your brain can't articulate them.
The Presentation Psychology
How you serve these milkshakes affects how people perceive the taste—it's not just smoke and mirrors. Use tall, clear glasses to showcase the purple color and create that dramatic vertical presentation. The meringue should be swirled high and torched unevenly—those dark caramelized spots aren't mistakes, they're flavor bombs that add visual interest and concentrated taste. When people see the care you put into presentation, their brains are already primed to enjoy the experience more. I've seen people rate identical milkshakes as tasting better when served in fancy glasses with thoughtful garnishes versus plain cups. We're visual creatures—use that to your advantage.
Creative Twists and Variations
This recipe is a playground. Here are some of my favorite ways to switch things up:
The Green-Eyed Monster
Swap the purple food coloring for green and add 1/2 teaspoon of matcha powder for an earthy, sophisticated flavor that tastes like a witch's brew for grown-ups. Replace the marshmallow syrup with white chocolate sauce and add a splash of mint extract. Top with crushed chocolate cookies to look like dirt from a graveyard. This version tastes like a Thin Mint cookie met a milkshake and had a beautiful, spooky baby. The matcha adds just enough bitterness to balance the sweetness, making it dangerously drinkable.
The Vampire's Kiss
Keep the purple base but add 2 tablespoons of grenadine for a blood-red swirl effect. Use raspberry sherbet instead of vanilla ice cream for a tart counterpoint to all that richness. The meringue gets a dusting of edible red glitter, and you serve it with a syringe of strawberry syrup for guests to inject their own "blood" into the shake. It's dramatic, Instagram-worthy, and tastes like summer fruit got invited to a Halloween party. Kids go absolutely bananas for the interactive element, but it's sophisticated enough for adult palates.
The Ghostbuster
Make the base white by omitting food coloring and using vanilla bean ice cream. Add 1/4 teaspoon of almond extract and swirl in marshmallow fluff for ghostly white streaks. The meringue gets extra tall and spiky, torched to look like a ghost emerging from the glass. Add candy eyes that peek out from beneath the meringue. This version tastes like marzipan and childhood, with a nutty sweetness that makes people ask for the recipe before they've finished their first sip.
The Sanderson Sister
Channel the original witches with a base that combines all their personalities: chocolate for Winifred's dark complexity, butterscotch for Sarah's sweetness, and a hint of spice for Mary's middle-child energy. Layer in crushed chocolate cookies, butterscotch chips, and a pinch of cayenne for that unexpected kick. Top with three different colored meringue swirls representing each sister. It's like drinking a character study—complex, surprising, and utterly addictive.
The Black Magic
Go full dark mode by using black cocoa powder and activated charcoal for a shake that's as black as your ex's heart. The flavor is intensely chocolatey with hints of espresso and smoke. Add black sesame paste for nuttiness and gold leaf for that touch of magic. Serve in matte black glasses for maximum drama. This version photographs like a dream and tastes like the void—dark, mysterious, and surprisingly sweet once you get past the color.
The Trick-or-Treat Remix
Turn the whole concept on its head by creating a "deconstructed" version. Serve the components separately: ice cream in mini cones, meringue as kiss-shaped cookies, marshmallow syrup as a dipping sauce, and popping candy in test tubes. Let guests assemble their own combinations. It's interactive, fun, and appeals to the kid in everyone. Plus, it stretches the recipe to serve more people and creates a memorable activity that guests will talk about long after the party ends.
Storing and Bringing It Back to Life
Fridge Storage
The homemade ice cream keeps beautifully for up to a week in an airtight container, but press plastic wrap directly against the surface to prevent ice crystals from forming. Store the marshmallow syrup in a sealed jar at room temperature for up to a month—it actually improves with age as the flavors meld. The meringue is best used within 4 hours of making, but you can store it in the refrigerator for up to 24 hours if necessary. It might weep slightly, but a quick re-whip will bring it back to life. I like to keep all components separate and assemble just before serving for maximum impact.
Freezer Friendly
You can freeze the ice cream for up to a month, but let it soften at room temperature for 10-15 minutes before scooping. The marshmallow syrup can be frozen in ice cube trays for perfect portion control—just thaw what you need. Don't freeze the meringue—it becomes a sad, weepy mess that even magic can't fix. If you want to prep far ahead, make the custard base and freeze it before churning. Thaw overnight in the refrigerator, then churn fresh when you're ready to serve. The flavor difference between fresh-churned and pre-frozen is noticeable enough to be worth the extra step.
Best Reheating Method
If your ice cream has become too hard in the freezer, let it sit at room temperature for 5-7 minutes before scooping. For the meringue, if you need to re-whip, add a pinch of cream of tartar to help stabilize it again. The marshmallow syrup can be gently warmed in the microwave for 10-15 seconds to make it pourable again. Here's a pro tip: if your assembled milkshakes start to melt before serving, pop them in the freezer for exactly 3 minutes—long enough to firm up but not so long that the meringue weeps. It's like hitting a reset button on the presentation without compromising texture.