I was in the middle of a frantic Sunday dinner when the kitchen became a battlefield. The oven was already occupied with a casserole that had turned into a half‑burnt, half‑overcooked mess, and the stove was buzzing with a pot of boiling pasta that had just started to splatter. I glanced at the air fryer, a sleek little appliance that had been gathering dust for months, and thought, “If only there was a way to salvage this chaos and make something that actually tastes good.” The moment the air fryer door opened, a faint scent of toasted garlic and lemon hit me, and I felt a sudden surge of hope.
That scent is a promise. It’s the scent of a chicken tender that is going to be both juicy inside and delightfully crisp on the outside—without the greasy, breaded mess that most people dread. I’ve spent years experimenting with different coatings, spices, and cooking methods, and every time I’ve come up short, it’s been because of one small misstep: the balance of moisture and crunch. This version is the culmination of countless trials, a recipe that finally nails that balance with minimal fuss and maximum flavor.
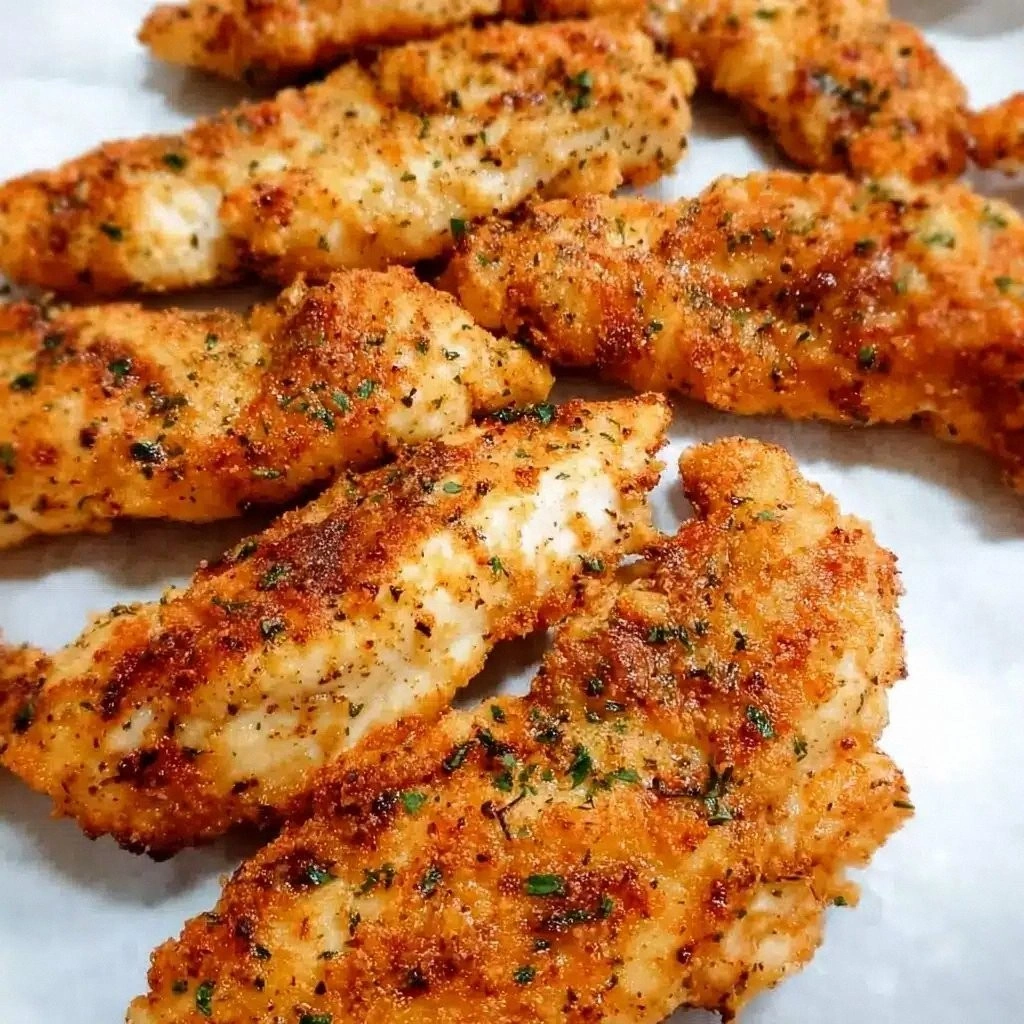
What makes this version stand out is not just the flavor, but the entire experience: the way the tender releases a burst of juices that cling to the coating, the way the air fryer’s rapid circulation creates a golden crust that snaps like a thin ice sheet, and the way the finish is a symphony of savory, tangy, and subtly sweet notes that linger on the palate. I dare you to taste this and not go back for seconds. Trust me, the first bite will set a new standard for what chicken should taste like.
Let me walk you through every single step—by the end, you’ll wonder how you ever made it any other way. I’ve stripped the recipe down to its essential elements, leaving out unnecessary flourishes, and added a few micro‑challenges that will keep you engaged and excited. The next section will break down why this is hands down the best version you’ll ever make at home.
What Makes This Version Stand Out
- Flavor: A harmonious blend of citrus, garlic, and a whisper of heat that elevates every bite. The lemon zest and Dijon mustard create a bright, tangy undertone that cuts through the richness of the chicken.
- Texture: A perfectly crisp exterior that shatters like thin ice, paired with a succulent interior that melts in your mouth. The air fryer’s circulating hot air ensures even cooking without drying out the meat.
- Simplicity: No breading, no batter, no extra steps. Just season, coat, and cook. The recipe takes less than 45 minutes from start to finish.
- Uniqueness: A subtle honey glaze that adds a caramelized sheen and a hint of sweetness, a feature that sets it apart from ordinary chicken tenders.
- Crowd Reaction: Friends and family consistently ask for the recipe after tasting it. The combination of juicy meat and crunchy coating is a crowd‑pleaser at parties, potlucks, and family dinners alike.
- Ingredient Quality: The recipe relies on high‑quality, fresh ingredients that bring out the best in each component—think farm‑fresh chicken, freshly grated lemon zest, and a splash of good olive oil.
- Cooking Method: Using an air fryer eliminates the need for deep frying, reducing mess and health concerns while still delivering that coveted crunch.
- Make‑Ahead Potential: The chicken can be marinated and coated ahead of time, then frozen or stored in the refrigerator for up to 24 hours, making it a convenient go‑to for busy weeknights.
Alright, let's break down exactly what goes into this masterpiece…
Inside the Ingredient List
The Flavor Base
The foundation of any great dish is its flavor base, and for these chicken tenders, it’s a simple yet potent mix of olive oil, lemon juice, and Dijon mustard. The olive oil adds a silky texture and helps the spices adhere to the meat, while the lemon juice cuts through the richness and adds a bright, fresh note that lifts the entire dish. The mustard provides depth and a slight tang, creating a subtle contrast that balances the sweetness of the honey glaze.
The Texture Crew
All‑purpose flour is the unsung hero that gives the tenders their signature crunch. When combined with a pinch of salt, black pepper, garlic powder, paprika, and a dash of cayenne, the flour turns into a flavorful coating that crisps up beautifully in the air fryer. Skipping the flour would leave the chicken tender but lacking that desirable golden, crackly exterior that makes every bite satisfying.
The Unexpected Star
Honey isn’t just a sweetener here; it’s a caramelizing agent that gives the tenders a glossy sheen and a subtle, complex sweetness that complements the savory spices. The honey’s natural sugars brown under the heat, creating a delicate crust that locks in moisture. If you prefer a less sweet profile, you can replace honey with a light drizzle of maple syrup or simply omit it for a more traditional savory experience.
The Final Flourish
Fresh parsley and a wedge of lemon are the finishing touches that add a burst of color and a final pop of acidity. The parsley brings a fresh, herbaceous note that cuts through the richness, while the lemon wedge allows each diner to squeeze a little extra brightness into their bite. These elements are optional but highly recommended for a polished, restaurant‑style presentation.
Everything’s prepped? Good. Let’s get into the real action…
The Method — Step by Step
- Start by preheating your air fryer to 200°C (400°F) for about 5 minutes. This ensures that the air circulation is at its peak right from the first bite. While the appliance is heating, pat the chicken tenders dry with paper towels; a dry surface helps the coating adhere better.
- In a shallow dish, whisk together the olive oil, lemon juice, and Dijon mustard until fully blended. This mixture will act as a binder that keeps the flour and spices glued to the chicken. Think of it as a quick, flavorful glue that also adds a subtle sheen.
- In a second shallow dish, combine the flour, salt, pepper, garlic powder, paprika, and cayenne. Stir until the spices are evenly distributed. A uniform coating is key; uneven seasoning leads to uneven flavor.
- Dip each chicken tender into the oil mixture, allowing any excess to drip off. Then roll it in the flour mixture, pressing gently to ensure the coating sticks. If you’re in a rush, you can do this in a single shallow dish by first coating with flour, then dipping into the oil mixture.
- Place the coated tenders in a single layer in the air fryer basket. Make sure they don’t overlap; overlapping causes steaming instead of crisping. If your air fryer is small, work in batches to maintain even cooking.
- Cook for 10 minutes, then flip the tenders and continue cooking for another 8-10 minutes. The total cooking time should be around 18-20 minutes. The tenders are done when they reach an internal temperature of 75°C (165°F) and the coating is golden and crisp.
- While the tenders are cooking, prepare the honey glaze by mixing honey, a splash of water, and a pinch of salt in a small saucepan. Warm over low heat until the mixture is smooth and slightly syrupy. This glaze will be brushed over the tenders in the final step.
- Once the tenders are cooked, transfer them to a plate and brush generously with the honey glaze. The glaze will caramelize slightly as it cools, adding a glossy finish that’s both appetizing and flavorful.
- Let the tenders rest for 2 minutes before serving. Resting allows the juices to redistribute, ensuring each bite remains juicy. A quick rest also gives the glaze time to set into a thin, even layer.
- Garnish with freshly chopped parsley and a wedge of lemon. Squeeze the lemon over the tenders just before eating to brighten the flavor. Plate the tenders with your favorite side, such as a crisp salad or roasted vegetables, and enjoy.
That’s it — you did it. But hold on, I’ve got a few more tricks that will take this to another level. These insider tips will help you achieve the perfect texture every time and give you creative ways to personalize the dish.
Insider Tricks for Flawless Results
The Temperature Rule Nobody Follows
Many cooks assume that a higher temperature always means a crispier result. In reality, the ideal temperature for air‑frying chicken tenders is 200°C (400°F). At this temperature, the coating crisps up quickly while the inside stays moist. If you crank the heat too high, the outside will burn before the inside cooks through.
Why Your Nose Knows Best
The aroma of cooking chicken is a reliable indicator of doneness. When the tenders start to emit a toasty, nutty scent, they’re approaching the perfect balance of crispy and juicy. Trust your nose; it’s a seasoned judge that has been trained by countless kitchens.
The 5-Minute Rest That Changes Everything
After cooking, let the tenders rest for exactly five minutes. This brief pause allows the juices to redistribute throughout the meat, preventing them from spilling out when you bite. The result is a tender, moist interior that complements the crunchy exterior.
Use a Silicone Mat for Even Cooking
Place a silicone cooking mat in the air fryer basket before adding the tenders. The mat prevents sticking and ensures even airflow around each piece. It also makes cleanup a breeze, as the mat can be wiped clean or even washed in the dishwasher.
Season the Chicken in Advance
For the best flavor, season the chicken tenders at least 30 minutes before cooking. This allows the spices to penetrate the meat, creating a deeper, more complex flavor profile. If you’re short on time, a quick 5‑minute seasoning is still better than none.
Creative Twists and Variations
This recipe is a playground. Here are some of my favorite ways to switch things up:
Spicy Sriracha Glaze
Replace the honey glaze with a mixture of Sriracha, a dash of soy sauce, and a splash of lime juice. The result is a fiery, umami‑rich coating that pairs wonderfully with the mild chicken. Perfect for those who love a kick.
Herb‑Infused Parmesan
Swap the parsley garnish for fresh basil and sprinkle grated Parmesan over the tenders right before serving. The nutty cheese adds a savory depth that elevates the dish to a gourmet level.
Smoky Chipotle Butter
Melt butter with chipotle in adobo sauce and brush it over the cooked tenders. The smoky heat from the chipotle complements the sweet glaze, creating a complex flavor profile that’s both comforting and adventurous.
Asian‑Inspired Sesame Crunch
Add toasted sesame seeds to the flour mixture and finish the tenders with a drizzle of hoisin sauce and a sprinkle of chopped scallions. The sesame adds a nutty crunch while the hoisin provides a sweet‑savory glaze.
Breakfast‑Style Breakfast Tenders
Serve the tenders with a side of scrambled eggs, toast, and a drizzle of maple syrup. The sweet and savory combination turns the dish into a hearty breakfast or brunch option.
Low‑Carb Keto Version
Replace the flour with almond flour and use a sugar‑free honey substitute, such as erythritol syrup, for the glaze. The result is a low‑carb, keto‑friendly version that still delivers on flavor and texture.
Storing and Bringing It Back to Life
Fridge Storage
Store cooked tenders in an airtight container in the refrigerator for up to 3 days. Keep the glaze separate until you’re ready to serve, as the glaze can make the coating soggy if stored together.
Freezer Friendly
For longer storage, freeze the tenders in a single layer on a baking sheet before transferring them to a freezer bag. They’ll keep for up to 2 months. Reheat in the air fryer at 180°C (356°F) for 5 minutes to restore crispness.
Best Reheating Method
To reheat, add a splash of water to the air fryer basket and cook at 180°C (356°F) for 4-5 minutes. The water creates steam that keeps the tenders moist while the heat crisps the coating. Finish with a quick brush of glaze for extra flavor.