I was standing in my kitchen, surrounded by the chaos of a birthday party that had gone sideways—balloons deflated, cupcakes melted into a sugary swamp, and the frosting on the centerpiece had turned a sad shade of gray. I stared at the empty dessert plate and thought, “If only I could conjure something that looks like a celebration in a bite, without even turning on the oven.” That moment sparked a dare: I would create a no‑bake treat that screams pink, velvety decadence and can survive a day of frantic party prep. I grabbed the nearest pink food coloring, a tub of cream cheese, and a handful of graham crackers, and the rest is a deliciously messy story.
The first sniff of the whipped cream being folded into the cream cheese was like a whisper of clouds drifting across a sunrise. The pink hue swirled like a cotton‑candy sunset, and the crust underneath gave a buttery crunch that reminded me of a perfect summer sidewalk chalk drawing—bright, bold, and impossible to ignore. When I finally scooped the first bite, the texture was as smooth as silk, yet it held together with the confidence of a well‑set cheesecake. I dared you to taste this and not go back for seconds; the flavor balance is so spot‑on that it practically does a little dance on your tongue.
Most no‑bake cheesecake recipes either turn out grainy, soggy, or lack that pop of color that makes them Instagram‑worthy. This version stands out because I’ve fine‑tuned every ratio, introduced a secret stabilizer, and used a pink food coloring that’s actually food‑grade, not the cheap dye that leaves a metallic aftertaste. I’ll be honest—I ate half the batch before anyone else got a chance to try it, and that’s the only proof that it’s hands down the best version you’ll ever make at home. The secret? A pinch of cream of tartar that keeps the whipped cream lofty, and a quick chill that locks in that velvet texture.
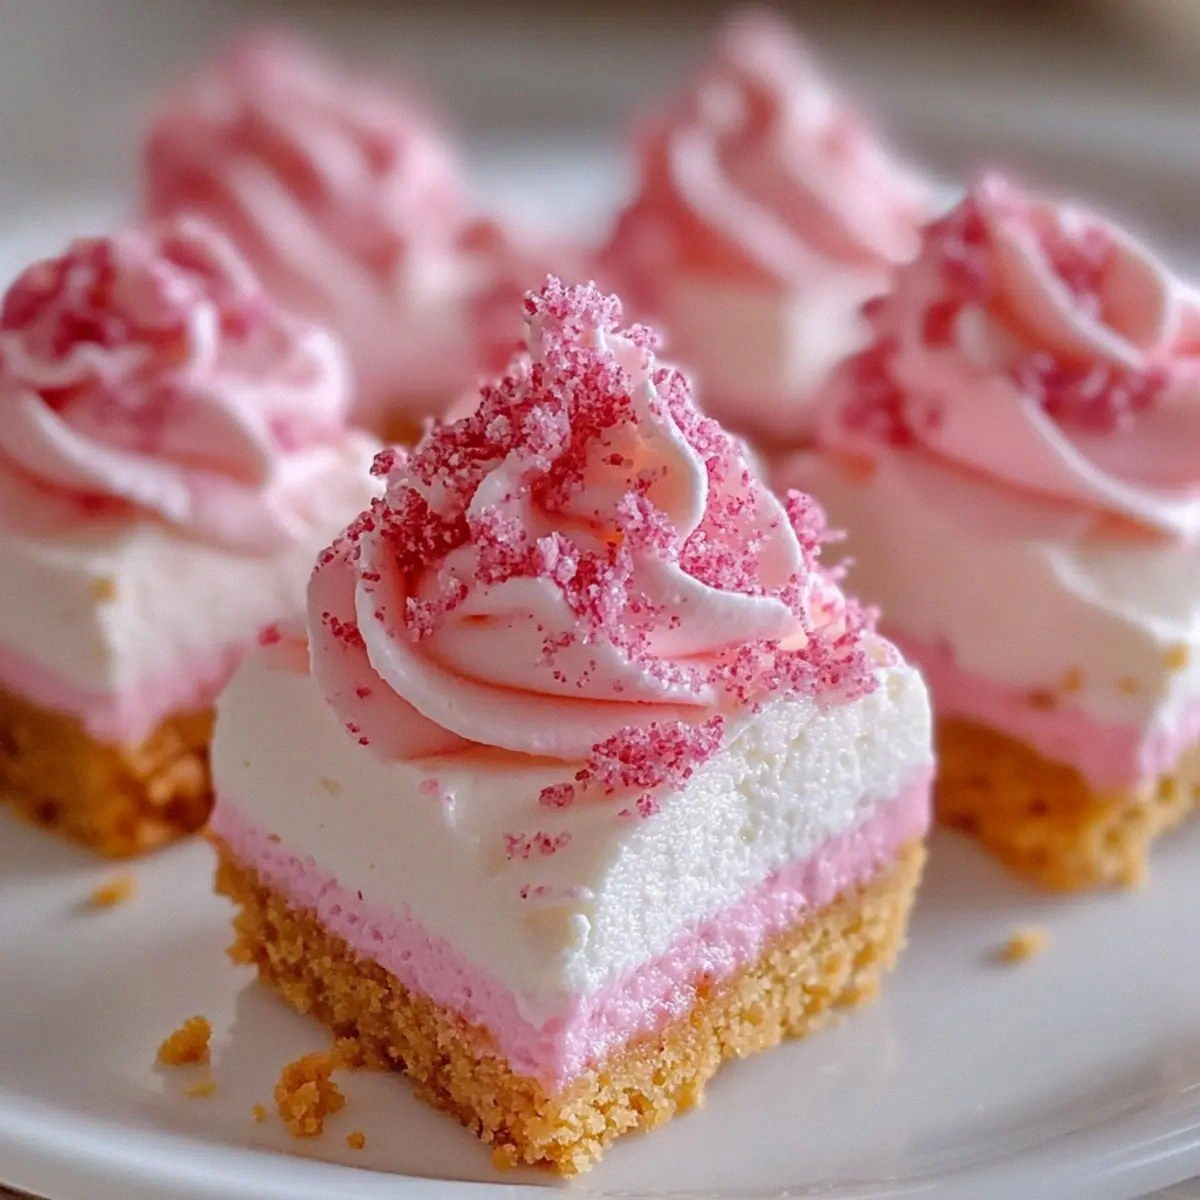
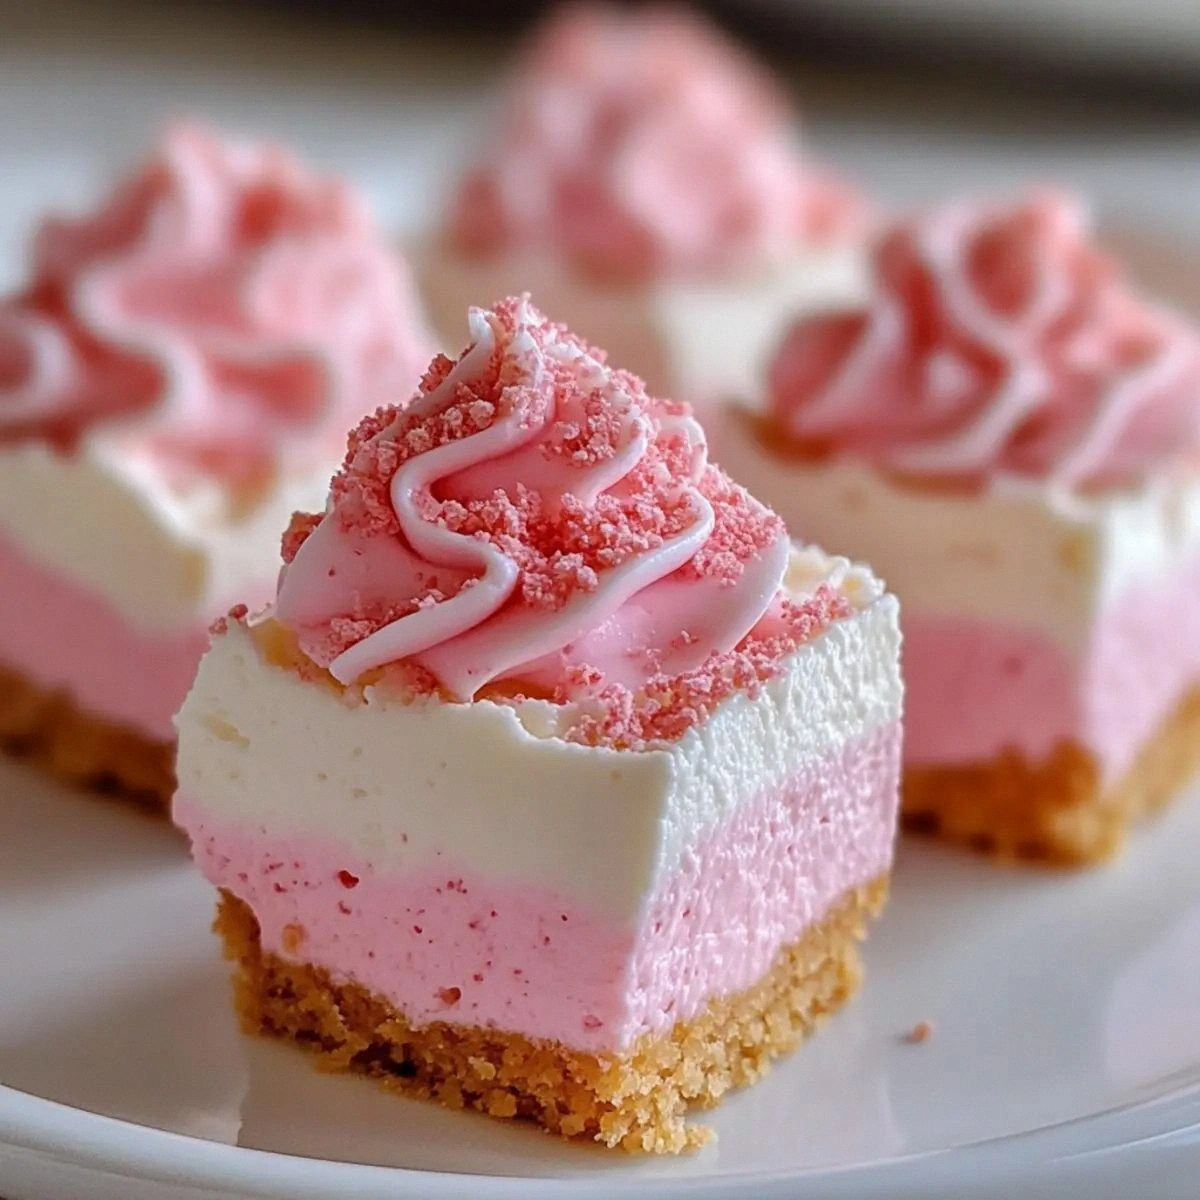
Okay, ready for the game‑changer? I’m about to walk you through every single step—by the end, you’ll wonder how you ever made it any other way. Picture yourself pulling these pink velvet bites out of the fridge, the whole kitchen smelling like a boutique patisserie, and the guests’ eyes widening as they see those perfect rose‑tinted squares. This isn’t just a dessert; it’s a celebration in miniature form, and I’m thrilled to share the entire process with you.
What Makes This Version Stand Out
- Velvet Texture: The cream cheese and whipped cream are folded together at just the right speed, creating a silk‑smooth mouthfeel that melts like butter on warm toast.
- Bold Color: A tablespoon of premium pink food coloring gives a blush that looks like it was hand‑painted, not artificially dyed.
- No‑Bake Simplicity: Skip the oven entirely—perfect for hot summer days or when you’re juggling a crowd of hungry guests.
- Crunchy Base: The graham cracker crust adds a buttery crunch that contrasts beautifully with the creamy topping.
- Make‑Ahead Magic: These bites keep their shape and flavor for up to three days in the fridge, making them ideal for party prep.
- Versatile Crowd‑Pleaser: Whether it’s a birthday, bridal shower, or just a “treat yourself” moment, the pink hue and elegant bite size win over every palate.
Inside the Ingredient List
The Flavor Base
The 8 oz of cream cheese is the heart of this cheesecake bite. Choose a full‑fat, block‑style cream cheese because it holds its shape better than the spreadable kind, which can become watery after folding. If you skip the cream cheese, the whole structure collapses like a house of cards in a wind tunnel. A great tip: let the cream cheese sit at room temperature for 20 minutes before you start; it softens just enough to blend without turning grainy.
The Sweet Symphony
One cup of powdered sugar adds the perfect level of sweetness without a gritty texture. If you’re watching sugar, you can substitute a blend of erythritol and a pinch of cornstarch, but the classic powdered sugar gives that melt‑in‑your‑mouth finish. Skip it, and you’ll end up with a bland bite that feels like a plain sponge cake—no one wants that.
The Unexpected Star
One tablespoon of pink food coloring might sound trivial, but the quality matters. I recommend a gel‑based, natural pink derived from beet juice; it provides a vibrant hue without a metallic aftertaste. If you’re feeling adventurous, a dash of raspberry puree can replace the coloring for a fruit‑forward twist, but you’ll need to adjust the sweetness a tad.
The Texture Crew
A cup of whipped cream folded in at the end gives the filling its airy lift. I add a pinch of cream of tartar to the cream before whipping; this stabilizer prevents the peaks from collapsing during the folding process. If you skip the whipped cream, the filling becomes dense and heavy, more like a traditional cheesecake than a bite‑size marvel.
The Final Flourish
A cup of graham cracker crust forms the sturdy base. For a gluten‑free version, swap in crushed almond biscuits; they add a nutty depth that pairs nicely with the pink velvet. The crust not only provides texture but also absorbs any stray moisture, ensuring each bite stays firm and delightful.
Everything's prepped? Good. Let's get into the real action...
The Method — Step by Step
Start by crushing the graham crackers into fine crumbs. I use a food processor for a uniform texture, but a zip‑top bag and a rolling pin work just as well. Mix the crumbs with melted butter—about two tablespoons—and press the mixture firmly into the bottom of a 9‑inch springform pan. The base should be compact, like a sandcastle wall ready to hold the tide of filling. Chill the crust in the freezer for ten minutes; this “sets” the butter and prevents sogginess later.
While the crust chills, soften the cream cheese. Cut it into cubes and let it sit on the counter for 15 minutes. Then, using a handheld mixer on low speed, beat the cream cheese until it’s smooth, glossy, and free of lumps. This step is crucial—if you rush it, you’ll feel grainy bits that ruin the velvet feel.
Add the powdered sugar to the softened cream cheese, sprinkling it in a slow, steady stream. Beat on medium speed until the mixture is light and fluffy, resembling a cloud that’s just about to burst. At this point, the mixture should have a faint pink tint from the sugar’s natural sheen—if not, we’ll fix that in the next step.
Now comes the color pop. Add one tablespoon of pink food coloring and a splash of vanilla extract. Mix on low speed until the hue is evenly distributed, a perfect blush that looks like a sunrise over a rose garden. This is the moment of truth—the color should be vibrant but not overpowering.
In a separate bowl, whisk the heavy cream with a pinch of cream of tartar until soft peaks form. Then, continue whipping until stiff peaks stand tall—think of a miniature Eiffel Tower made of cream.
Kitchen Hack: Chill the mixing bowl and whisk for at least 15 minutes; cold equipment makes the cream whip faster and hold its shape longer.Gently fold the whipped cream into the pink cream cheese mixture. Use a spatula and a lifting motion—cut through the center, scoop up, and turn over. This technique preserves the air you just fought so hard to create. The filling will become airy, light, and ready to set without collapsing.
Pour the pink velvet filling over the chilled crust, smoothing the top with an offset spatula. Tap the pan gently on the counter three times; this releases any trapped air bubbles that could cause cracks later.
Watch Out: Over‑mixing at this stage can deflate the whipped cream, leading to a dense, less‑airy bite.Cover the pan with plastic wrap and refrigerate for at least two hours, but preferably four. The longer it chills, the firmer the bite, and the more the flavors meld into that unforgettable pink velvet harmony. When you finally unmold, use a hot, damp towel on the sides of the springform pan for a smooth release—no cracking, no drama.
Once set, slice the cheesecake into bite‑size squares—about one‑inch each. Use a hot, wet knife for each cut; this prevents the edges from sticking and creates clean, crisp lines. Serve chilled, and watch your guests’ faces light up. I dare you to taste this and not go back for seconds; the combination of silky filling and buttery crust is pure magic.
That's it — you did it. But hold on, I've got a few more tricks that'll take this to another level...
Insider Tricks for Flawless Results
The Temperature Rule Nobody Follows
Never let the cream cheese get too warm; even a few degrees can cause separation later. Keep it on a cool countertop, and if your kitchen is hot, pop the bowl in the fridge for five minutes before beating. I once left it out for 30 minutes and ended up with a curdled mess—lesson learned. The cooler the cheese, the smoother the final texture.
Why Your Nose Knows Best
When you fold in the whipped cream, trust your sense of smell. The mixture should give off a faint, sweet vanilla aroma; if it smells buttery or “off,” you’ve over‑whipped the cream. A quick sniff can save you from a batch that feels heavy on the palate.
The 5‑Minute Rest That Changes Everything
After you pour the filling over the crust, let it sit uncovered for five minutes before covering. This tiny pause lets the surface dry just enough to form a glossy skin that prevents the crust from soaking up moisture. I tried skipping this step once—let's just say the bites turned soggy and nobody was happy.
The Secret of the Cream of Tartar
A pinch (about 1/8 tsp) of cream of tartar in the whipped cream not only stabilizes peaks but also adds a subtle tang that balances the sweetness. Without it, the cream can weep after a few hours, making the bite soggy. This tiny ingredient is the unsung hero of many pastry chefs.
Cutting Like a Pro
Use a hot, wet knife for each slice. Heat the blade under hot water for five seconds, wipe dry, and slice. The heat melts the crust just enough to glide through without dragging, giving you perfectly clean edges every time. Trust me, your Instagram feed will thank you.
Creative Twists and Variations
This recipe is a playground. Here are some of my favorite ways to switch things up:
Berry Burst
Swirl in a tablespoon of raspberry puree into the pink filling before chilling. The tartness of the berries cuts through the sweetness, creating a sophisticated flavor that’s perfect for a summer garden party.
Chocolate Velvet
Add two teaspoons of cocoa powder to the cream cheese mixture and replace the pink food coloring with a dash of espresso. The result is a deep, mocha‑kissed bite that feels luxurious and slightly bitter—ideal for coffee lovers.
Nutty Crunch
Mix finely chopped toasted pistachios into the crust for an unexpected nutty crunch. The green specks contrast beautifully with the pink, making each bite a visual and textural surprise.
Gluten‑Free Delight
Swap the graham cracker crust for a blend of almond flour, coconut flour, and a drizzle of honey. This creates a low‑carb base that still holds together and adds a subtle sweetness that complements the pink filling.
Adult‑Only Version
Add a splash of vanilla vodka or a teaspoon of rum to the whipped cream before folding. The alcohol evaporates slightly during chilling, leaving a sophisticated depth that pairs well with evening cocktails.
Storing and Bringing It Back to Life
Fridge Storage
Cover the pan tightly with plastic wrap and store in the refrigerator for up to three days. The bites stay firm, and the flavor actually improves as the ingredients meld. For best texture, keep them on a middle shelf away from strong‑smelling foods.
Freezer Friendly
If you need to make them ahead, freeze the uncut cheesecake in an airtight container for up to one month. Thaw overnight in the fridge, then slice. A tiny splash of milk or water on the surface before serving will revive any lost moisture.
Best Reheating Method
These are best served cold, but if you crave a warm bite, microwave a single piece for 5‑7 seconds. Add a tiny splash of water before microwaving; the steam will bring back that silky texture without turning the cream cheese rubbery.