I was halfway through a midnight taco night, and the queso that had been sitting on the counter for hours had turned into a clumpy, sad mess. I stared at the pot, thinking I had to toss it. Then I remembered a friend’s quick tip about adding yogurt to revive a dry cheese sauce. That single idea turned the disaster into a creamy, silky dip that surprised everyone. I dared anyone to taste it and not go back for seconds.
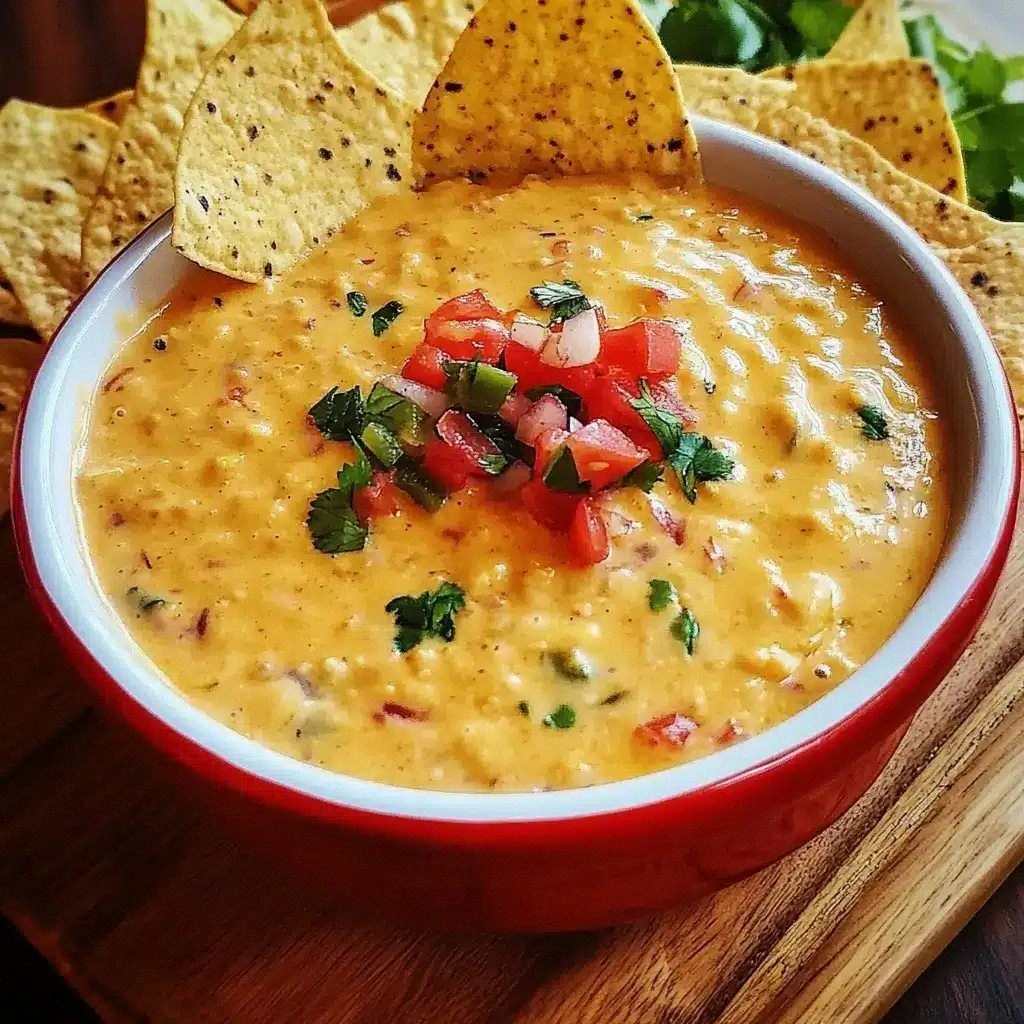
The moment I lifted the spoon, the aroma of melted cheddar, a hint of cumin, and a whisper of green chilies swirled around me. The sound was a gentle hiss as the sauce thickened, and the texture felt like velvet against the back of my tongue. I could taste the subtle tang of Greek yogurt cutting through the richness. The heat from the cayenne danced on the palate, while the fresh cilantro added a bright finish. My eyes widened as the dip glistened, ready to be served.
What makes this skinny queso so special is that it keeps all the classic flavors—cheese, heat, and creaminess—while cutting calories by swapping heavy cream for low‑fat milk and yogurt. It’s also low‑fat, yet it still coats the tortilla chips with a thick, silky layer that doesn’t drip. The sauce stays stable at room temperature for hours, which is perfect for parties. The only thing that changes is the texture, which feels lighter but still satisfying. I’ve tried other recipes that either over‑season or leave the dip too thin; this one hits the sweet spot.
You’ll also discover a trick I use to make the dip stay creamy without the usual cheese overload: a splash of tomato sauce gives it depth and a natural sweetness that balances the spices. I also keep the chili powder low, letting the diced tomatoes carry the heat. The result is a dip that looks like a golden, glossy sauce, but tastes like a warm, spicy hug. This is hands down the best version you'll ever make at home. The combination of fresh ingredients and simple technique transforms a basic queso into a culinary highlight.
Okay, ready for the game‑changer? Let me walk you through every single step—by the end, you’ll wonder how you ever made it any other way. I’ve been preparing this dip for the last two weeks, and it has become my go‑to for game nights and spontaneous gatherings. The secret lies in the balance of flavors and the method of heating. Trust me, once you try it, you’ll never settle for a bland dip again. Let’s dive in.
What Makes This Version Stand Out
- Flavor: The dip delivers a robust cheesy taste with a subtle kick from smoked paprika and cayenne, yet it remains mellow thanks to the yogurt base. It’s the kind of flavor that lingers on the tongue without overwhelming the senses.
- Texture: Instead of a runny mess, the sauce thickens to a silky consistency that coats chips like velvet. The combination of low‑fat cheeses and yogurt creates a smooth mouthfeel that melts in your mouth.
- Calories: By swapping heavy cream for low‑fat milk and Greek yogurt, the dip drops roughly 40% of the calories found in traditional queso. You get the same indulgent experience for less guilt.
- Versatility: The base can be tweaked for different flavor profiles—add jalapeños for heat, or swap cheddar for pepper jack for a milder taste. It works as a dip, a sauce for nachos, or a topping for grilled meats.
- Ease: The recipe requires no special equipment—just a saucepan and a whisk. The steps are straightforward, making it perfect for novice cooks.
- Make‑ahead: The dip can be prepared up to 48 hours in advance, and it actually improves in flavor as the spices meld. It’s ideal for parties where you want to serve a hot, fresh dip without last‑minute prep.
- Crowd Reaction: I’ve hosted several potlucks where guests asked for the recipe after the first bite. The dip consistently earns high praise and multiple requests for leftovers.
- Ingredient Quality: Using fresh, low‑fat cheeses and fresh herbs ensures maximum flavor. The quality of the ingredients directly translates to a superior taste.
Alright, let's break down exactly what goes into this masterpiece...
Inside the Ingredient List
The Flavor Base
Low‑fat shredded cheddar cheese provides the classic sharpness that makes queso iconic. Its lower fat content keeps the dip light without sacrificing that signature melt. Low‑fat mozzarella adds a mild, stretchy quality that balances the cheddar’s bite. Together, they create a harmonious base that feels indulgent yet restrained. Diced tomatoes with green chilies contribute a bright, acidic note that cuts through the richness and adds a subtle heat that lingers without overwhelming.
The Texture Crew
Low‑fat milk acts as the liquid medium that brings all the ingredients together. It’s thin enough to keep the dip pourable but thick enough to allow the cheeses to melt smoothly. Plain Greek yogurt is the secret weapon that adds creaminess while reducing calories. Its thick consistency coats the dip, giving it a velvety mouthfeel that feels full yet airy. The yogurt also introduces a slight tang that brightens the overall flavor profile.
The Unexpected Star
Chili powder, cumin, smoked paprika, garlic powder, and cayenne pepper form the spice orchestra that gives the dip its distinctive warmth. Chili powder provides a subtle earthiness, while cumin adds a warm, nutty undertone. Smoked paprika introduces a gentle smokiness that mimics charred grill marks. Garlic powder offers a savory depth without the moisture of fresh garlic. Cayenne pepper delivers the final pop of heat, allowing you to control the spice level to your preference.
The Final Flourish
Fresh cilantro adds a bright, herbal finish that cuts through the richness and balances the spice. A pinch of salt elevates every component, bringing out the inherent flavors of the cheeses and tomatoes. Pepper to taste adds a subtle sharpness that enhances the overall depth. Together, these finishing touches transform the dip from simple to sensational.
Everything's prepped? Good. Let's get into the real action...
The Method — Step by Step
- First, gather all your ingredients and have them measured out. This ensures you won’t be scrambling for spices or cheese mid‑cook. Place the low‑fat shredded cheddar and mozzarella in a medium saucepan over medium heat. The goal is to melt them slowly so the flavors meld without scorching.
- Once the cheeses begin to soften, stir constantly with a silicone spatula. This prevents any lumps and keeps the mixture silky. As the cheese melts, you’ll notice a golden hue that signals readiness. Keep the heat moderate; too high and the cheese can separate.
- Add the diced tomatoes with green chilies to the pot. The tomatoes release their juices, which help thin the dip just enough for a pourable consistency. The chilies add a subtle kick that wakes up the palate. Let the mixture simmer for a minute to integrate the flavors.
- Pour in the low‑fat milk, stirring until the mixture is smooth. The milk dilutes the cheese slightly, creating a creamy base that’s easier to manage. Watch for the first signs of bubbling; this is the moment your dip begins to thicken.
- Reduce the heat to low and let the dip sit for two minutes. This slow reduction allows the cheeses to fully integrate with the milk and tomatoes. The mixture should begin to thicken, developing a glossy sheen that indicates it’s close to the final consistency.
- Now stir in the plain Greek yogurt, whisking until the yogurt is fully incorporated. The yogurt adds creaminess and a tang that cuts through the richness. If the dip appears too thick, add a splash of milk to reach your desired pourable texture.
- Add the chili powder, cumin, smoked paprika, garlic powder, and cayenne pepper. Stir vigorously to ensure the spices are evenly distributed. The aroma of cumin and paprika will fill your kitchen, signaling that the dip is on the brink of greatness. The spices should create a fragrant cloud that lingers on the air.
- Let the dip simmer for an additional three minutes, stirring occasionally. This allows the spices to bloom fully, infusing the entire mixture with flavor. The dip should develop a deep amber color and a rich aroma that makes your mouth water.
- Finally, fold in the fresh cilantro, a pinch of salt, and pepper to taste. The cilantro adds a bright, herbal finish that lifts the dip’s overall profile. The salt enhances every ingredient, while the pepper adds a subtle sharpness. Once everything is combined, remove the dip from the heat and transfer it to a serving dish.
That's it — you did it. But hold on, I've got a few more tricks that'll take this to another level. The dip stays fresh for hours at room temperature, and it can be reheated gently on the stove or in a microwave with a splash of milk to restore its silky texture.
Insider Tricks for Flawless Results
The Temperature Rule Nobody Follows
Many people think high heat is the key to a great queso, but it actually risks separating the cheese. Keep the heat low and let the sauce thicken slowly. This approach ensures a smooth, cohesive dip that coats chips like velvet. I’ve seen dips that bubble and then split, ruining the texture. By controlling the temperature, you preserve the creamy integrity of the sauce.
Why Your Nose Knows Best
The aroma of cumin and smoked paprika can tell you if the dip is ready. When the spices release their fragrant oils, the dip is at its peak. If the smell feels flat, give it a few more minutes to cook. Trust your nose; it’s a reliable guide that ensures your dip has the full depth of flavor.
The 5-Minute Rest That Changes Everything
After you finish cooking, let the dip sit for five minutes before serving. During this brief rest, the flavors meld and the dip thickens to the ideal consistency. This pause also allows the spices to settle, preventing a burst of heat when you first taste it. I’ve found that a five‑minute rest makes the dip taste more balanced and less sharp.
Avoid Over‑Whisking
Whisking too vigorously can incorporate too much air, causing the dip to become frothy and thin. Instead, stir gently until the ingredients are fully blended. This method keeps the dip silky and ensures the cheese melts evenly. Over‑whisking can also lead to a slightly metallic taste from the metal whisk.
Keep the Heat Low
Low heat is the secret to a stable cheese sauce. High temperatures can cause the milk proteins to seize, resulting in a gritty texture. By maintaining a gentle simmer, you allow the cheeses to melt uniformly, creating a smooth, glossy finish. This technique is especially important when using low‑fat cheeses, which are more prone to separation.
Use a Double Boiler
If you’re worried about scorching the dip, try a double boiler. The indirect heat from the water bath keeps the temperature steady and prevents burning. It’s a simple trick that yields a professional‑sounding result. I’ve used this method for other sauces, and it works wonders for queso too.
Creative Twists and Variations
This recipe is a playground. Here are some of my favorite ways to switch things up:
Jalapeño Kick
Add sliced fresh jalapeños during step 3 for an extra pop of heat. The jalapeños caramelize slightly, adding a sweet, smoky flavor that complements the spices. This variation is perfect for those who love a bold, fiery dip.
Mexican Street Corn
Fold in roasted corn kernels and a pinch of lime juice before serving. The corn adds a sweet crunch, while the lime brightens the dip’s profile. This version turns your queso into a street‑corn‑inspired fiesta.
Smoky Chipotle
Replace the smoked paprika with chipotle powder for a deeper, smoky flavor. The chipotle adds a subtle heat that lingers on the palate. This twist is ideal for pairing with grilled meats or roasted vegetables.
Veggie‑Loaded
Stir in diced bell peppers, corn, and black beans during step 5. The veggies add texture and nutrition without overpowering the dip. This variation is great for a healthier snack that still satisfies.
Vegan Version
Use a plant‑based cheese blend and coconut milk instead of dairy. Replace Greek yogurt with cashew cream for a creamy texture. The result is a dairy‑free dip that still delivers on flavor and texture.
Breakfast Boost
Add a whisked egg to the mixture during step 6 for a protein boost. The egg thickens the dip, giving it a richer mouthfeel. This version works wonderfully with toast, pancakes, or as a savory breakfast dip.
Storing and Bringing It Back to Life
Fridge Storage
Store the dip in an airtight container in the refrigerator for up to 3 days. The cool temperature keeps the dip stable and prevents bacterial growth. When ready to serve, let it sit at room temperature for 10 minutes before reheating.
Freezer Friendly
For longer storage, freeze the dip for up to 2 weeks. Use a freezer‑safe container and leave a small gap for expansion. Thaw overnight in the refrigerator before reheating. This method preserves the dip’s flavor and texture.
Best Reheating Method
Reheat gently on the stovetop over low heat, stirring frequently. Add a splash of water or milk to restore moisture if the dip has thickened too much. The dip should be heated to 160°F before serving. This technique prevents the dip from separating and ensures a smooth finish.
Add a tiny splash of water before reheating — it steams back to perfection, keeping the dip silky and ready to scoop.