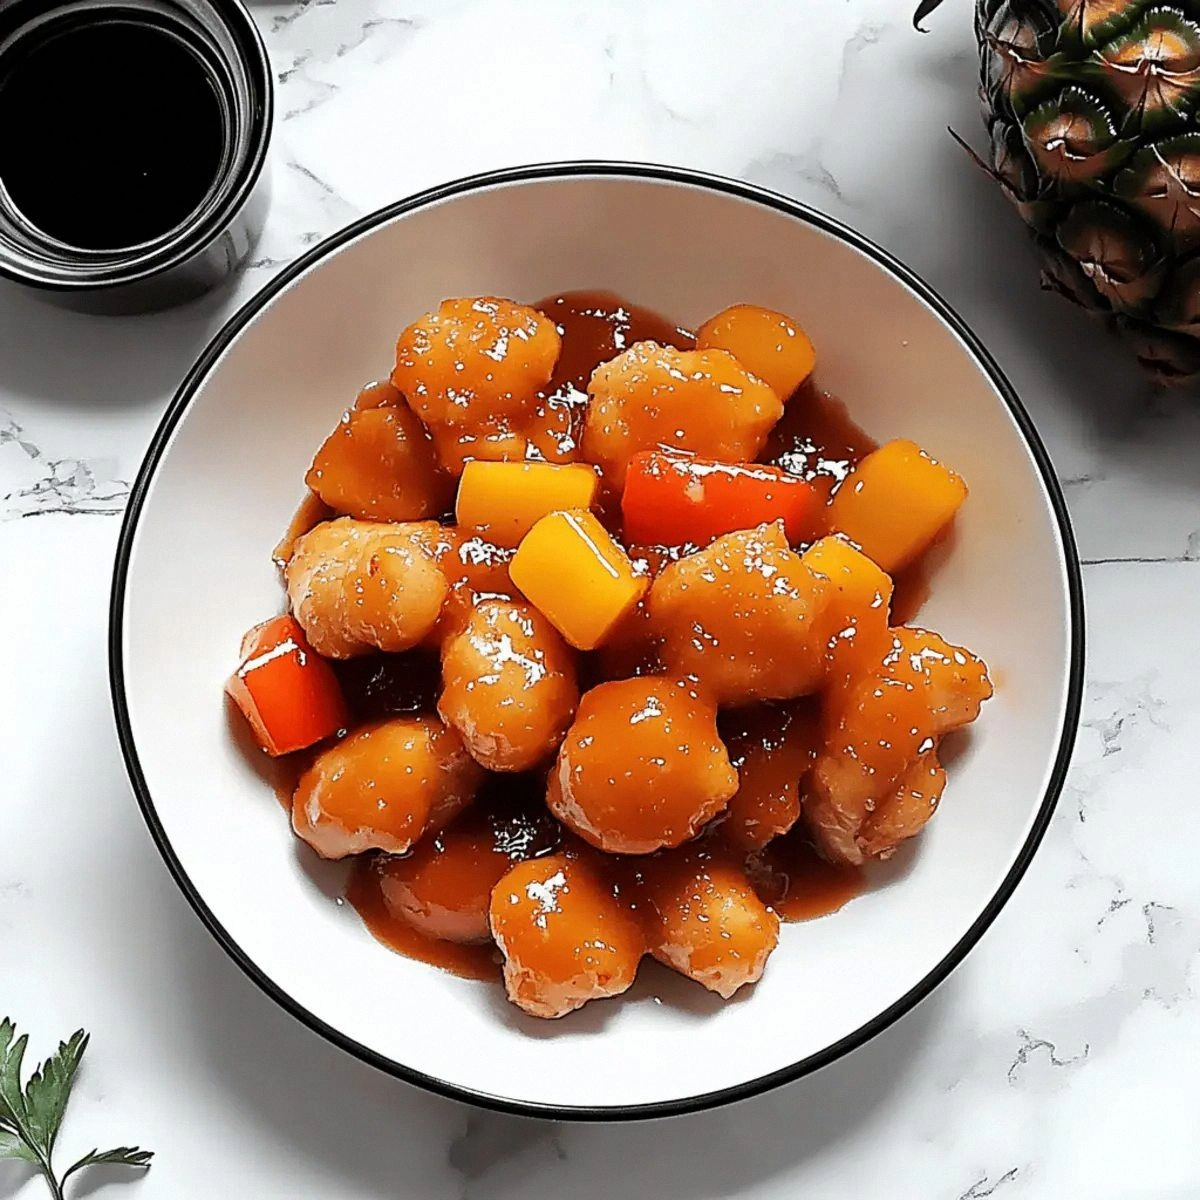
I still remember the first time I tried to make sweet and sour chicken at home. Picture this: I was 22, fresh out of college, armed with nothing but a dull knife, a warped frying pan, and an overinflated sense of culinary confidence. The result? A sticky, fluorescent mess that looked like it had been salvaged from a nuclear reactor and tasted like disappointment mixed with way too much vinegar. My roommate took one bite, politely excused himself, and ordered pizza. I ate the whole thing out of stubborn pride and spent the rest of the night chugging water like I'd just crossed the Sahara.
Fast forward ten years, and I've become that friend who shows up to potlucks with a covered dish that makes people abandon polite conversation mid-sentence. The sweet and sour chicken I'm about to share with you isn't just good — it's the kind of recipe that'll ruin takeout for you forever. We're talking about tender chicken cubes wearing the lightest, crispiest coat, swimming in a sauce that hits every note on your taste bud piano. The best part? You can pull this off on a random Tuesday night when you're still wearing your work clothes and your phone battery is at 12 percent.
What makes this version different from every other recipe cluttering the internet? First, we skip the food coloring and let real ingredients do the heavy lifting. Second, the sauce isn't just ketchup and sugar thrown together like some sad cafeteria shortcut. Third, and this is where it gets interesting, we're using a cornstarch coating technique that creates these delicate, shattery edges that stay crisp even after the sauce comes to the party. Most recipes get this completely wrong — they either bread it like fried chicken (too heavy) or skip coating entirely (soggy city).
I'll be honest with you: I ate half the batch before anyone else got to try it. My plan was to photograph the beautiful final platter for this blog post, but instead I found myself standing over the stove at midnight, fork in hand, promising myself "just one more bite" until the pan was embarrassingly empty. If you've ever struggled with sweet and sour chicken that turns out gummy, bland, or that weird radioactive pink color, you're not alone — and I've got the fix.
Picture yourself pulling this out of the oven, the whole kitchen smelling like that perfect balance of tangy vinegar, sweet pineapple, and savory chicken. The sauce coats each piece like liquid velvet, glistening under your kitchen lights. Your neighbors will start sniffing around, drawn by the aroma that somehow manages to smell like both comfort food and something excitingly new. Let me walk you through every single step — by the end, you'll wonder how you ever made it any other way.
What Makes This Version Stand Out
This isn't your neighborhood Chinese takeout's sweet and sour chicken, and that's exactly the point. While they're using frozen chicken nuggets and sauce from a plastic jug, we're building layers of flavor that would make a food chemist weep with joy. The difference starts with real chicken breast, not mystery meat, and ends with a sauce that actually tastes like something grown in nature rather than a laboratory.
- Restaurant-Quality Texture: The cornstarch coating creates this delicate crust that stays crispy even after bathing in sauce. It's like each piece of chicken is wearing a paper-thin armor of crunch that shatters between your teeth before giving way to juicy meat. Most home versions turn soggy within minutes, but this one holds its ground like a champ.
- Balanced Sweet-Tart Ratio: Forget that cloying sweetness that makes your teeth ache. We've achieved the perfect equilibrium where the vinegar's bright acidity dances with the pineapple's natural sweetness, creating a sauce that makes your mouth water rather than pucker. It's like the difference between a cheap wine hangover and a perfectly balanced cocktail.
- 45-Minute Reality Check: I'm not one of those food bloggers who claims "30 minutes!" while you're still chopping vegetables an hour in. This actually takes 45 minutes from fridge to plate, and that includes the time you'll spend licking sauce off your fingers. I've timed it on my worst, most distracted cooking days.
- Pantry-Friendly Ingredients: Everything you need is probably sitting in your kitchen right now, judging you for not using it sooner. No specialty vinegars, no obscure Asian sauces you'll use once and forget about. Just honest ingredients that pull their weight and then some.
- Leftovers That Actually Improve: Here's where it gets wild — this dish tastes even better the next day after the flavors have had time to mingle and get to know each other. The chicken stays surprisingly crisp if you know the storage trick, which I'll share later. Most sweet and sour chicken turns into a sad, mushy mess overnight, but this one breaks the rules.
- Customizable Heat Level: Want it kid-friendly? Keep it as is. Feeling spicy? A single Thai chili transforms the whole personality of the dish. It's like having multiple recipes in one, ready to adapt to whatever mood you're in or whoever's coming to dinner.
Alright, let's break down exactly what goes into this masterpiece...
Inside the Ingredient List
The Flavor Base
Chicken breast gets a bad rap in the stir-fry world, but here's the thing — when you treat it right, it becomes the perfect canvas for our sweet and sour masterpiece. The key is cutting it into uniform 1-inch cubes, no bigger than your thumb joint. Any larger and the coating-to-chicken ratio gets thrown off, leaving you with boring, unseasoned centers. I learned this the hard way after serving what my husband now calls "chocolate chip chicken" — big chunks with tiny coating chips clinging for dear life.
The cornstarch isn't just there for coating; it's the secret to that light, shattery texture that makes restaurant versions so addictive. When it hits hot oil, it creates these microscopic bubbles that turn into a delicate, crispy network. Skip it and you're basically making chicken soup with sweet and sour dressing. Not appetizing. If you're out of cornstarch, potato starch works in a pinch, but it won't give you quite the same glass-like crunch.
The Texture Crew
Red and green bell peppers aren't just there for color — they're the textural contrast that keeps each bite interesting. The red ones bring sweetness and soften faster, while the green ones stay crisper and add that slight bitter note that prevents the whole dish from becoming a sugar bomb. Cut them into 1-inch squares, roughly the same size as your chicken, so they cook evenly and you get perfect forkfuls every time.
The onion might seem like a background player, but it's actually doing heavy lifting in the flavor department. When it hits that hot pan, it releases sulfur compounds that create new flavor molecules with the peppers and chicken. It's like a tiny chemistry experiment happening right on your stove. Slice it into wedges that separate into petals when they cook — these catch the sauce like little flavor boats.
The Unexpected Star
Pineapple chunks are where most recipes go wrong — they either use the syrupy canned stuff (too sweet) or fresh pineapple (doesn't hold up to heat). The trick is using pineapple canned in juice, not syrup, and patting it dry before it goes in. This gives you that tropical brightness without turning your sauce into candy. Plus, the bromelain in pineapple actually helps tenderize the chicken slightly, making everything more succulent.
The juice from the can? Don't you dare throw that away. We're using it to thin our sauce and add natural sweetness that tastes like sunshine instead of high-fructose corn syrup. It's the difference between a sauce that tastes like it came from a bottle and one that tastes like it came from Hawaii.
The Final Flourish
The sauce is where the magic happens, and it all starts with ketchup — but not the way you think. We're using it as a base for color and umami, not as the main flavor. The vinegar provides that mouth-watering tang that makes you want to keep eating, while the soy sauce adds depth and that gorgeous mahogany color. It's like building a flavor pyramid where each ingredient supports the others without stealing the show.
Fresh ginger and garlic are non-negotiable here. The powdered versions taste like dusty library books compared to the bright, spicy kick you get from the real thing. Grate them fine so they disappear into the sauce, leaving behind just their essence. And that tablespoon of sugar? It's not making things sweeter — it's balancing the acid from the vinegar and helping everything caramelize properly.
Everything's prepped? Good. Let's get into the real action...
The Method — Step by Step
- Start with the Chicken Foundation: Pat your chicken breast cubes absolutely dry with paper towels — I mean Sahara Desert dry. Any moisture will steam the meat instead of searing it, giving you that sad, gray chicken that tastes like hospital food. Toss the cubes with salt, pepper, and cornstarch until each piece looks like it's been rolling around in fresh snow. This coating is going to create that delicate crust we're after, so don't rush this step. Let it sit while you heat your oil — this gives the cornstarch time to hydrate and stick properly.
- Master the Sear: Heat your oil in a large skillet until it shimmers like a mirage on hot pavement — you're looking for around 350°F if you have a thermometer, or until a wooden spoon handle dipped in creates tiny bubbles. Add the chicken in a single layer, resisting the urge to crowd the pan like you're stuffing a suitcase. Work in batches if you need to; overcrowding drops the oil temperature faster than a bad stock price. Cook for 3-4 minutes per side until golden and crispy, then remove to a paper towel-lined plate. That sizzle when it hits the pan? Absolute perfection.
- Build the Aromatics: In the same pan (don't wipe it out — those browned bits are flavor gold), add your onions and peppers. The residual oil is perfectly seasoned now and will make your vegetables taste like they've been hanging out with the chicken at a flavor party. Cook for 2-3 minutes until the edges start to caramelize and your kitchen smells like you know what you're doing. The onions should go translucent at the edges but still have bite in the middle — we're not making soup here.
- Create the Sauce Symphony: Push the vegetables to the sides and in the center, add your garlic and ginger. Let them sizzle for just 30 seconds — any longer and the garlic turns bitter faster than a bad breakup. Pour in your vinegar and watch it steam and bubble like a tiny volcano. Add the ketchup, soy sauce, and sugar, whisking constantly. The sauce will start thick and then thin out as everything combines. This is the moment of truth — taste it and adjust. Too sweet? Add more vinegar. Too tart? A pinch more sugar. You're looking for that perfect balance that makes your taste buds do a happy dance.
- Bring It All Together: Add the pineapple chunks and let them warm through for about a minute — they just need to heat up, not cook into mush. Return the chicken to the pan and toss everything together like you're conducting an orchestra. The sauce should coat each piece without drowning it. If it's too thick, add water a tablespoon at a time until it reaches that perfect consistency that clings but doesn't pool. If it's too thin, let it bubble for another minute to reduce.
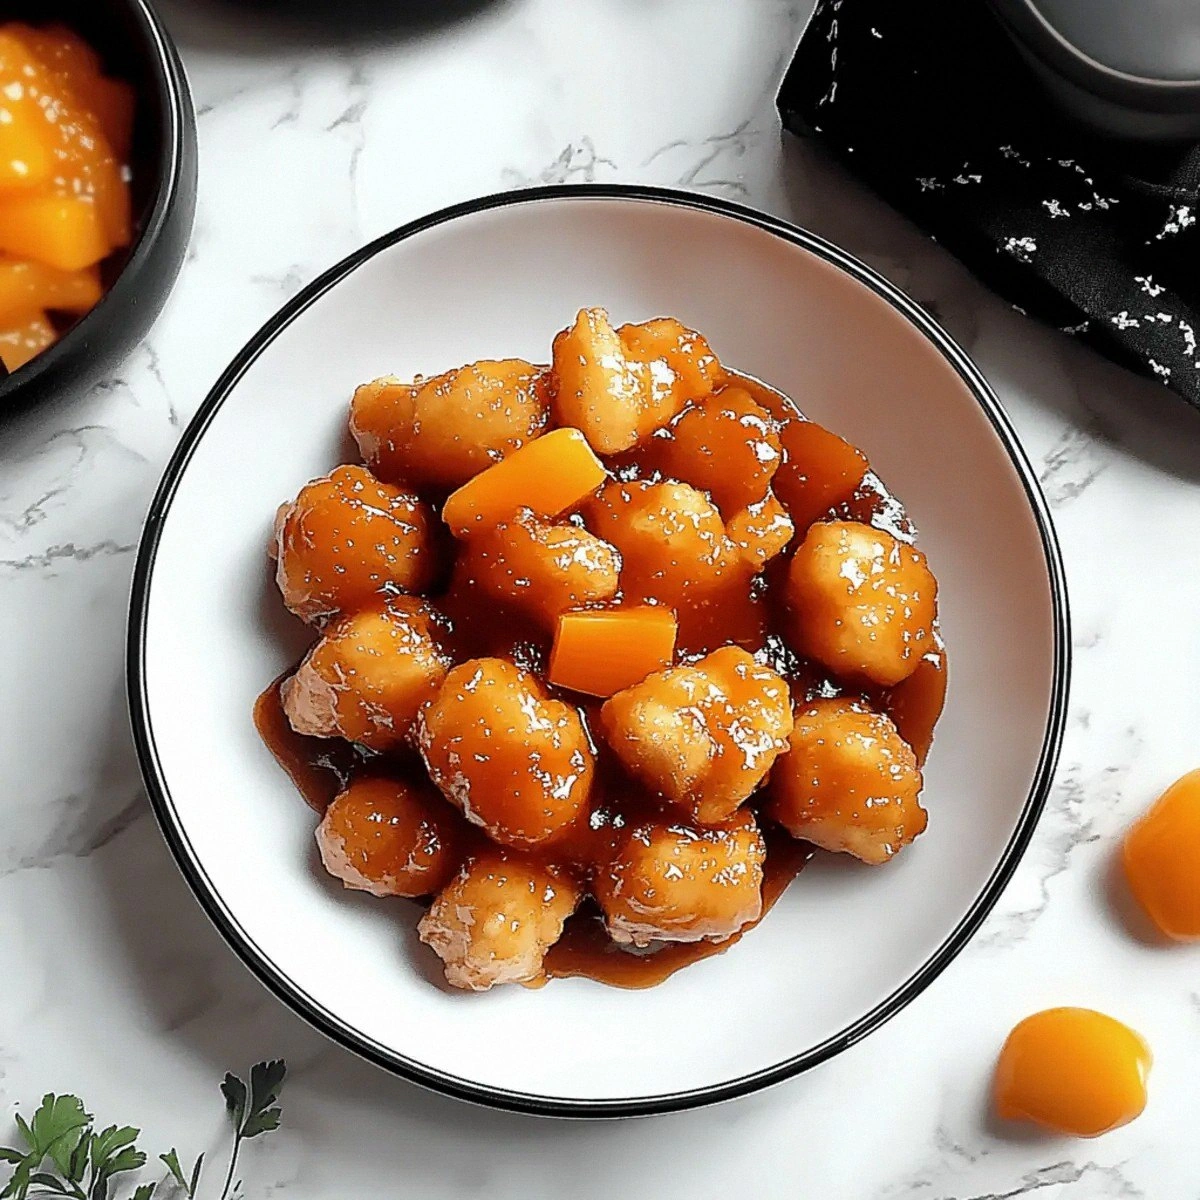
- The Final Toss and Serve: Everything should be glossy and fragrant, with the chicken pieces wearing their sauce like a light jacket rather than a heavy coat. Give it one final taste and adjust seasoning — this is where you add that crucial pinch of salt that makes all the flavors pop. Serve immediately over rice, or if you're feeling fancy, in a hollowed-out pineapple half like those tiki restaurants from the 80s. The chicken should still have some crunch even after saucing, and the vegetables should retain their color and bite.
That's it — you did it. But hold on, I've got a few more tricks that'll take this to another level...
Insider Tricks for Flawless Results
The Temperature Rule Nobody Follows
Here's where most home cooks mess up: they don't get their oil hot enough at the start, then panic and crank the heat to maximum, burning the outside while leaving the inside raw. The sweet spot is medium-high heat that stays consistent. If you have an electric stove, preheat your pan for a full 3 minutes before adding oil. Gas users, you get a gold star — your heat is more responsive, but don't get cocky and walk away. The chicken should sizzle immediately upon contact but not spit like it's angry at you.
A friend tried skipping this step once — let's just say it didn't end well. She ended up with chicken that was golden and beautiful on the outside but still cold in the center. We tried to fix it by microwaving, which turned the coating into rubber and the sauce into something resembling orange glue. Learn from her pain: use a thermometer or the wooden spoon test, and don't rush the preheating.
Why Your Nose Knows Best
Your sense of smell is your most underutilized kitchen tool here. When the garlic and ginger hit the pan, they should smell bright and aromatic, not sharp or bitter. If you catch a whiff of something acrid, you've gone too far — remove the pan from heat immediately. The same goes for the sauce: when it's perfectly balanced, you'll smell sweetness and tang in equal measure, like a tropical vacation mixed with a pickle factory (trust me, it's better than it sounds).
The pineapple is your secret weapon for aroma too. When it's properly heated through, it releases this incredible tropical fragrance that makes people wander into your kitchen asking what smells so good. If it smells flat or tinny, it needs another minute to wake up and join the party.
The 5-Minute Rest That Changes Everything
This next part? Pure magic. After everything's combined, turn off the heat and let it sit for exactly 5 minutes. I know, I know — you're hungry and it smells incredible. But here's what happens in those 5 minutes: the sauce thickens slightly as it cools, the chicken reabsorbs some of the juices, and the flavors distribute evenly throughout. It's like the difference between a good orchestra tuning up versus actually playing a symphony.
During this rest, loosely tent the pan with foil — don't seal it tight or you'll steam the crispiness away. The residual heat finishes cooking any slightly underdone pieces while keeping everything at the perfect serving temperature. This is when you should be cooking your rice or setting the table, not hovering over the stove like a vulture.
Creative Twists and Variations
This recipe is a playground. Here are some of my favorite ways to switch things up:
The Heat Seeker's Version
Add one Thai chili, sliced paper-thin, when you add the garlic and ginger. The heat blooms slowly, building with each bite until you're reaching for water but not wanting to stop eating. It's like edible torture in the best possible way. The pineapple's sweetness perfectly balances the heat, creating that addictive sweet-spicy combo that keeps Thai food fans coming back for more. I dare you to taste this and not go back for seconds — though maybe keep some milk handy just in case.
The Tropical Vacation Remix
Swap out the bell peppers for mango chunks and add a handful of toasted coconut flakes at the very end. The mango gives you that lush, tropical sweetness that makes you want to put on a Hawaiian shirt and blast ukulele music. The coconut adds texture and this incredible nutty aroma that transforms your kitchen into a beachside restaurant. Pro tip: use champagne vinegar instead of white vinegar for a more sophisticated tang that pairs beautifully with the mango.
The Low-Carb Hero
Replace the cornstarch coating with a light dusting of coconut flour, and serve it over cauliflower rice. The coconut flour creates a different but equally delicious crust that stays crispy and adds a subtle nuttiness. Double the vegetables and skip the pineapple if you're watching sugar, though I personally think life is too short to skip pineapple. This version has saved me during many a keto phase when I was craving something that didn't taste like diet food.
The Fancy Dinner Party Upgrade
Use chicken thighs instead of breast for richer flavor, and add a splash of dry sherry to the sauce. Serve it in individual ramekins over a bed of jasmine rice, garnished with fresh cilantro and a sprinkle of sesame seeds. The sherry adds this incredible depth that makes people think you went to culinary school. It's the same basic recipe, but the presentation and those little flavor tweaks elevate it from weeknight dinner to something you'd serve to impress your boss.
The Kid-Friendly Classic
Skip the ginger and use just a tiny pinch of garlic, or better yet, garlic powder. Cut everything into smaller pieces and serve it with toothpicks instead of chopsticks — suddenly it's party food instead of dinner. The familiar ketchup base makes it approachable for picky eaters, while the hidden vegetables give parents peace of mind. My nephew calls it "candy chicken" and requests it every time I visit. Future pacing: picture yourself becoming the cool aunt/uncle who always brings the good stuff.
The Vegetarian Champion
Replace the chicken with firm tofu that's been pressed and cubed, or go wild with cauliflower florets. The coating and sauce work just as well on vegetables, creating this incredible transformation where even tofu skeptics keep stealing bites. If using cauliflower, roast it first until the edges are caramelized, then toss with the sauce. The nooks and crannies catch all that sweet-tangy goodness, making vegetables taste like a treat instead of a chore.
Storing and Bringing It Back to Life
Fridge Storage
Store leftovers in an airtight container for up to 4 days, but here's the trick that'll change your leftover game: separate the chicken from the sauce if possible. Keep them in different containers and combine when reheating. The chicken stays crisp, the sauce stays vibrant, and you don't end up with that sad, soggy mess that usually happens to takeout leftovers. If you're like me and can't be bothered with multiple containers, at least don't pack it while it's still hot — the steam creates condensation that turns your crispy coating into rubber.
The sauce actually improves after a day in the fridge — the flavors meld and deepen like a good stew. When you're ready to reheat, add a tiny splash of water to loosen it up. Cold sauce straight from the fridge has the consistency of jelly, which is actually pretty great for spreading on sandwiches if you're feeling wild.
Freezer Friendly
This recipe freezes beautifully, but with a caveat: freeze the components separately. Cook and freeze the chicken on a baking sheet first, then transfer to bags once frozen solid. The sauce freezes into perfect portions in ice cube trays. When you're ready for instant sweet and sour happiness, reheat the sauce in a pan, add the frozen chicken directly, and let everything come together. It takes about 8 minutes from frozen to fabulous, making this your new emergency dinner for those nights when you can't even with cooking.
I've got bags of this stashed in my freezer like treasure, and on particularly rough days, knowing I can have restaurant-quality dinner in under 10 minutes feels like having a superpower. Just don't microwave from frozen — the chicken turns into rubber bullets and nobody wants that.
Best Reheating Method
The microwave is your enemy here — it'll turn your beautiful creation into something that tastes like it came from a gas station buffet. Instead, reheat in a dry skillet over medium heat, adding just a teaspoon of water to create steam. Toss constantly for 3-4 minutes until everything is heated through and the sauce regains its glossy shine. The chicken won't be quite as crispy as fresh, but it'll be miles better than microwaved mush.
If you're reheating from the freezer, skip thawing. Add the frozen chicken to a hot pan with a splash of water, cover for 2 minutes, then uncover and add the sauce. The steam defrosts while the direct heat recrisps. It's like having a time machine that takes you back to the first delicious bite, minus the 45-minute cooking time.