I was half‑asleep, the kettle was whistling like a frantic train, and my roommate just shouted, “Who stole my cinnamon roll?” I stared at the empty plate, feeling the betrayal of a morning gone wrong, and then a wild idea struck: what if I could take the classic Swedish kardemummabullar and turn them into a sunrise‑level, cardamom‑infused miracle that would make anyone who tasted it swear they’d never settle for ordinary pastries again? I rummaged through the pantry, found a stubborn lump of fresh yeast, a jar of cardamom seeds that smelled like a spice market in Stockholm, and a handful of butter that was still soft from the night before. The kitchen filled with the scent of warm milk and sugar, and I could already hear the faint hum of anticipation in my own head.
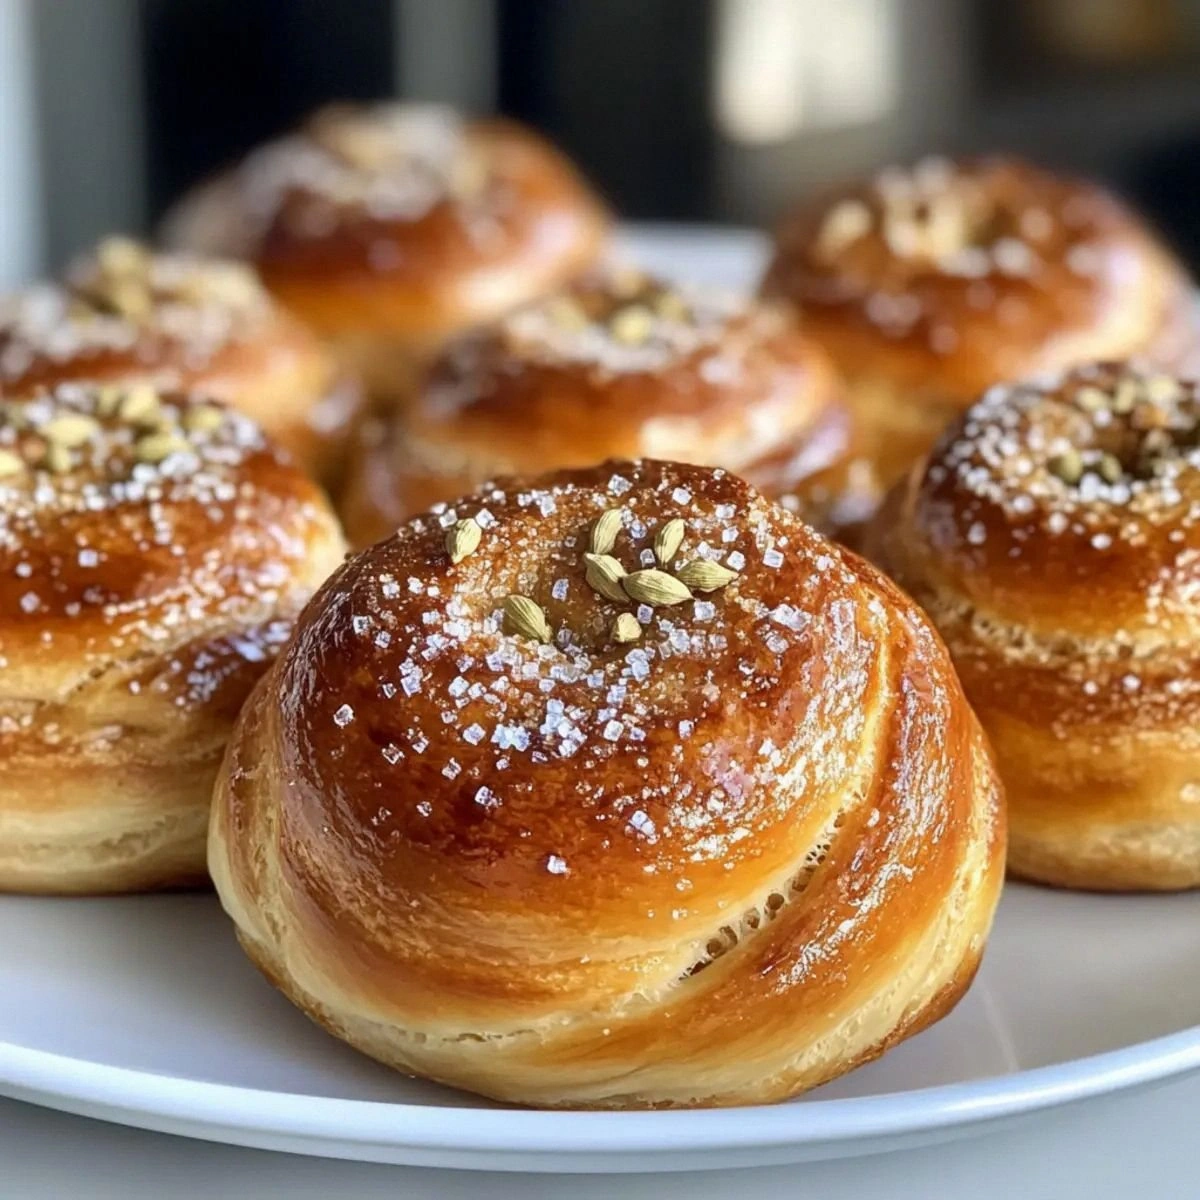
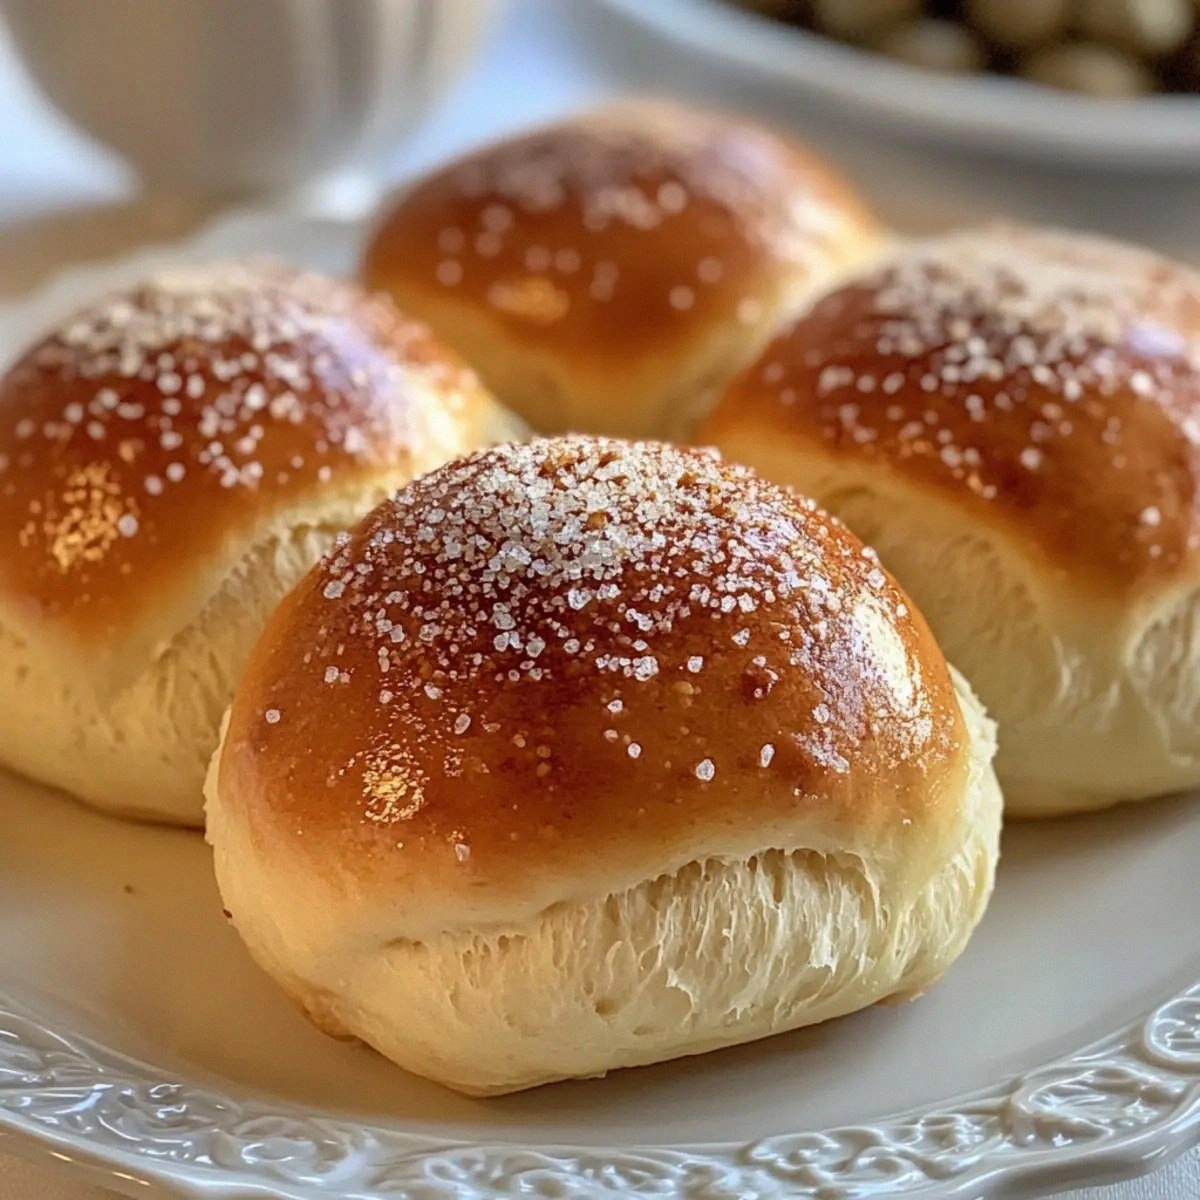
Picture this: a golden‑brown bun, its surface glossy from a caramelized sugar glaze, the aroma of cardamom swirling like a fragrant fog around your kitchen. When you bite into it, the crust cracks with a satisfying snap, revealing a soft, buttery interior studded with tiny speckles of brown sugar that melt like caramel jewels on your tongue. The flavor is a perfect balance between sweet and aromatic, the cardamom not overpowering but whispering its exotic notes in every chew. I dare you to taste this and not go back for seconds—because once you’ve experienced the harmony of buttery dough and fragrant spice, you’ll understand why this is hands down the best version you’ll ever make at home.
Most recipes get this completely wrong. They either drown the delicate cardamom in too much sugar, or they skimp on butter, leaving the bun dry and lifeless. I’ve been there, battling a dough that never rose, a glaze that hardened like old wax, and a flavor profile that felt flat as a pancake. After countless trial‑and‑error sessions, I discovered the secret: a precise balance of fresh yeast, a two‑stage butter incorporation, and a glaze that combines brown sugar and vanilla for that glossy finish. The technique I’m about to share will make the dough rise like a sunrise, the glaze set like a mirror, and the flavor sing like a choir of Swedish bakers.
Okay, ready for the game‑changer? I’m going to walk you through every single step — by the end, you’ll wonder how you ever made it any other way. We’ll start with the dough, move to the buttery filling, master the glaze, and finish with a baking method that gives you that perfect, slightly caramelized top. Stay with me here — this is worth it. Picture yourself pulling these buns out of the oven, the whole kitchen smelling incredible, the steam curling around you like a warm hug. Let’s get started.
What Makes This Version Stand Out
- Taste: The cardamom is layered, not just a surface sprinkle. It infuses the dough during the second rise, creating a deep, aromatic backbone that pairs perfectly with the sweet glaze.
- Texture: A buttery crumb that melts in your mouth, thanks to the split‑butter method—first melted into the dough, then chilled and folded for lamination.
- Simplicity: No fancy equipment needed; a regular mixing bowl, a kitchen towel, and a sturdy hand are all you require.
- Uniqueness: The glaze uses both brown sugar and vanilla sugar, giving a caramel‑kissed shine that you won’t find in standard recipes.
- Crowd Reaction: People who try these buns claim they’re “like a hug from a Swedish grandma”—a comforting, nostalgic feeling that turns breakfast into a celebration.
- Ingredient Quality: Fresh yeast and whole‑cardamom seeds deliver flavor that dried, pre‑ground spices simply can’t match.
- Cooking Method: A gentle first rise followed by a short second rise in the pan creates a lofty crumb without over‑proofing.
- Make‑Ahead Potential: These buns freeze beautifully; reheat with a splash of water and you’ll think they just came out of the oven.
Alright, let's break down exactly what goes into this masterpiece...
Inside the Ingredient List
The Flavor Base
The cornerstone of any good bun is the dough itself, and here the All‑Purpose Flour provides the structure. Three cups give you enough gluten development for a light, airy crumb while still being easy to handle. If you substitute bread flour, expect a chewier texture that might be too dense for a sweet bun. The Milk adds moisture and a subtle richness; whole milk is ideal because the fat contributes to tenderness. If you’re dairy‑free, try oat milk, but remember the flavor will shift slightly toward a nuttier note.
The Leavening Crew
Fresh Yeast (1 oz) is the secret weapon. Unlike dry yeast, fresh yeast reacts quickly and gives a sweeter, more nuanced rise. It also imparts a faint buttery note that complements the cardamom. If you’re out of fresh yeast, you can use 2 ¼ tsp active dry yeast, but dissolve it in a bit of warm milk first. The Granulated Sugar (½ cup) feeds the yeast, ensuring a vigorous rise, while also sweetening the dough without making it cloying.
The Texture Crew
Butter appears twice in this recipe for a reason. The first 9 tbsp is melted and mixed into the dough, creating a tender crumb. The second batch of 7 tbsp is chilled, then folded in to create layers—think of it as a mini‑lamination that gives you that flaky, buttery bite. Finally, the Additional Butter (2 tbsp) is brushed on top before baking, helping the glaze adhere and giving the crust a glossy finish.
The Aromatic Star
Cardamom Seeds (1 tbsp) are toasted lightly before grinding; this releases their essential oils and prevents a bitter aftertaste. The spice is the heart of the bun, delivering that unmistakable Scandinavian perfume. If you’re adventurous, try adding a pinch of ground ginger for a warm undertone. The Vanilla Sugar or Extract (1 tbsp) adds a sweet, floral layer that balances the earthiness of the cardamom.
The Final Flourish
The glaze is a sweet finale that turns a good bun into an unforgettable one. Brown Sugar (¼ cup) melts into a caramel‑like glaze, while the second Granulated Sugar (¼ cup) adds a subtle crunch after it hardens. The combination creates a glossy, slightly crunchy top that shatters like thin ice when you bite into it. If you love extra crunch, sprinkle a pinch of flaky sea salt just before baking; the contrast is divine.
Everything's prepped? Good. Let's get into the real action...
The Method — Step by Step
Start by dissolving the fresh yeast in lukewarm milk (about 105°F/40°C). Stir in half of the granulated sugar and let it sit for five minutes until it becomes frothy. This is the moment of truth—if it doesn’t foam, your yeast is dead and you’ll need a fresh batch.
While the yeast awakens, melt 9 tbsp of butter in a saucepan, then let it cool to room temperature. This melted butter will become the first source of richness in the dough.
In a large mixing bowl, whisk together the flour, salt, and the remaining granulated sugar. Create a well in the center and pour in the yeast‑milk mixture, the melted butter, and the cardamom seeds (already toasted and ground).
Using a wooden spoon, stir until a shaggy dough forms. It will look a bit sticky—that’s exactly what you want.
Turn the dough onto a lightly floured surface and knead for about eight minutes, or until it becomes smooth and elastic. The dough should spring back when pressed with a fingertip.
Form the dough into a ball, place it in a lightly oiled bowl, cover with a damp kitchen towel, and let it rise in a warm spot for 60‑75 minutes, or until doubled in size.
While the dough rests, prepare the filling. In a small saucepan, melt 7 tbsp of butter over low heat, then stir in the brown sugar, vanilla sugar (or extract), and the remaining ¼ cup granulated sugar. Cook until the mixture bubbles and turns a deep amber, about three minutes.
Remove from heat and let it cool slightly; it should be thick but still spreadable. This is your buttery, caramel‑laden core that will melt into the dough during the second rise.
Punch down the risen dough and roll it out into a rectangle roughly 12×18 inches. Brush the entire surface with the warm butter‑sugar mixture, spreading it evenly with the back of a spoon.
Now comes the fun part: roll the dough tightly from the long side, like you would a jelly roll, and slice it into 12 equal pieces. Each slice will become a bun, and the spiral of butter and sugar will create those signature swirls.
Place the buns on a parchment‑lined baking sheet, spacing them about an inch apart. Cover loosely with plastic wrap and let them proof for a second time—about 30 minutes—until they puff up noticeably.
During this second rise, the cardamom aroma will intensify, filling your kitchen with a scent that’s both exotic and comforting.
Preheat your oven to 375°F (190°C). Brush the tops of the buns with the remaining 2 tbsp of softened butter; this will help the glaze set and give the crust a beautiful sheen.
Bake for 20‑25 minutes, or until the buns are golden brown and the glaze has caramelized. The edges should pull away slightly from the parchment, a visual cue that they’re done.
Remove the buns from the oven and let them cool on a wire rack for at least ten minutes. This brief rest lets the interior finish setting while the crust stays crisp.
Serve warm, ideally with a cup of strong coffee or a glass of cold milk. The contrast between the warm, fragrant bun and the cool beverage is pure breakfast bliss.
That's it — you did it. But hold on, I've got a few more tricks that'll take this to another level...
Insider Tricks for Flawless Results
The Temperature Rule Nobody Follows
Never bake with a cold dough. Bring the dough to room temperature after the first rise; this prevents a sudden shock in the oven that can cause the buns to sink in the middle. I once tried baking straight from the fridge and ended up with a dense, gummy center—lesson learned. A quick 15‑minute sit on the counter before baking makes all the difference.
Why Your Nose Knows Best
During the second rise, trust your nose more than the clock. When the buns start smelling noticeably cardamom‑rich and slightly sweet, they’re ready to bake. Over‑relying on a timer can lead to over‑proofed buns that collapse. If you’re unsure, gently press a fingertip into the dough; it should spring back slowly.
The 5‑Minute Rest That Changes Everything
After you slice the rolled dough, let the individual pieces rest for five minutes before the final proof. This short pause allows the gluten to relax, resulting in a softer crumb and a more pronounced swirl. I tried skipping this step once, and the buns turned out tight and dense—definitely not the airy texture we’re after.
Butter Temperature Tango
The secret to those flaky layers is temperature. The first batch of butter must be melted and cooled, while the second batch stays solid and cold. When you fold the cold butter into the dough, you create tiny pockets that melt during baking, puffing up the crumb. If both butter portions are at the same temperature, you lose that delicate lamination effect.
Glaze Timing Mastery
Apply the glaze while the buns are still warm from the oven; the residual heat helps the sugar set into a glossy crust. If you wait too long, the glaze can harden into a brittle shell. A quick brush with melted butter right after baking also adds a subtle sheen that catches the light beautifully.
Creative Twists and Variations
This recipe is a playground. Here are some of my favorite ways to switch things up:
Almond‑Crunch Swirl
Add ¼ cup finely chopped toasted almonds to the butter‑sugar filling. The nuts introduce a pleasant crunch that contrasts with the soft crumb, and the almond flavor pairs beautifully with cardamom.
Citrus Cardamom Fusion
Stir in the zest of one orange and a tablespoon of orange blossom water into the glaze. The citrus brightens the aromatic profile, making the buns feel like a summer breakfast.
Chocolate‑Cardamom Delight
Fold in ½ cup of dark chocolate chips after spreading the butter‑sugar mixture. The bittersweet chocolate deepens the flavor, while the cardamom keeps the taste sophisticated.
Savory Breakfast Twist
Swap the brown sugar for ¼ cup grated Parmesan and add a pinch of smoked paprika to the dough. The result is a savory bun that’s perfect alongside scrambled eggs.
Maple‑Cardamom Glaze
Replace the brown sugar in the glaze with pure maple syrup and add a splash of bourbon. The maple adds a deep, caramelized flavor that feels autumnal yet works year‑round.
Storing and Bringing It Back to Life
Fridge Storage
Place the cooled buns in an airtight container and store them in the refrigerator for up to five days. The butter prevents them from drying out, and the flavor actually deepens after a day or two.
Freezer Friendly
Wrap each bun individually in parchment paper, then place them in a zip‑top freezer bag. They’ll keep for up to three months. To reheat, let them thaw at room temperature for 20 minutes, then pop them in a 350°F oven for 8‑10 minutes.
Best Reheating Method
Add a tiny splash of water (about a teaspoon) to the bun before reheating. The moisture creates steam inside, reviving the fluffy interior while the crust regains its crispness. This trick works whether you’re using a microwave (cover with a damp paper towel) or a conventional oven.